


Using Visual Studio Template
Visual Studio Project template allows you to create a simple ASP.NET Core MVC application. To use C1 MVC controls, few additional steps are required to configure the project created using the basic Visual Studio project template.
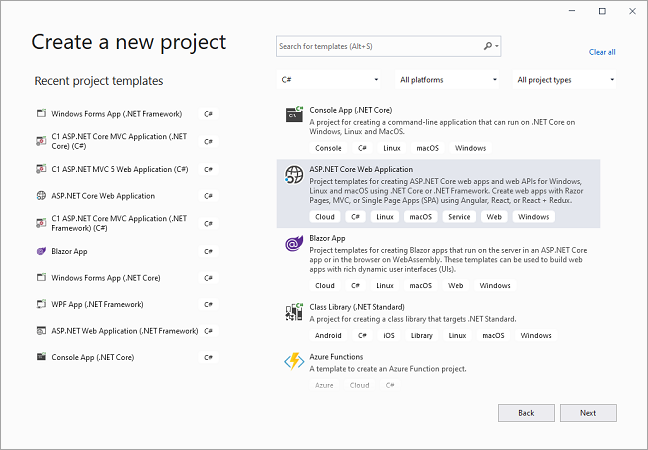
Open Visual Studio and Select Create a new project.
In the Create a new project window, select ASP.NET Core Web Application and click Next.
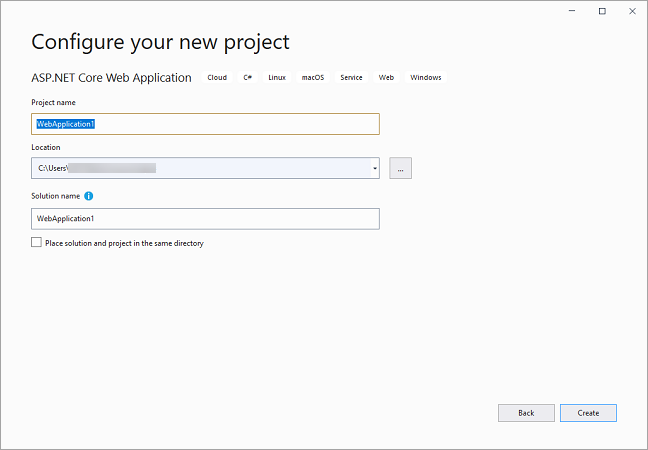
In the Configure your new project window, write your project name, choose location to save your project and click Create.
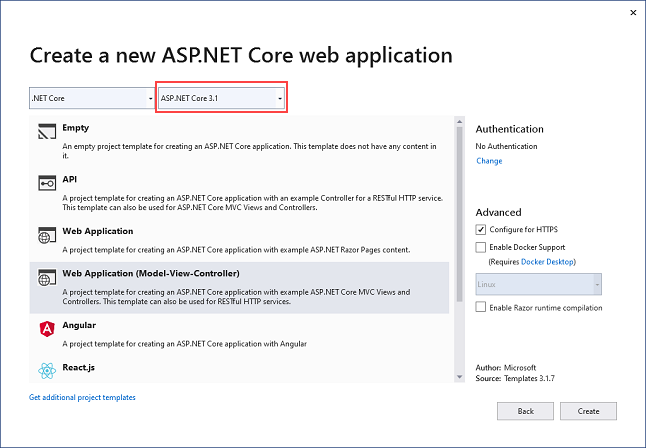
In the Create a new ASP.NET Core web application window, select the ASP.NET Core version, say ASP.NET Core 3.1, and click Create.
From the Solution Explorer, expand the folder Views and double click the
_ViewImports.cshtmlfile to open it.In the _ViewImports.cshtml file, add the following code.
@addTagHelper *, C1.AspNetCore.Mvc(Optional) To add specific controls in your application, you need to add the following TagHelpers in the
_ViewImports.cshtmlfile.Control
TagHelper
Financial Chart
@addTagHelper *, C1.AspNetCore.Mvc.FinanceFlexSheet
@addTagHelper *, C1.AspNetCore.Mvc.FlexSheetOLAP
@addTagHelper *, C1.AspNetCore.Mvc.OlapMultiRow
@addTagHelper *, C1.AspNetCore.Mvc.MultiRowFlexViewer
@addTagHelper *, C1.AspNetCore.Mvc.FlexViewerTransposedGrid
@addTagHelper *, C1.AspNetCore.Mvc.TransposedGridTransposedMultiRow
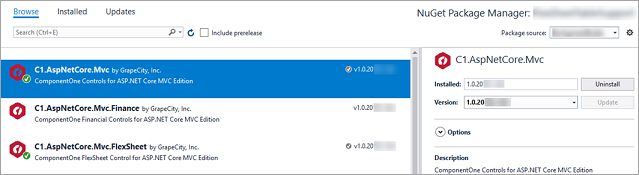
@addTagHelper *, C1.AspNetCore.Mvc.TransposedMultiRowAdd the ASP.NET MVC Core Edition references to the project. In the Solution Explorer, right click References and select Manage NuGet Packages. In NuGet Package Manager, select https://api.nuget.org/v3/index.json as the Package source. Search for C1.AspNetCore.Mvc package, and click Install.
Note: "C1.AspNetCore.Mvc" gets added under the "dependencies" within project.json file of your project once you restore the packages.
To use specific controls in your application, add the following NuGet Packages based on the control.
Control
NuGet Package
Financial Chart
C1.AspNetCore.Mvc.FinanceFlexSheet
auto C1.AspNetCore.Mvc.FlexSheetOLAP
auto C1.AspNetCore.Mvc.OlapMultiRow
auto C1.AspNetCore.Mvc.MultiRowFlexViewer
C1.AspNetCore.Mvc.FlexViewerTransposedGrid
C1.AspNetCore.Mvc.TransposedGridTransposedMultiRow
C1.AspNetCore.Mvc.TransposedMultiRowTo add a license, right-click the solution name from the Solution Explorer or go to the Tools menu, and then select MESCIUS License Manager. Optionally, you can also generate runtime license key and add it to your application. For more information on generating license, see Licensing topic.
After completing the steps above, register the resources for the controls to be used in the application. For more information, see Registering Resources.
Add map route using the following line of code (highlighted in bold) in the Configure method, Startup.cs file (For MVC Core 3.0 apps).
```
app.UseEndpoints(endpoints =>
{
   endpoints.MapRazorPages();
   endpoints.MapControllers();
});
```