CSV
This article explains connecting a Page or an RDLX report to a CSV data source. You can connect to this data source while creating a new report (via report wizard) or using report explorer (via report data source dialog).
Connect to CSV Data Source using Report Wizard
The steps to connect to the CSV data source are:
Create a New Report.
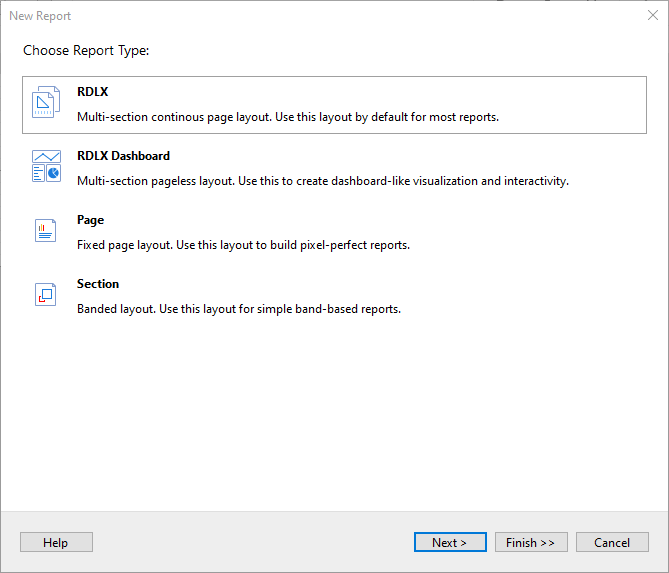
In the New Report dialog, choose the Report Type as RDLX, RDLX Dashboard, or Page and click Next.
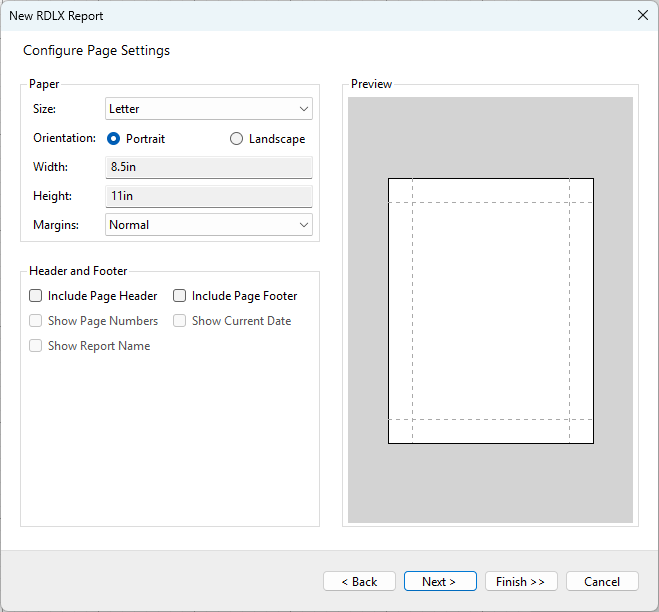
Configure page settings if you need to customize the report page settings and click Next >.
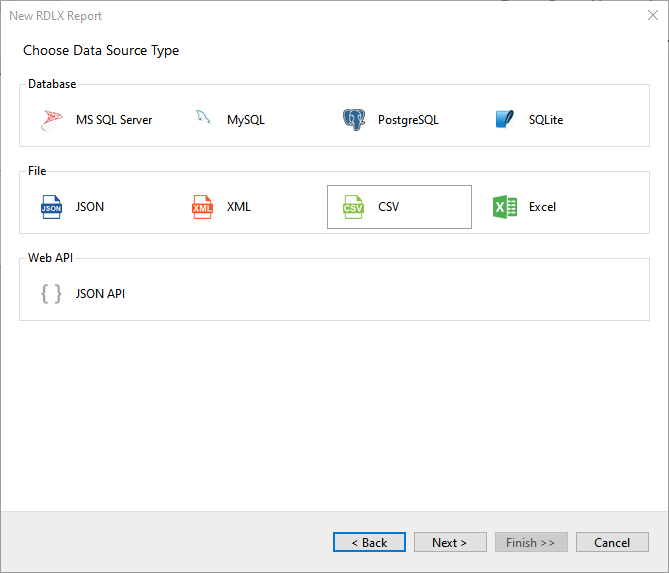
Select the Data Source Type as CSV and click Next.
To specify the File Path, click the Browse button and navigate to the desired folder on your system. For example, you can connect to the MyOrders.csv sample data source which can be downloaded from GitHub.
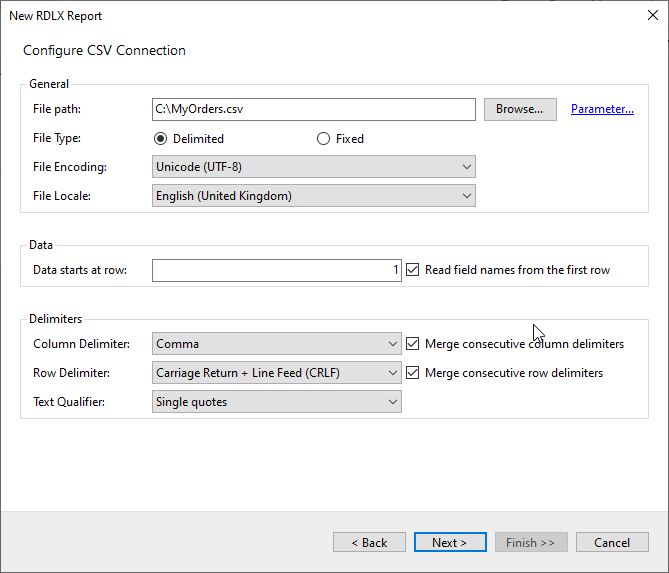
To specify the runtime connection values, click Parameter (or Insert Parameter for queries) to open the Parameters dialog. Then click the Add button to add a new parameter, or select the existing parameter and specify the below details:
Name: Specify the name of the parameter.
Type: Select the value type (string by default) from the drop-down list.
Testing Value: Specify the runtime value for the connection properties.
Input Source: Select Interactive for non-hidden parameters and Programmatic for hidden parameters from the drop-down list.
7. Select the File Type as Delimited or Fixed.
8. Then click Next to check the Fields section, which includes field names with their corresponding data types present in the CSV file. This allows you to modify the field names and their data type (like String, Boolean, DateTime, Integer, Float, Decimal, Double, or Long) for the columns. You can check the changes in the Preview section.
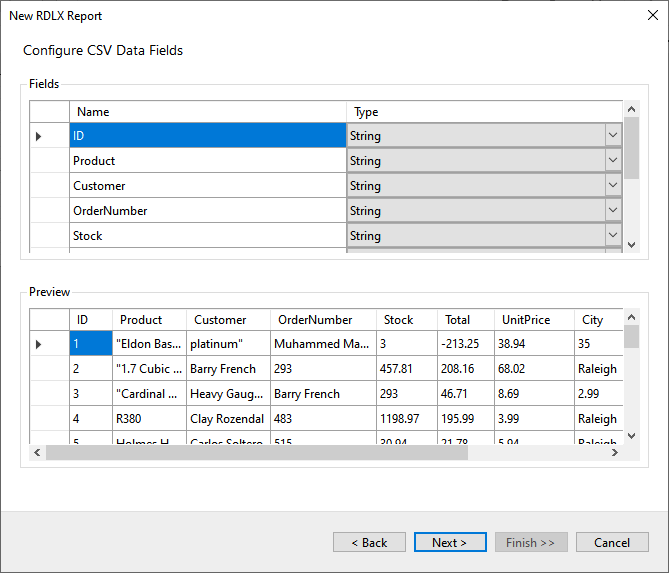
9. On the final screen of the Report Wizard, review the summary of the report and click Finish to successfully add the report with the CSV data source.
Connect to a CSV Data Source using Report Data Source dialog
In the designer, go to the Report Explorer, right-click the Data Sources node and select the Add Data Source option or click the Add button and then select the Data Source option.
In the Report Data Source dialog that appears, select the General page and enter the name of the data source in the Name field. By default, the data source name is set to DataSource1. This name appears as a child node to the Data Sources node in the Report Explorer.
Under the Type field, select Csv Provider.
In the Connection String tab, click the Build icon to open the Configure CSV Data Source dialog.
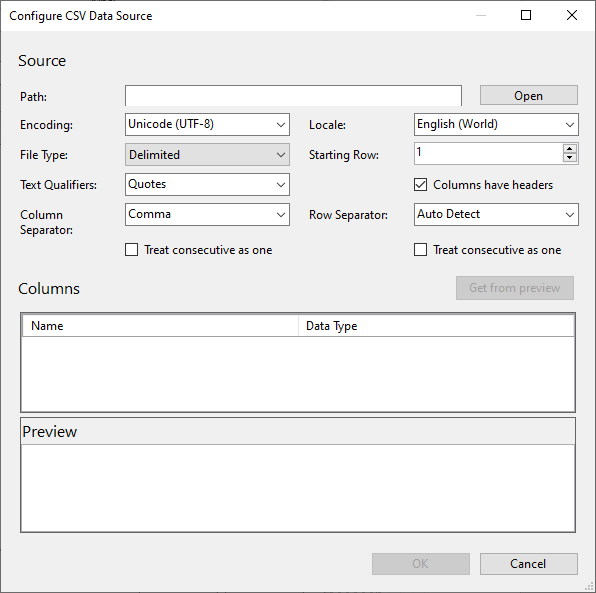
To specify the Path of the file, click the Open button and navigate to the desired folder on your system. For example, you can connect to the MyOrders.csv sample data source which can be downloaded from GitHub.
Select the Column Separator as Comma from the drop-down menu.
Click the Get from Preview button to fill the Columns area with the column names and their corresponding data types (string by default) present in the CSV file. This allows you to modify the name and data type (like String, Boolean, DateTime, Integer, Float, Decimal, Double, or Long) for the columns.
For more information, see the Configuration Settings for CSV Data Source section.
Click OK to save the changes and close the Configure CSV Data Source dialog.
The Connection String tab displays the generated connection string as shown below:
`Path=C:\\MyOrders.csv;Locale=en-IN;TextQualifier=";ColumnsSeparator=,;RowsSeparator=\r\n;Columns=ID,Product,Customer,OrderNumber,Stock,Total(Decimal),UnitPrice(Decimal),City,ProductLine,Discount(Decimal);HasHeaders=True`
You can validate the connection string by clicking the Validate DataSource icon.
9. Click OK to close the Report Data Source dialog. Your report is now connected to the CSV data source successfully.
Configuration Settings for CSV Data Source
The CSV Data Provider provides the following configuration settings in the Configure CSV Data Source dialog. Based on the defined configuration settings, the CSV connection string is generated.
Setting | Description |
|---|---|
File Path/Path | Path to the CSV file - both local and relative; or a URL for centrally located CSV data sources. |
File Type/Type | Define the type of CSV file. You can choose from Fixed and Delimited options. |
File Encoding/Encoding | Specify the character encoding used in the CSV file. |
File Locale/Locale | Specify the locale used in the CSV file. |
Data Starts at row/Starting Row | Row number to start fetching data. |
Use starting row as column headers | Select this check box to use the first row as column header. |
Column Delimiter/Column Separator | Specify the symbol used to separate the columns in the CSV file. You can choose from Comma, Semicolon, Tab, and Space options. Note: This option is not available for Fixed file type. |
Merge consecutive column delimiters | Select this check box to treat consecutive column delimiters as one. |
Row Delimiter/Row Separator | Symbol used to separate the rows in the CSV file. You can choose from Auto Detect, CRLF (carriage return and line feed), CR (carriage return), and LF (line feed) new line formats. Note: This option is not available for Fixed file type. |
Merge consecutive row delimiters | Select this check box to treat consecutive row delimiters as one. |
Text Qualifier | Character to specify where the text begins and ends, that is, the character that encloses values in the CSV file. You can choose from Quotes and Single quotes options. Note: This option is not available for Fixed file type. |
Columns have headers | Specify whether the CSV file has columns with headers or not. |
Treat consecutive as one | Specify whether to join the column separators or row separators as one. Note: This option is not available for Fixed file type. |
Get from preview | Fills the Columns area with names and data types (string by default) for columns present in the CSV file. This allows you to modify the name and data type (like String, Boolean, DateTime, Integer, Float, Decimal, Double, or Long) for the columns. |


