NuxtJS
SpreadJS Designer Component works seamlessly with Nuxt 3 and Nuxt 4.
This tutorial shows how to integrate SpreadJS Designer Component in a Nuxt project, configure it for client-side rendering, and enable Excel-like editing tools.
Integrating SpreadJS Designer Component in a Nuxt App
Step 1: Set up the Nuxt project
You can use any existing Nuxt 3 or Nuxt 4 project.
If you want to start from a clean setup, run:
npm create nuxt@latest nuxt-with-spreadjs-designerWhen the terminal prompts the configuration messages, select the required option and press the Enter key to confirm. For this tutorial, you can select the following options:
Template: Minimal
Package manager: npm
Initialize git repository: Yes
Would you like to browse and install modules?: No
Wait a while as the terminal installs and creates the project. Then type the following commands in the terminal:
cd nuxt-with-spreadjs-designer
npm install
Note:
If
npm installfails withCannot find native bindingor a missing@rolldown/binding-*package, remove thenode_modulesfolder andpackage-lock.jsonfile, and then runnpm installagain.
Then launch the app:
npm run devOnce verified that the base Nuxt app runs (http://localhost:3000), you can start integrating SpreadJS Designer Component.
Step 2: Install and Configure SpreadJS Designer Component
Install the SpreadJS Designer Component packages
npm i --save @mescius/spread-sheets @mescius/spread-sheets-barcode @mescius/spread-sheets-charts @mescius/spread-sheets-datacharts-addon @mescius/spread-sheets-designer @mescius/spread-sheets-designer-resources-en @mescius/spread-sheets-designer-vue @mescius/spread-sheets-formula-panel @mescius/spread-sheets-ganttsheet @mescius/spread-sheets-io @mescius/spread-sheets-languagepackages @mescius/spread-sheets-pdf @mescius/spread-sheets-print @mescius/spread-sheets-pivot-addon @mescius/spread-sheets-reportsheet-addon @mescius/spread-sheets-shapes @mescius/spread-sheets-slicers @mescius/spread-sheets-tablesheetAdd a SpreadJS Designer Component
Create a folder called components in the Nuxt project's root folder. If it does not exist. In the
componentsfolder, create a file namedSpreadsheet.vue. For example, in this tutorial, the file path isnuxt-with-spreadjs-designer/components/Spreadsheet.vue. Define the component as shown below.
<template>
    <div id="gc-designer-container">
        <gc-spread-sheets-designer :styleInfo="styleInfo" :config="config" :spreadOptions="spreadOptions"
            @designerInitialized="initDesigner" />
    </div>
</template>

<script setup>
import "@mescius/spread-sheets/styles/gc.spread.sheets.excel2013white.css";
import "@mescius/spread-sheets-designer/styles/gc.spread.sheets.designer.light.min.css";

import "@mescius/spread-sheets-print";
import "@mescius/spread-sheets-shapes";
import "@mescius/spread-sheets-datacharts-addon";
import "@mescius/spread-sheets-slicers";
import "@mescius/spread-sheets-pivot-addon";
import "@mescius/spread-sheets-tablesheet";
import "@mescius/spread-sheets-ganttsheet";
import "@mescius/spread-sheets-reportsheet-addon";
import "@mescius/spread-sheets-formula-panel";
import "@mescius/spread-sheets-io";
import "@mescius/spread-sheets-designer-resources-en";

import * as GC from "@mescius/spread-sheets";
import * as GCD from "@mescius/spread-sheets-designer";
import GcSpreadSheetsDesigner from "@mescius/spread-sheets-designer-vue";

// Optional: Set your SpreadJS license key and Designer Component license key
// GC.Spread.Sheets.LicenseKey = "sjs-distribution-key";
// GCD.Spread.Sheets.Designer.LicenseKey = "designer-component-distribution-key";

const styleInfo = { height: "85vh", width: "100%" };
const config = GCD.Spread.Sheets.Designer.DefaultConfig;
const spreadOptions = { sheetCount: 2 };

let designer = null;

function initDesigner(value) {
    designer = value;
    console.log("Designer initialized:", designer);

    const spread = designer.getWorkbook();
    if (spread) {
        const sheet = spread.getSheet(0);
        sheet.setValue(0, 0, "Welcome to SpreadJS Designer!");
    }
}
</script>

<style scoped>
#gc-designer-container {
    width: 100%;
    height: 100%;
}
</style>
Use the component in your main app
Replace the default content of
app.vuewith:
<template>
  <div>
    <h1>
      Nuxt.JS + SpreadJS Designer Component Demo
    </h1>
    <SpreadSheet />
  </div>
</template>

<script setup>
import SpreadSheet from "../components/Spreadsheet.vue";
</script>
Update Nuxt config (optional)
// https://nuxt.com/docs/api/configuration/nuxt-config
export default defineNuxtConfig({
  //...

  ssr: false,
  components: true,
})
Note:
SpreadJS Designer Component relies on browser APIs and runs only on the client side. When using Nuxt in SSR mode, wrap the SpreadJS Designer Component in a <client-only> tag or register it as a client-only plugin (e.g. plugins/spreadjs.client.ts).
Step 3: Run and Verify the Integration
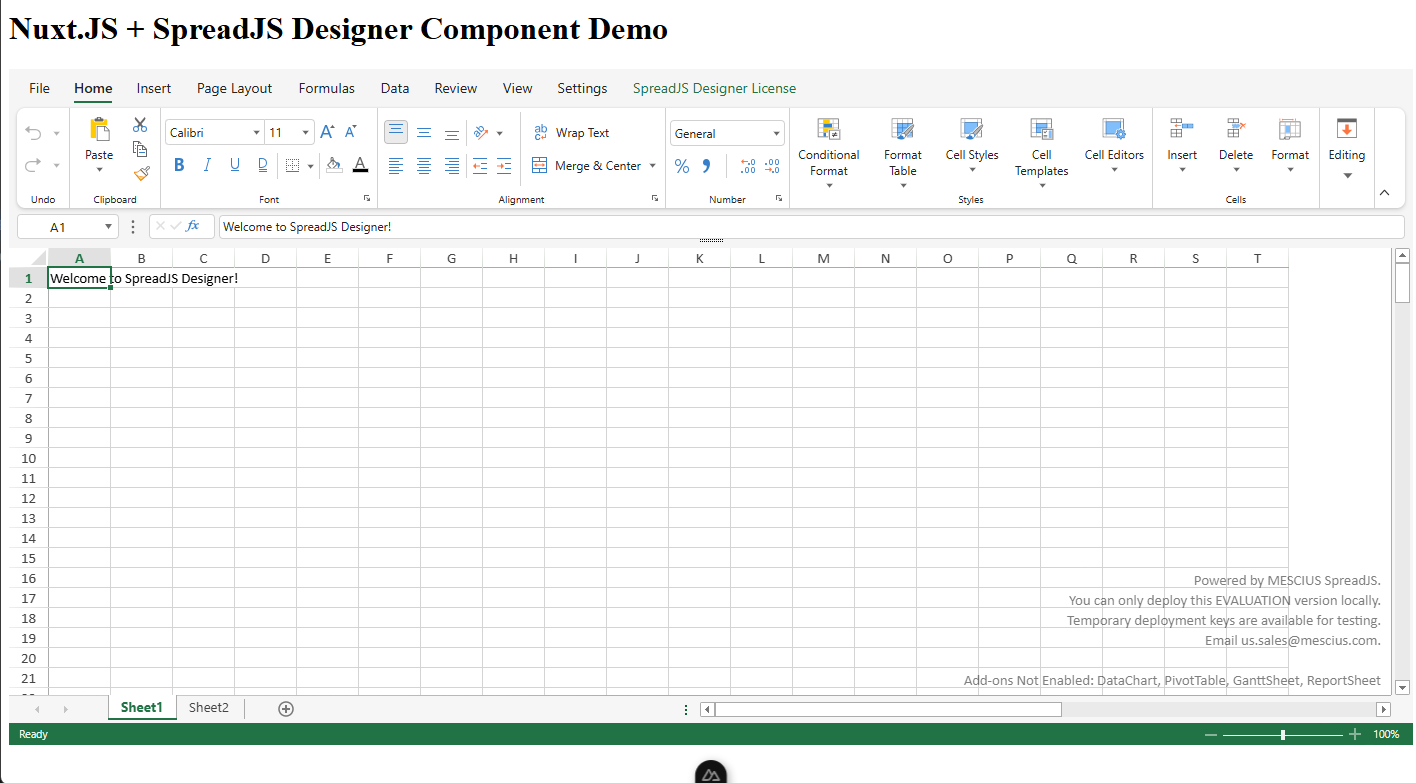
npm run devThe app should be available at http://localhost:3000, rendering the SpreadJS Designer Component within the Nuxt app.