Style and Appearance
The following sections explain in detail how to customize the Maps control's layout and appearance. You can use built-in layout options to lay your controls out in panels such as Grids or Canvases. Themes allow you to customize the appearance of the grid and take advantage of WPF's XAML-based styling.
Maps Properties
The following table outlines the brush properties of the Maps control:
Brushes | Description |
|---|---|
Background | Gets or sets the brush of the control’s background. |
MouseOverBrush | Gets or sets the System.Windows.Media.Brush used to highlight the map buttons when the mouse is hovered over them. |
PressedBrush | Gets or sets the System.Windows.Media.Brush used to highlight the buttons when they are clicked on. |
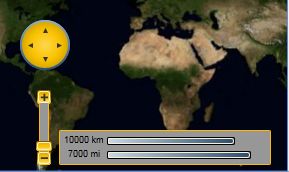
You can completely change the appearance of the C1Maps control by setting a few properties, such as the Background property, which sets the background color of the map’s tools.
Maps Theming
Complete the following steps:
Open the .xaml page in Visual Studio.
Place your cursor between the <Grid></Grid> tags.
In the Tools panel, double-click the C1ThemeRainierOrange icon to declare the theme. Its tags will appear as follows:
<my:C1ThemeRainierOrange>
</my:C1ThemeRainierOrange>
Place your cursor between the <my:C1ThemeRainierOrange> and </my:C1ThemeRainierOrange> tags.
In the Tools panel, double-click the C1Maps icon to add the control to the project. Its tags will appear as children of the <my:C1ThemeRainierOrange> tags, causing the markup to resemble the following:
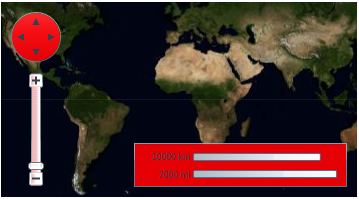
<my:C1ThemeRainierOrange>
    <c1:C1Maps Height="172" Width="288" Margin="200,0,34,0"/> </my:C1ThemeRainierOrange>
Run your project.
This Topic Illustrates the Following:
The following image depicts a Maps control with the C1ThemeRainierOrange theme.