
Quick Start
The following quick start guide is intended to get you up and running with FilePicker for WPF. In this quick start, you'll create a new Visual Studio project with the C1FilePicker control to select image files and display them in another control.
Create an Application
In Visual Studio, select File | New | Project.
In the New Project dialog box, select WPF Application.
Enter a Name and Location for your project and click OK to create the new application.
In the XAML window of the project, place the cursor between the <Grid> and </Grid> tags and click once.
Add the following XAML markup between the <Grid> and </Grid> tags in the MainPage.xaml file:
<Grid.RowDefinitions>
    <RowDefinition Height="Auto" />
    <RowDefinition />
    <RowDefinition Height="Auto" />
</Grid.RowDefinitions>
Navigate to the Toolbox and double-click the C1FilePicker icon to add the control to your application.
Edit the C1FilePicker tag so it appears similar to the following:
<c1:C1FilePicker x:Name="C1FilePicker1" SelectedFilesChanged="C1FilePicker_SelectedFilesChanged" Grid.Row="0" Margin="15" Height="30" />
The markup above gives the control a name, specifies the grid row the control appears in, sets the height of the control and the margin around the control, and indicates an event handler for the SelectedFilesChanged event. You'll add the event handler code in a later step.Add the following XAML markup beneath the <c1:C1FilePicker> tag and before the </Grid> tag in the MainPage.xaml file:
<ScrollViewer Grid.Row="1" Margin="15,0,15,0">
    <ListBox x:Name="ListBox" />
</ScrollViewer>
<StackPanel Grid.Row="2" Name="stackPanel1" Orientation="Horizontal" HorizontalAlignment="Center">
    <Button Content="Clear File Selection" Name="button1" Click="button1_Click" Height="30" Margin="0,15,15,15" Width="150" Grid.Row="2" />
    <Button Content="Clear List Items" Name="button2" Click="button2_Click" Height="30" Margin="15,15,0,15" Width="150" Grid.Row="2" />
</StackPanel>
This markup will add a ListBox control which will allow you to view local images you select using the C1FilePicker control. The markup also adds two buttons which will let you clear the content of the C1FilePicker control and the content of the ListBox.
Add Code to the Application
In the last step you set up a WPF application, but it currently does not function. In this step you'll continue by adding code to add functionality to the application.
Complete the following steps:
- Navigate to the Solution Explorer, right-click MainPage.xaml file or the MainWindow.xaml file, and select View Code to switch to Code view.
- In Code view, add the following import statements to the top of the page if they are not included:
Imports System.Windows.Media.Imaging
Imports C1.WPF.Input
using System.Windows.Media.Imaging;
using C1.WPF.Input;
- Add the following event handler to the MainPage.xaml.cs (or .vb) file or the MainWindow.xaml.cs (or .vb) file, below all the other methods in the MainPage class:
Private Sub C1FilePicker_SelectedFilesChanged(sender As Object, e As EventArgs)
    If C1FilePicker1.SelectedFile IsNot Nothing Then
        Dim stream = C1FilePicker1.SelectedFile.OpenRead()
        Dim source = New BitmapImage()
        source.SetSource(stream)
        Dim image = New Image()
        image.Source = source
        image.Stretch = Stretch.Uniform
        image.Height = 100
        ListBox.Items.Add(image)
    End If
End Sub
private void C1FilePicker_SelectedFilesChanged(object sender, EventArgs e)
{
    if (C1FilePicker1.SelectedFile != null)
    {
        var stream = C1FilePicker1.SelectedFile.OpenRead();
        var source = new BitmapImage();
        source.SetSource(stream);
        var image = new Image();
        image.Source = source;
        image.Stretch = Stretch.Uniform;
        image.Height = 100;
        ListBox.Items.Add(image);
    }
}
This code handles the SelectedFilesChanged event. When a user selects an image with the C1FilePicker control, the image is customized and added to the ListBox control.
- Add the following code to handle the Click events of the Button controls on the page:
Private Sub button1_Click(sender As Object, e As RoutedEventArgs)
    C1FilePicker1.ClearSelection()
End Sub
Private Sub button2_Click(sender As Object, e As RoutedEventArgs)
    ListBox.Items.Clear()
End Sub
private void button1_Click(object sender, RoutedEventArgs e)
{
    C1FilePicker1.ClearSelection();
}
private void button2_Click(object sender, RoutedEventArgs e)
{
    ListBox.Items.Clear();
}
Run the Application
Now that you've created a WPF application, set up the application, and added code to add functionality to the application, the only thing left to do is run your application. To observe your application's run-time interactions, complete the following steps:
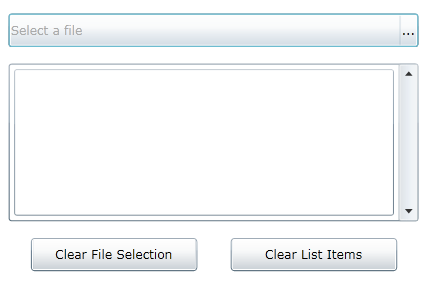
Choose Debug | Start Debugging from the menu to run your application. The application will appear similar to the following image:
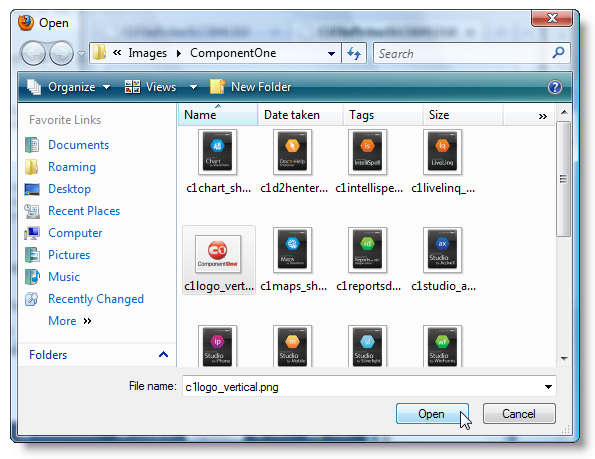
Click the ellipses button on the C1FilePicker control. The Open dialog box will appear.
In the Open dialog box, locate and select an image, and click Open to open the selected image:
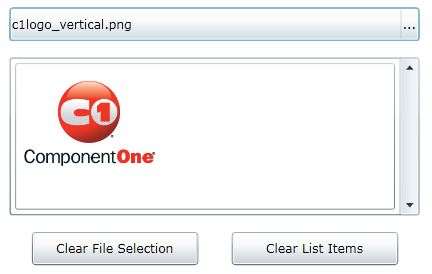
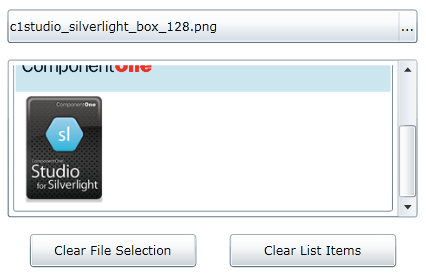
The selected image will appear in the list box and the name of the file will appear in the C1FilePicker control:
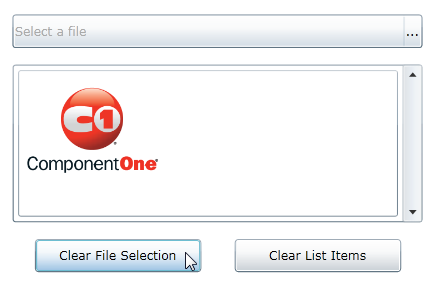
Click the Clear File Selection button. Notice that the name of the file no longer appears in the C1FilePicker control:
Click the ellipses button on the C1FilePicker control again. The Open dialog box will appear.
In the Open dialog box, try to select more than one image. Notice that you cannot. That is because the Multiselect property is set to False by default. To select multiple files at one, you would need to set the Multiselect property to True.
Select a file in the Open dialog box and click Open. Notice that the second file appears listed in the C1FilePicker control and has been added to the List Box:
- Click the Clear List Items button; the list of files will be cleared.
What You've Accomplished
Congratulations, you've completed the FilePicker for WPF quick start! You've created a simple application that uses FilePicker for WPF to select image files that are then displayed in another control.