


Step 1 of 4: Creating an Application
In this step, you'll create an application using ComboBox for WPF.
Complete the following steps:
In Visual Studio, select File | New Project.
In the New Project dialog box, select the Windows Desktop Template in the left-hand pane.
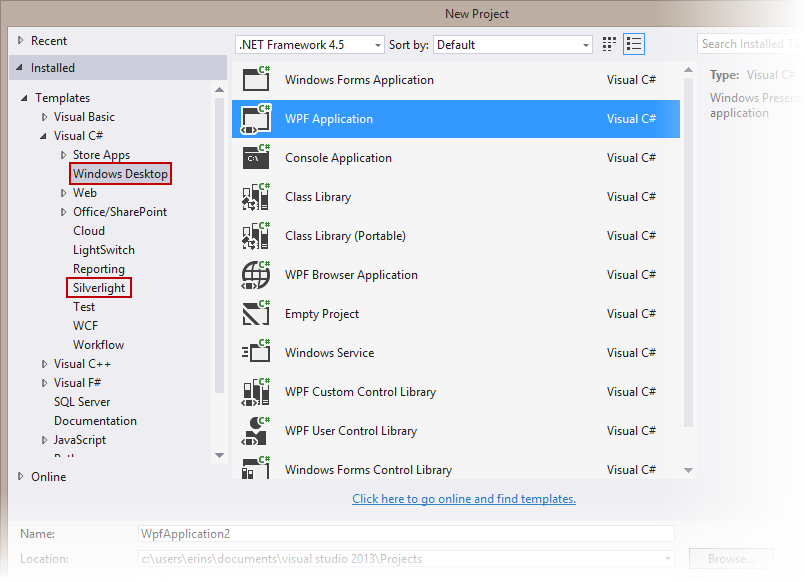
New Project Dialog Box
Select WPF Application.
Enter a Name for your project, for example "QuickStart", and click OK. In a WPF Application, the MainWindow.xaml file will open.
Add the following assemblies to your application by right-clicking the References folder and selecting Add Reference:
WPF: C1.WPF.4.dll
In the Visual Studio Toolbox, locate the StackPanel control and double-click to add it to your page. Edit the StackPanel's properties to reflect the following:
Width = "300"
Height = "35"
Orientation = Horizontal
Locate the ComboBox control in the Toolbox and add two controls to the StackPanel by double-clicking the control. These two controls will be named, by default, combobox1 and combobox2.
Edit combobox1's properties to reflect the following:
Width = "150"
Height = "35"
Name = "Category"
Edit combobox2's properties to reflect the following:
Width = "150"
Height = "35"
Name = "Shows"
You have completed the first step of the quick start by creating a WPF and adding two C1ComboBox controls to it. In the next step, you'll add items to the first C1ComboBox control.