
Quick Start
This section will lead you through the creation of a simple Visual Studio project that uses the SpellChecker component with a RichTextBox control. Note that you could also check the spelling of the text in any TextBox control.
Complete the following steps to create a basic spell-checking form:
- Add the SpellChecker component to the Toolbox.
- From the Toolbox, double-click the C1SpellChecker component to add it to the form. Note that the component will appear below the form, not on it.
- From the Toolbox, double-click the RichTextBox control to add it to the form.
- Select the RichTextBox, and set the following properties:
- Dock property to Fill.
- SpellChecking on C1SpellChecker property to True.
type=note
Note: The SpellChecking property is an extender property provided by the SpellChecker.
Now the sample application is ready; it’s that easy! Run the application, type any text in the box, and observe Microsoft Word-style spell-checking functionality (right-click misspelled words to see a list of suggestions):
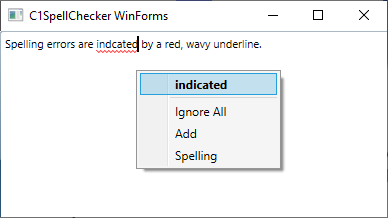
Notice that spelling errors are indicated by a red, wavy underline. Right-clicking the spelling error provides valid spelling alternatives (just like in Microsoft Word).