- Introduction
- Report Readers
-
Report Authors
- Standalone Designer
- WebDesigner
- Report Types
- Report Controls
- Report Wizard
- Data Binding
- Design Reports
- DevOps
- Developers
- Samples
- Troubleshooting
Designing Code-Based Section Reports in Visual Studio
Introduction
In this tutorial, we will guide you through the process of building a code-based section report from scratch using Visual Studio.NET. By the end of this tutorial, you will have learned how to:
Add a code-based section report to a Visual Studio Project.
Bind a report to a JSON endpoint.
Alter the report layout using report code.
Preview the report output using the built-in Preview functionality.
Prerequisites
Before starting this tutorial, please ensure the following requirements are met:
ActiveReports.NET Installation: ActiveReports.NET should be installed on your machine. If you have not yet installed it, please refer to our Install ActiveReports guide for detailed instructions.
Visual Studio: Visual Studio 2022 or later with the .NET Desktop Development workload installed. If you need a refresher on navigating Visual Studio, visit the Visual Studio Documentation.
Creating New Project
Launch Visual Studio and follow these steps to create your new application:
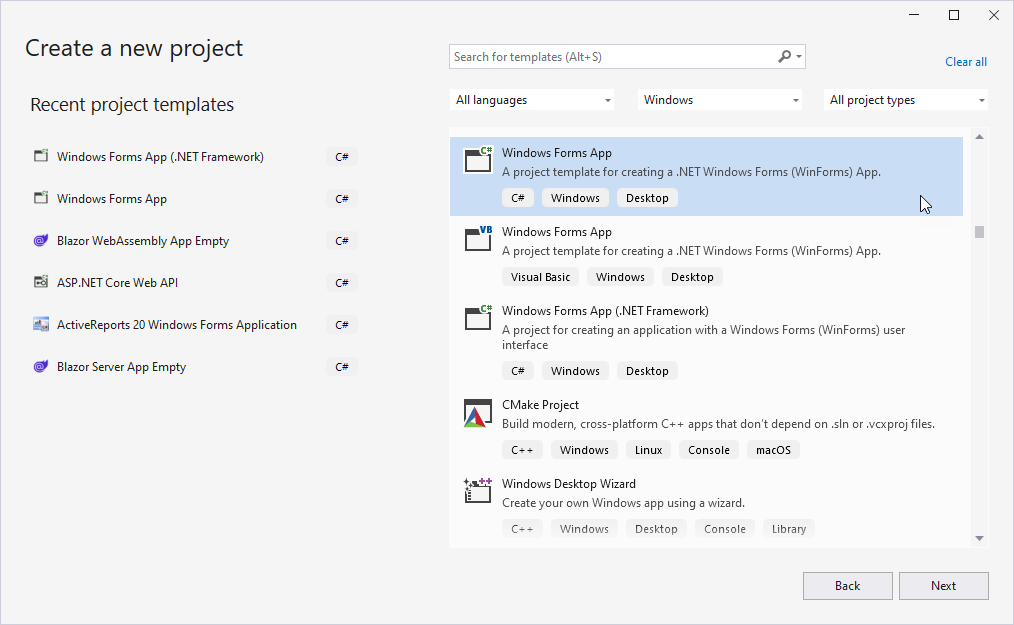
Select Create a new project from the Visual Studio startup window.
In the list of project templates, find and select Windows Forms App. Click Next to continue.
In the Configure your new project dialog, provide a name for your project, choose a location for your files, and click Next.
Select a Framework supported by ActiveReports (see Product Requirements) and click Create.
Adding a Code-Based Section Report
In the Solution Explorer, right-click the project and go to Add > New Item.
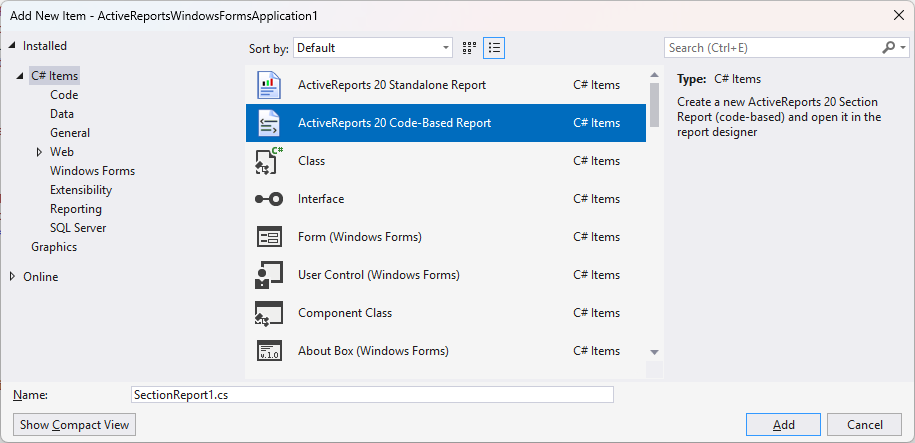
Select ActiveReports 20 Code-Based Report and click Add.
Binding Report to Data Source
In the
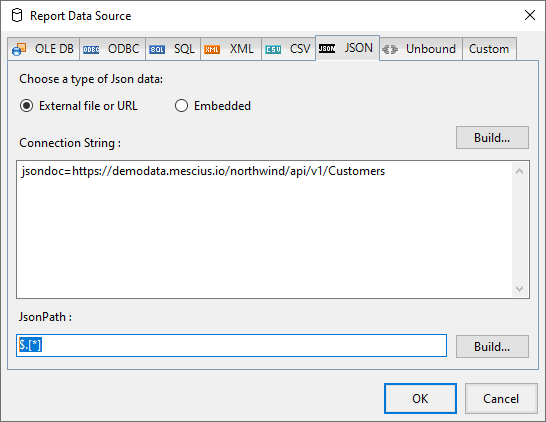
SectionReport1.csdesign view, click the Data Source icon located in the header of the Detail section.In the Report Data Source dialog, select the JSON tab and click the
Build...button.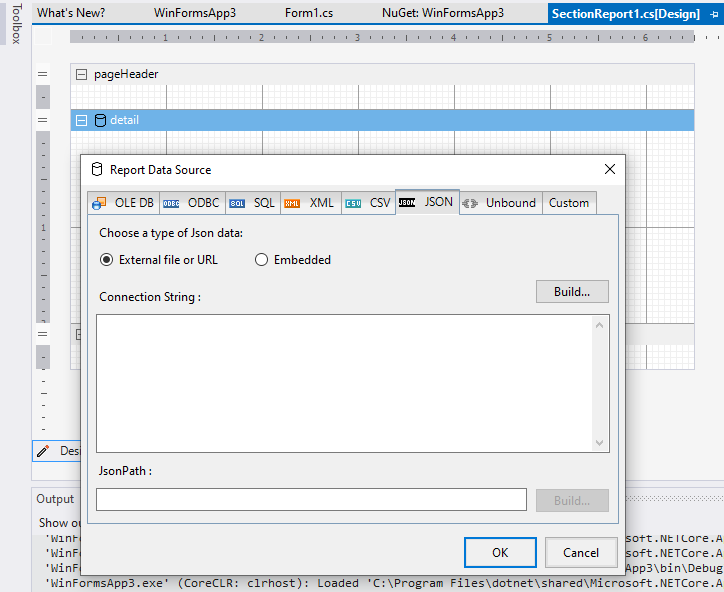
In the Configure JSON Data Source dialog, enter
https://demodata.mescius.io/northwind/api/v1/Customersin the Data Path field and click Test Request. Once validated, click OK.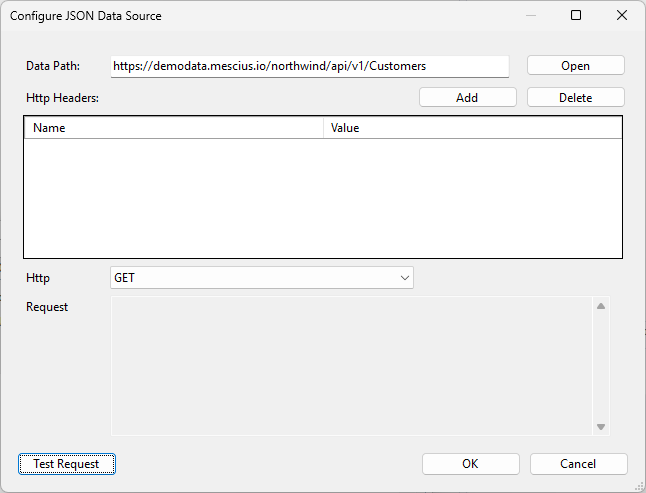
Under the JSON Path section (back in the Data Source dialog), click the
Build...button. Select the[*]node and click OK.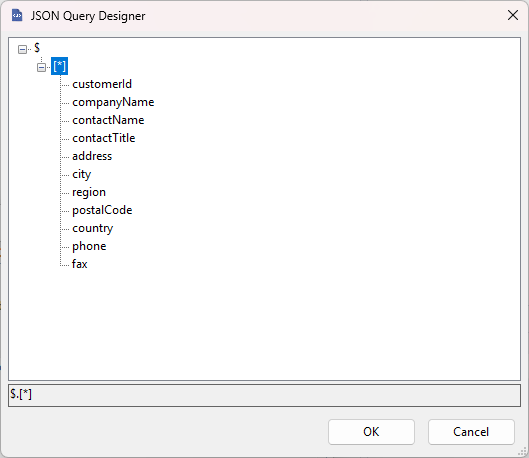
Click OK to save the changes.
Building Report Layout
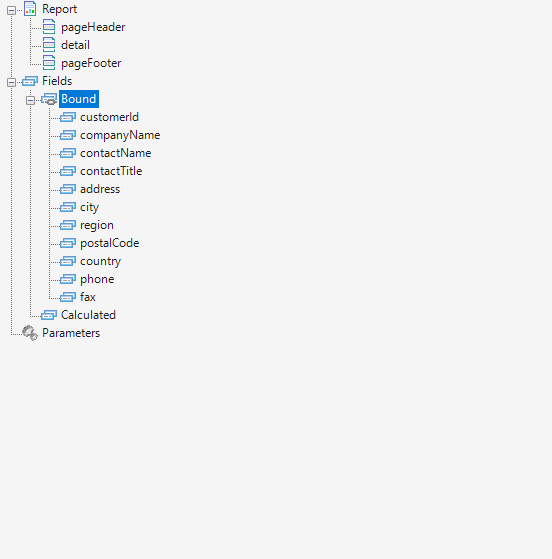
Open the Report Explorer. Expand the Fields > Bound node to view the available data fields.
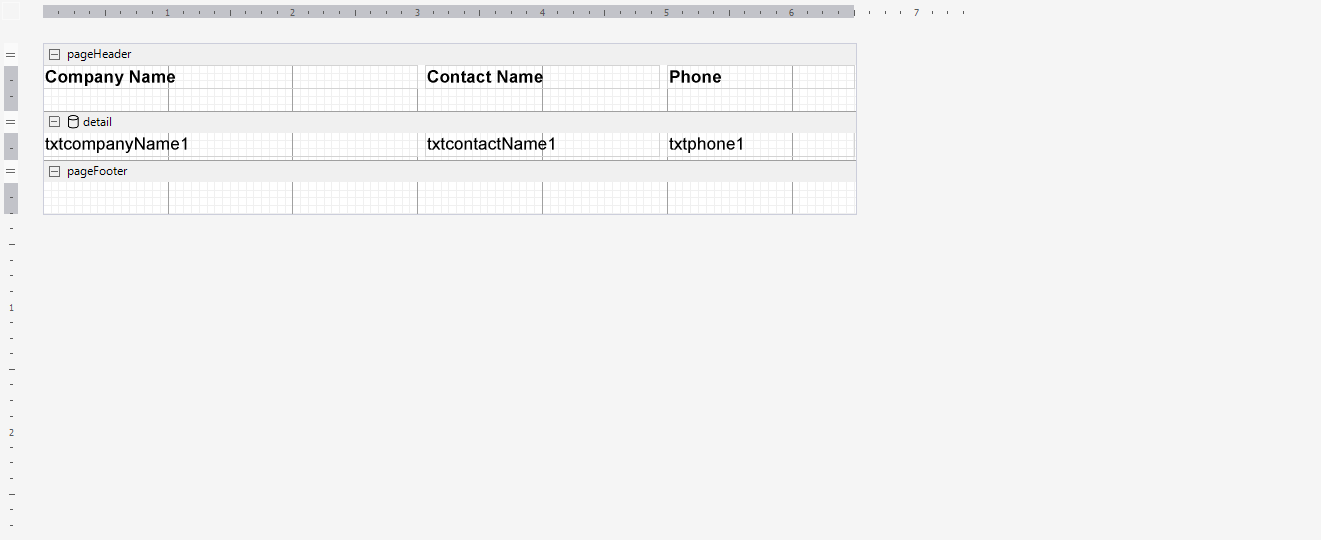
Drag and drop the
companyName,contactName, andphonefields from the Report Explorer onto the Detail section of the report design surface. This automatically creates three TextBox controls bound to these fields.Resize and arrange the textboxes. For example, make
txtcompanyName1wider than the others to accommodate longer names.Open the Visual Studio Toolbox and locate the ActiveReports Section Report tab.
Drag three Label controls into the PageHeader section. Align them with the TextBox controls in the Detail section below.
Set the
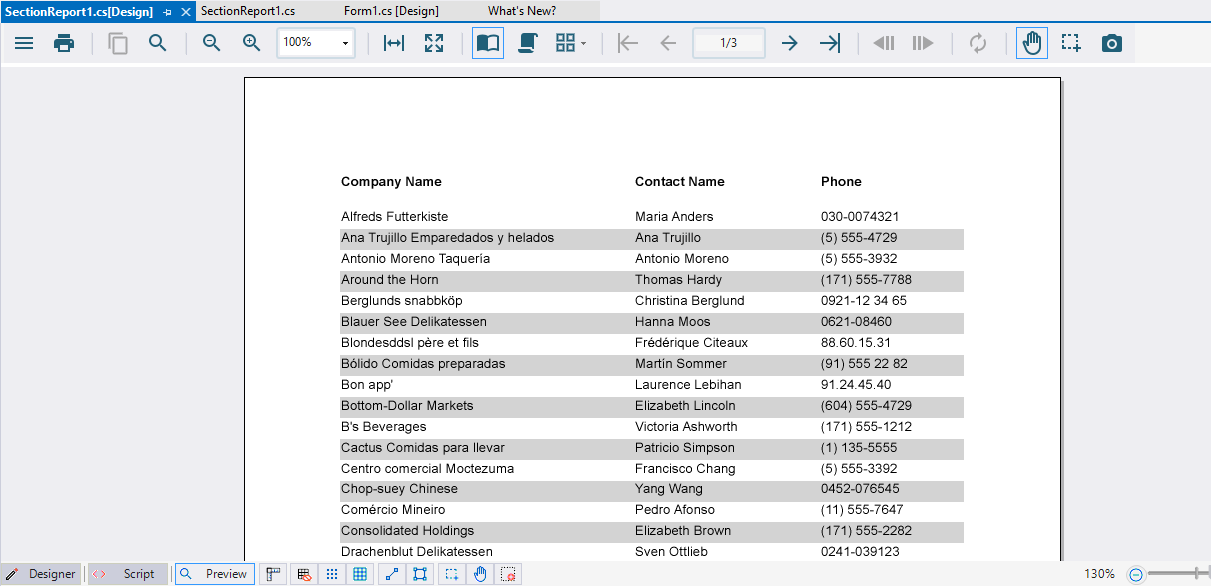
Textproperty of the labels to "Company Name", "Contact Name", and "Phone" respectively.Set the font style to Bold for the header labels using the Property Grid or Toolbar. The layout should look like this:
Adding Report Code
Double-click the Detail section of the report. This switches to the code view and automatically generates a handler for the
Formatevent.Add the following code to dynamically alternate the background color of the detail section. Ensure you keep the existing constructor.
public partial class SectionReport1 : GrapeCity.ActiveReports.SectionReport
{
    // Keep your existing constructor
    public SectionReport1()
    {
        InitializeComponent();
    }

    private int detailIndex = 0;

    private void detail_Format(object sender, System.EventArgs e)
    {
        detailIndex++;
        this.detail.BackColor = detailIndex % 2 == 0 ? Color.LightGray : Color.White;
    }
}
Previewing Report Output
Switch back to the report designer by right-clicking the code file and selecting View Designer. Click the Preview tab at the bottom of the designer to view the final report: