


-
Spread Windows Forms Product Documentation
- Getting Started
-
Developer's Guide
- Understanding the Product
- Working with the Component
- Spreadsheet Objects
- Ribbon Control
- Sheets
- Rows and Columns
- Headers
- Cells
- Cell Types
- Data Binding
- Customizing the Sheet Appearance
- Customizing Interaction in Cells
- Tables
- Pivot Table
- Understanding the Underlying Models
- Customizing Row or Column Interaction
- Formulas in Cells
- Sparklines
- Keyboard Interaction
- Events from User Actions
- File Operations
- Storing Excel Summary and View
- Printing
- Chart Control
- Enhanced Chart
- Customizing Drawing
- Touch Support with the Component
- Spread Designer Guide
- Assembly Reference
- Import and Export Reference
- Version Comparison Reference
Tutorial: Binding to a Corporate Database (Visual Studio 2013 or later)
The following tutorial walks you through creating a project and binding the Spread control to a database. These instructions are based on the steps required in Visual Studio 2013 or later.
Step 1 - Add Spread Control to the Project
The following steps will help you in adding Spread control to the project:
Start a new Visual Studio .NET project.
Provide a name to your project and the form file.
Now, add the FpSpread component to your project, and then place the component on the form.
If you do not know how to add the FpSpread component to the project, refer to Adding a Component to a Visual Studio 2019 Project or Adding a Component to a Visual Studio 2015 or 2017 Project or Adding a Component to a Visual Studio 2013 Project.
Step 2 - Configure Data Source
In this section, we will use the Quickstart menu to set up the database connection and the data set.
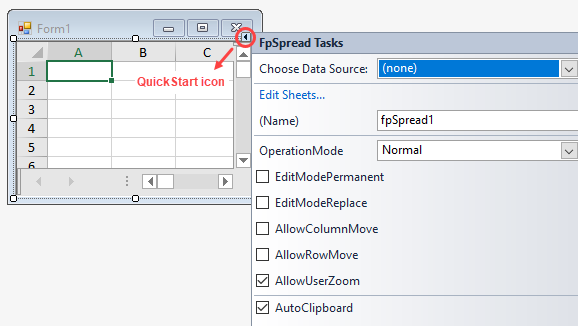
Select the form and click the QuickStart icon to launch the FpSpreadTasks menu as shown in the following image.
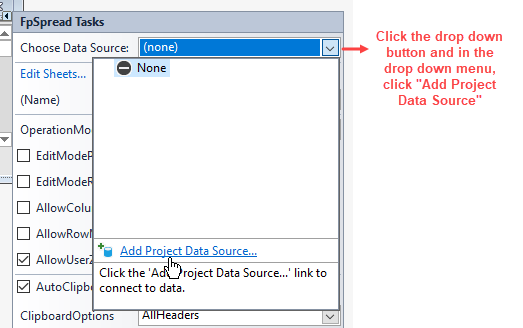
In the FpSpreadTasks menu, go to Choose Data Source and click the drop down button. In the drop down menu that appears, click Add Project Data Source to open the Data Source Configuration Wizard.
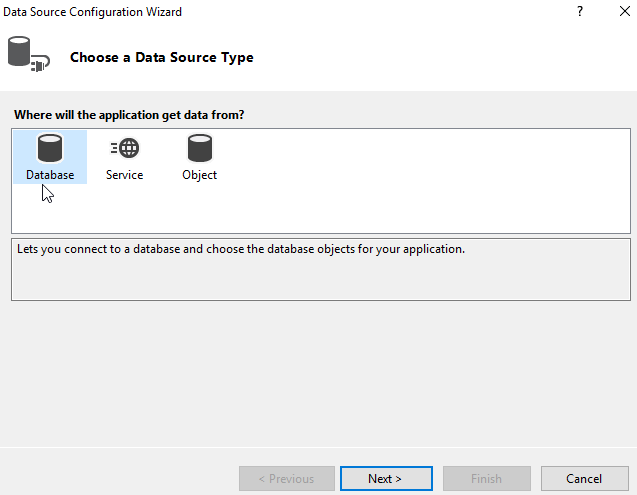
In the Data Source Configuration Wizard, click Database and then click Next.
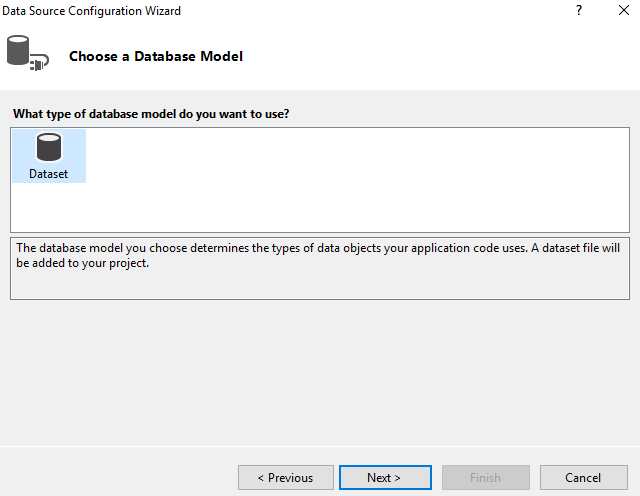
Click Dataset to specify the database model that you want to use and then click Next.
Under Choose your Data Connection, either choose an existing data connection or click New Connection and then click Next to display the Add Connection dialog.
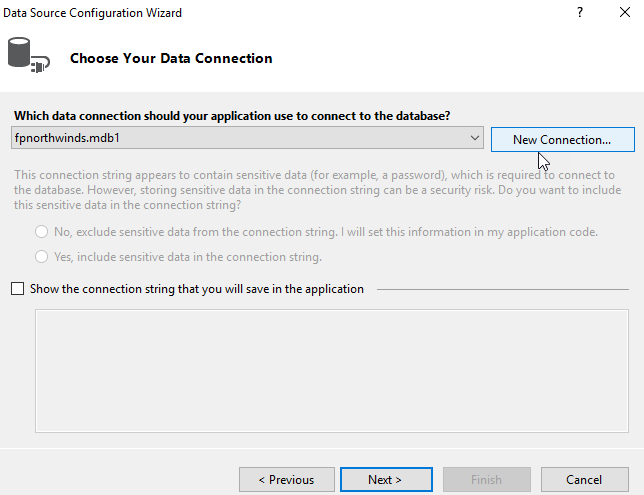
In the Add Connection dialog, click Browse to open the Select Micrsoft Access Database File dialog.
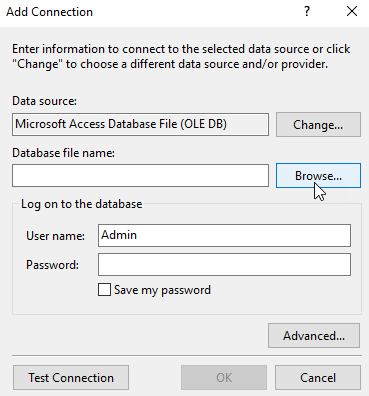
In the Select Microsoft Access Database File dialog, make sure the folder path is set to C:\Program Files (x86)\Mescius\Spread.NET 16\Windows Forms\v16.0.20221.0\Samples\C#\Common\Spread.Common.DataStore\Data and then click Open.
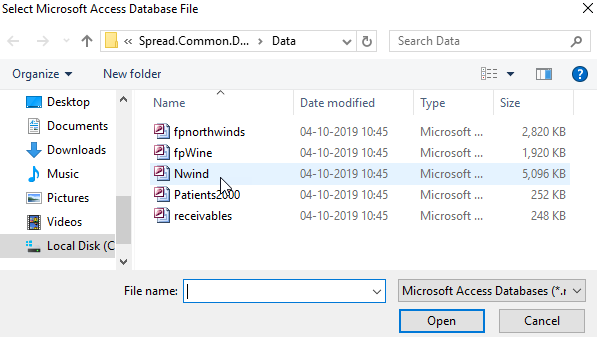 You can also click the Test Connection button in the Add Connection dialog to test the connection. If you do not receive a message stating the "Test connection succeeded" retry this step. If you receive the message "Test connection succeeded," your connection is complete. Click OK to close the Add Connection dialog.
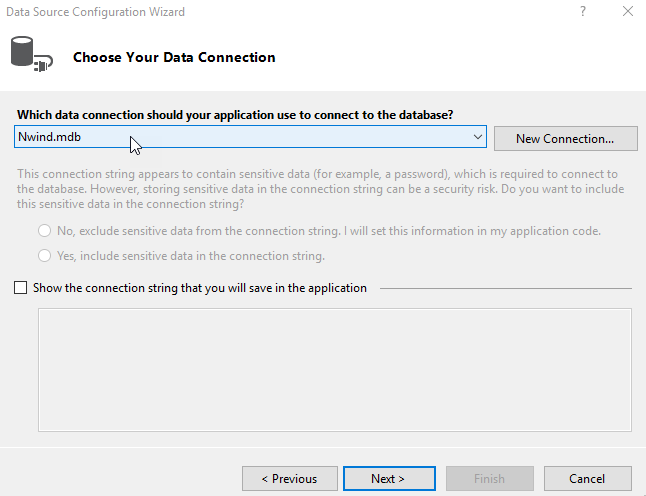
In the Data Source Configuration Wizard, make sure the database file that you had chosen in the above step is displayed under Choose Your Data Connection. Click Next to proceed.
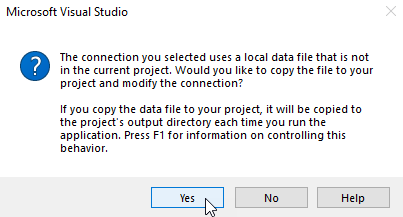
Now, Visual Studio displays a dialog that asks if you want to copy the database file to your project. Click Yes to continue.
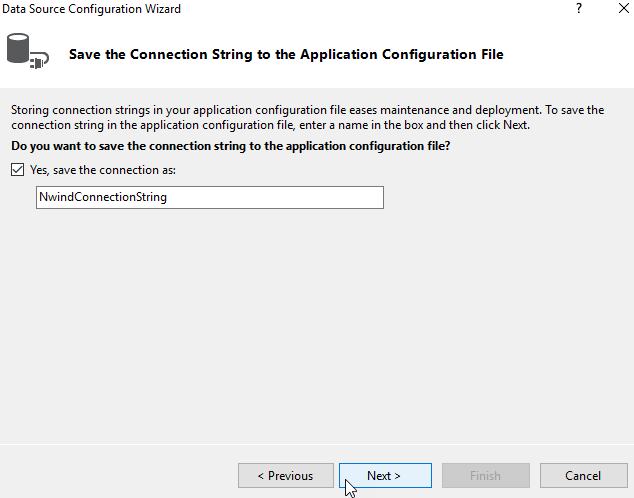
Under Save the Connection String to the Application Configuration File, make sure the box for Yes, save the connection as is checked, and accept the default name by clicking Next.
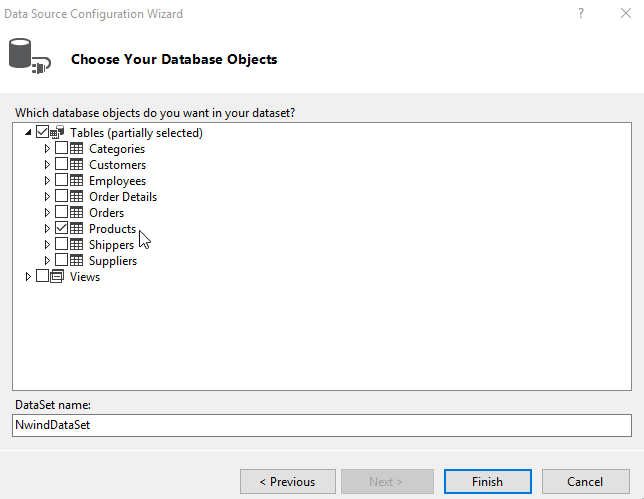
Under Choose Your Database Objects, click the arrow next to Tables to open the drop-down list of available tables. Click the arrow next to Products to display the list of fields in the Products table. You can choose any table that you want to include in your form.
In the list of fields, select Product ID, Product Name and UnitPrice as shown in the following image and click Finish. You can select as many fields as you want.
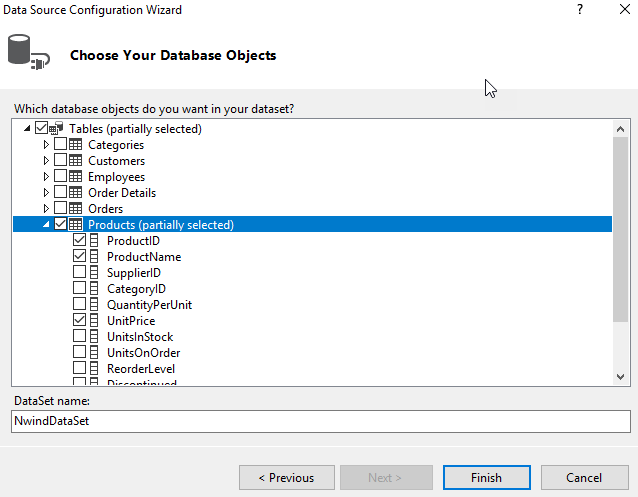
The NwindDataSet is now added to your project. Notice that the column headers in Spread control get changed to the field names (ProductID, ProductName and UnitPrice) fetched from the Products table in your database.
Save your project and run it. You should see a form that looks similar to the following image with table data populated across the spreadsheet.
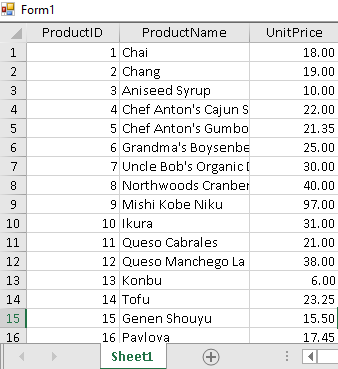
If your form doesn't look similar to the image shown above, adjust the size of your Spread control and re-check the steps that you have performed so far.
Step 3 - Improve the Display of Data
In this step, you can change the cell type for one of the columns to display the data from the database in a better way.
Double-click on the form to open the code window.
Set the cell type for the UnitPrice column by adding the following code snippet below the code in the Form_Load event.
Save your project.
The following code snippet can be added to enhance the display of the data fetched from the database.
// Bind the component to the data set.
fpSpread1.Sheets[0].AutoGenerateColumns = false;
fpSpread1.Sheets[0].DataSource = dbDataSet;
fpSpread1.Sheets[0].ColumnCount = 2;
fpSpread1.Sheets[0].BindDataColumn(0, "ID");
fpSpread1.Sheets[0].BindDataColumn(1, "Description");
' Bind the component to the data set.
fpSpread1.Sheets(0).AutoGenerateColumns = False
fpSpread1.Sheets(0).DataSource = dbDataSet
fpSpread1.Sheets(0).ColumnCount = 2
fpSpread1.Sheets(0).BindDataColumn(0, "ID")
fpSpread1.Sheets(0).BindDataColumn(1, "Description")