
-
Spread Windows Forms Product Documentation
- Getting Started
-
Developer's Guide
- Understanding the Product
- Working with the Component
- Spreadsheet Objects
- Ribbon Control
- Sheets
- Rows and Columns
- Headers
- Cells
- Cell Types
- Data Binding
- Customizing the Sheet Appearance
- Customizing Interaction in Cells
- Tables
- Pivot Table
- Understanding the Underlying Models
- Customizing Row or Column Interaction
-
Formulas in Cells
- Placing a Formula in Cells
- Displaying Formula in Cells
- Specifying a Cell Reference in a Formula
- Specifying a Sheet Reference in a Formula
- Specifying an External Reference in a Formula
- Using a Circular Reference in a Formula
- Using DataTable Formula
- Nesting Functions in a Formula
- Recalculating and Updating Formulas Automatically
- Finding a Value Using GoalSeek
- Allowing the User to Enter Formulas
- Creating and Using a Custom Name
- Creating and Using a Custom Function
- Creating and Using a Visual Function
- Creating and Using External Variable
- Using the Array Formula
- Working With Dynamic Array Formulas
- Working with the Formula Text Box
- Setting up the Formula Provider
- Setting up the Name Box
- Using Language Package
- Accessing Data from Header or Footer
- Auto Format Formulas
- Managing External Reference
- Precedents and Dependents
- Sparklines
- Keyboard Interaction
- Events from User Actions
- File Operations
- Storing Excel Summary and View
- Printing
- Chart Control
- Enhanced Chart
- Customizing Drawing
- Touch Support with the Component
- Spread Designer Guide
- Assembly Reference
- Import and Export Reference
- Version Comparison Reference
Setting up the Name Box
You can use the name box control to display or create custom names at run time. Custom names that are created by the name box can only refer to a cell or a range of cells.
Setting up the Name Box
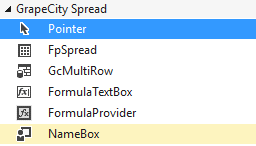
Select the name box control from the Toolbox and draw it on the form or use the NameBox class to create the control at runtime. Then attach the control to Spread. The following image displays the NameBox control in the toolbox.
Using the Name Box
To create a custom name, select a cell or range of cells in the Spread control, type a custom name in the name box control, and then press the equal key to create the custom name.
Use the drop-down list in the name box control to display the custom names. You can select one of the names to see the cell or cell range that the name refers to.

Using Code
Create the name box and attach it to the control.
Example
This example code creates a name box control and a custom name.
fpSpread1.ActiveSheet.AddCustomName("Alpha", "A1:B1", 0, 0);

                FarPoint.Win.Spread.NameBox namebox1 = new FarPoint.Win.Spread.NameBox();
                namebox1.Location = new Point(0, 0);
                namebox1.Size = new Size(80, 20);
                this.Controls.Add(namebox1);
                namebox1.Attach(fpSpread1);
fpSpread1.ActiveSheet.AddCustomName("Alpha", "A1:B1", 0, 0)
Dim namebox1 As New FarPoint.Win.Spread.NameBox()
namebox1.Location = New Point(0, 0)
namebox1.Size = New Size(80, 20)
Controls.Add(namebox1)
namebox1.Attach(fpSpread1)See Also
Specifying a Cell Reference in a Formula
Specifying a Sheet Reference in a Formula
Specifying an External Reference in a Formula
Using a Circular Reference in a Formula
Nesting Functions in a Formula
Recalculating and Updating Formulas Automatically
Finding a Value Using GoalSeek
Allowing the User to Enter Formulas
Creating and Using a Custom Name
Creating and Using a Custom Function
Creating and Using External Variable
Working with the Formula Text Box