


Configuring Page Settings
The Configure Page Settings page of the Report Wizard allows you to define the paper size, orientation, and layout for your report.
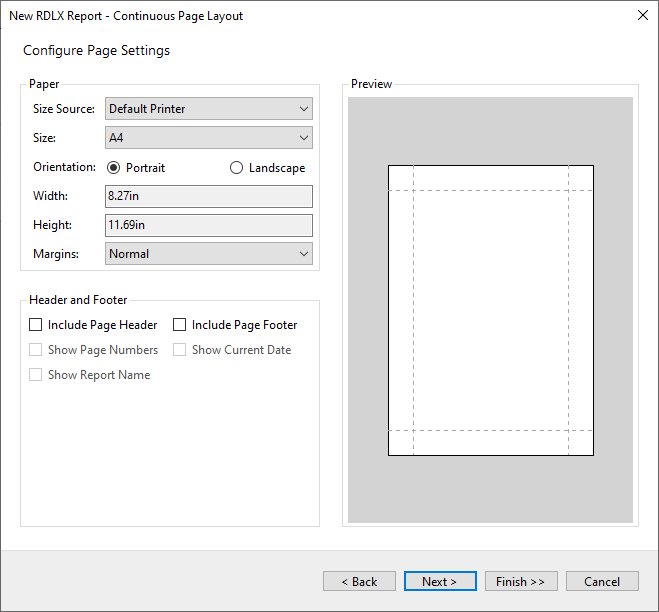
The available options are:
Paper
Size Source: Specifies where the paper sizes in the Size list come from. The available options are:
Default printer - Shows paper sizes supported by the system default printer. This is the default option.
Installed printer - Shows paper sizes supported by a selected installed printer.
Standard list - Shows the built-in standard paper sizes.
When you select a size source, the Size list updates automatically.
Size: You can choose one of the pre-defined paper sizes, such as Letter or A4 or select the Custom option that allows you to specify the width and height of the paper manually.
Orientation: Select either Portrait or Landscape orientation, depending on how you want the content to be laid out on the page. This option is disabled for the Custom size.
Width and Height: These fields automatically update based on the selected paper size and orientation. You can also manually set them for the Custom size.
Margins: Use the dropdown to select the margin size. Options include Normal, Narrow, Moderate, and None.
Header and Footer
You can choose to include a Page Header and/or Page Footer by checking the corresponding boxes.
Additional options include:
Show Page Numbers: Displays page numbers on each page footer or header.
Show Current Date: Adds the current date to the page header or footer.
Show Report Name: Displays the report name in the footer or header.
Preview
On the right side of the page, you will see a Preview pane that provides a visual representation of the current settings. This preview updates automatically as you make changes.
After configuring your page settings, click Next > to proceed with the Configuring Data Source step, or Finish >> to finalize your settings and generate an empty report with the selected page settings. If you need to make changes, you can click < Back to return to the previous step or Cancel to exit the wizard.