
Deploy Application Using Docker
In this tutorial, we will be deploying the JSViewer_MVC_Core sample using Docker on Windows environment. Download the JSViewer_MVC_Core sample from our WebSamples19 GitHub repository.
Create Docker File
To create a docker file, follow the steps as described below:
Create a file named 'Dockerfile' and add it to the above sample project (make sure no extension is added like .txt is added). See creating Dockerfile on Windows for more information.
Use the .Net SDK image (Docker Official Image) and install dependencies like node.js in it.
FROM mcr.microsoft.com/dotnet/sdk:6.0 AS build
# installing node
RUN curl -sL https://deb.nodesource.com/setup_12.x | bash - \
 && apt update \
 && apt install -y nodejs
Create a new working folder named 'src' and copy the files from our project in the local machine to 'src' folder. Also, install the required project dependencies and build the application using the dotnet restore and dotnet build commands, followed by dotnet publish to publish the same.
WORKDIR /src
COPY . .
ENV PATH="$PATH:/root/.dotnet/tools"
RUN dotnet restore "./JSViewer_MVC_Core.csproj"
RUN dotnet build "JSViewer_MVC_Core.csproj" -c Release -o /app/build
FROM build AS publish
RUN dotnet publish "JSViewer_MVC_Core.csproj" -c Release -o /app/publish
Once done, create a working directory called 'app' and copy the contents of the published application from the layer having an alias name as 'publish' and run the application as follows.
WORKDIR /app
COPY --from=publish /app/publish .
ENTRYPOINT ["dotnet", "JSViewer_MVC_Core.dll"]
Therefore, we now have a docker file with the following commands.
FROM mcr.microsoft.com/dotnet/sdk:6.0 AS build
# installing node
RUN curl -sL https://deb.nodesource.com/setup_12.x | bash - \
 && apt update \
 && apt install -y nodejs
WORKDIR /src
COPY . .
ENV PATH="$PATH:/root/.dotnet/tools"
RUN dotnet restore "./JSViewer_MVC_Core.csproj"
RUN dotnet build "JSViewer_MVC_Core.csproj" -c Release -o /app/build
FROM build AS publish
RUN dotnet publish "JSViewer_MVC_Core.csproj" -c Release -o /app/publish
# final stage/image
FROM mcr.microsoft.com/dotnet/aspnet:6.0-focal
RUN apt-get update; \

ENV ASPNETCORE_URLS="http://+:5000"
WORKDIR /app
COPY --from=publish /app/publish .
ENTRYPOINT ["dotnet", "JSViewer_MVC_Core.dll"]
Create an image using the above-created Docker File
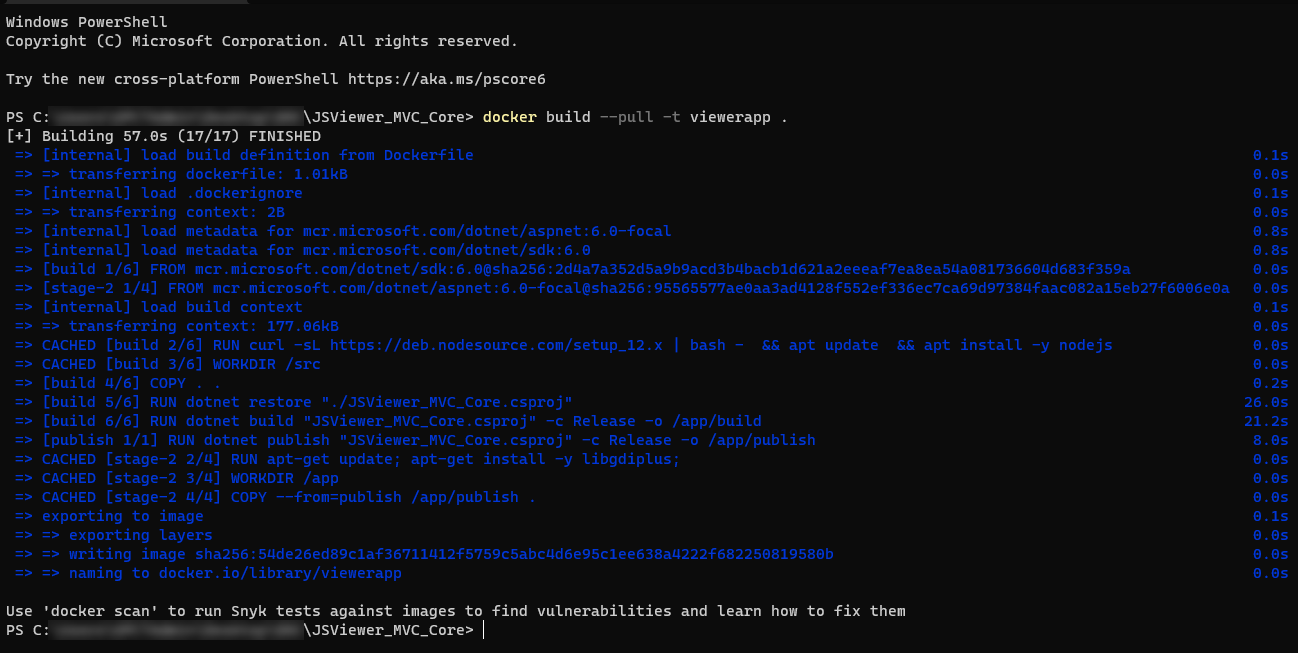
Open the command prompt and build an image named 'viewerapp' from the above-created docker file and use the docker build command as follows.
docker build --pull -t viewerapp
The console screenshot on executing the above command is shown.
For more information on the above command, please refer to the link: https://docs.docker.com/reference/cli/docker/buildx/build/.
Execute the above-created image inside the docker container
We will use the following docker run command and would bind the port 8090 of the host system to the container’s 5000 port where the above specified JSViewer application is running.
docker run -dp 8090:5000 viewerapp
The console screenshot on executing the above command is shown.

For more information on the above command, please refer to the link: https://docs.docker.com/reference/cli/docker/container/run/
Now, try opening the localhost:8090 in the browser of the host system, the output should be as follows.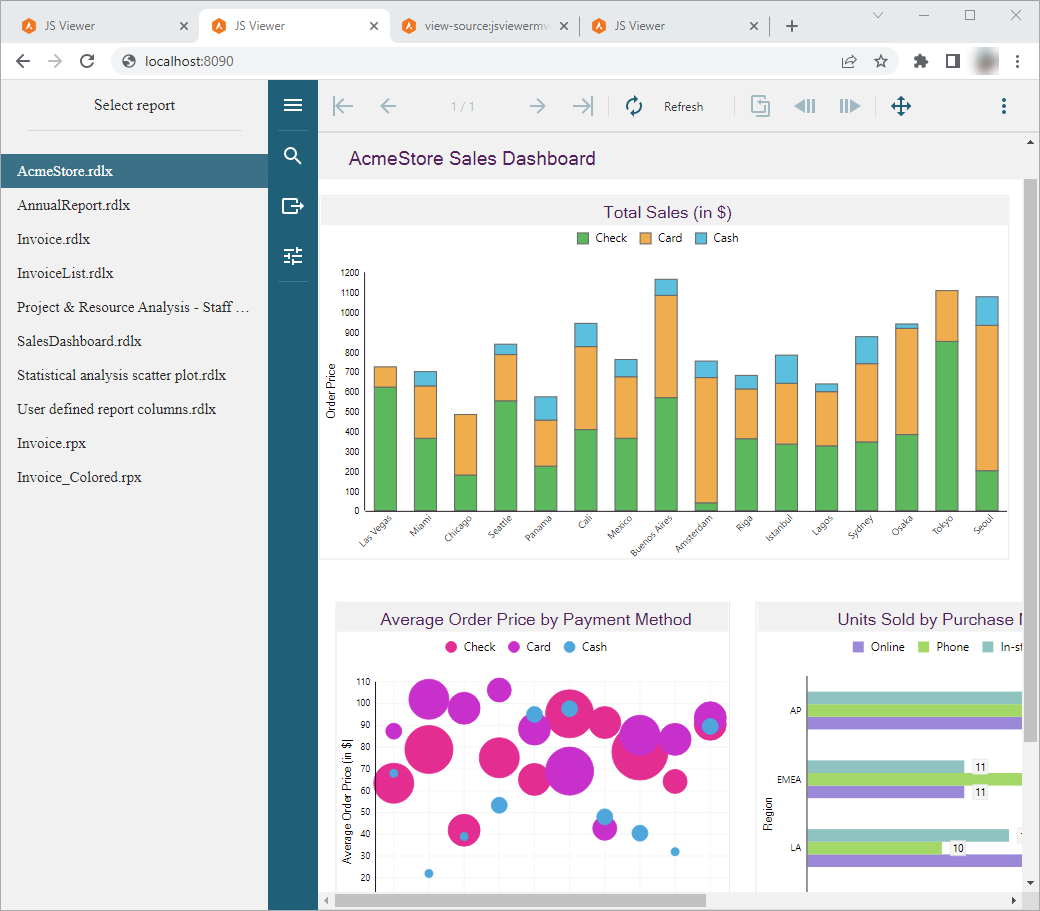
Licensing the Application Deployed on Docker
You can activate the license with Pipeline License or with Standard Developer License as explained in the Licensing Build Agents/Pipelines using Command Line page.