Creating a Horizontal or Vertical Splitter
In This Topic
The C1SplitterExtender control allows you to change the orientation of a splitter. Simply set the Orientation property to take advantage of this feature.
- Create an ASP.NET Web application.
- Add a standard Panel control to the main content of your page.
- Add a second Panel control within the first panel, Panel1.
- Add markup within each panel so the final markup looks like this:
<asp:Panel runat="server" ID="Panel1">
<div>
panel1
</div>
<div>
<asp:Panel runat="server" ID="Panel2">
<div>
panel2</div>
<div>
panel3</div>
</asp:Panel>
</div>
</asp:Panel>
-
Click the Panel1 smart tag and select Add Extender from the Tasks menu.
-
In the Extender Wizard, select C1SplitterExtender and click OK. A C1SplitterExtender control is added to the page and the TargetControlID is set to Panel1.
-
Click the Panel2 smart tag and select Add Extender from the Tasks menu.
-
In the Extender Wizard, select C1SplitterExtender and click OK. A C1SplitterExtender control is added to the page and the TargetControlID is set to Panel2.
-
Select View | Properties Window in the Visual Studio menu.
-
Click the drop-down list at the top of the Properties window and select Panel1_C1SplitterExtender.
-
-
Click the drop-down list at the top of the Properties window and select Panel2_C1SplitterExtender.
-
-
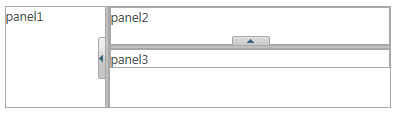
Press F5 to run the application. The splitter will look similar to this: