
Configuring File Data Source
If you selected one of the JSON, XML, CSV, or Excel File data sources, the next screen of the report wizard allows you to configure the actual connection. The following sections describe the connection settings for each file type.
Fixed and Dynamic Settings
Connection settings can either be fixed or dynamic:
- Fixed Settings: These are hard-coded values that remain constant and can only be modified at design-time.
- Dynamic Settings: These allow you to supply values programmatically or interactively, giving more flexibility during runtime or when different users view the report.
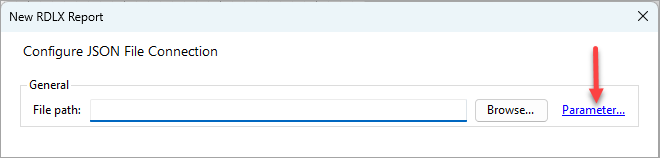
To make a setting dynamic, click the Parameter... link near the setting name:
This will open the Parameters dialog:
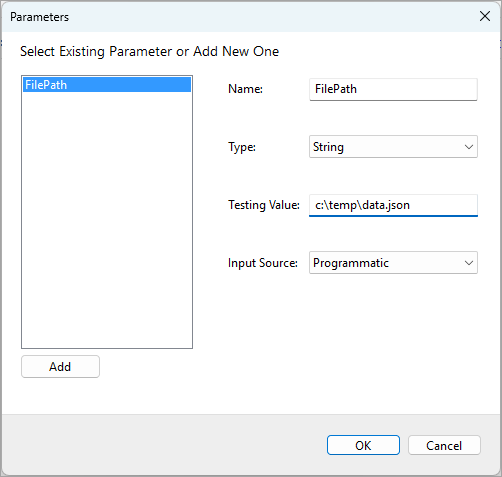
Here, you can re-use an existing parameter or create a new one by clicking the Add button. The following properties can be configured:
- Name: The parameter name used as a reference in the connection settings. You’ll need this name to supply its value via code if you choose to do so.
- Type: The data type of the parameter. You can select from Boolean, DateTime, Integer, Float, and String.
- Testing Value: The value used at design-time to test the connection.
- Input Source: Choose Programmatic to supply the parameter values via your application code, or Interactive to allow report readers to provide the parameter values.
Advantages of Dynamic Settings
Dynamic settings offer flexibility, especially in environments where connection details might change or where different users require different settings. For example, you might want to use different files depending on the current logged-in user in your application.
Configuring JSON File Connection
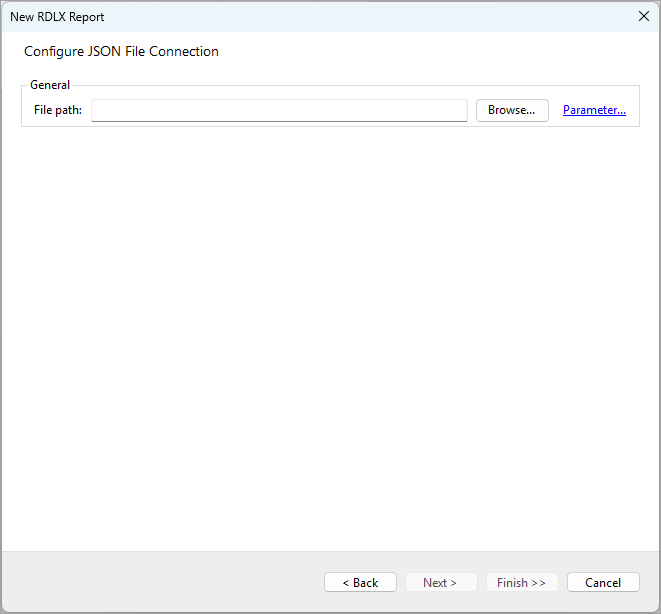
General Settings
- File Path: Enter the path to the JSON file that contains the data you want to connect to. You can either type the path directly, use the Browse... button to locate the file, or make the path dynamic by using a parameter, as described in the Fixed and Dynamic Settings section above.
Proceeding to Next Steps
Once you have the file path configured, click Next > to proceed to the Configuring JSON Queries step of the report wizard.
Configuring XML File Connection
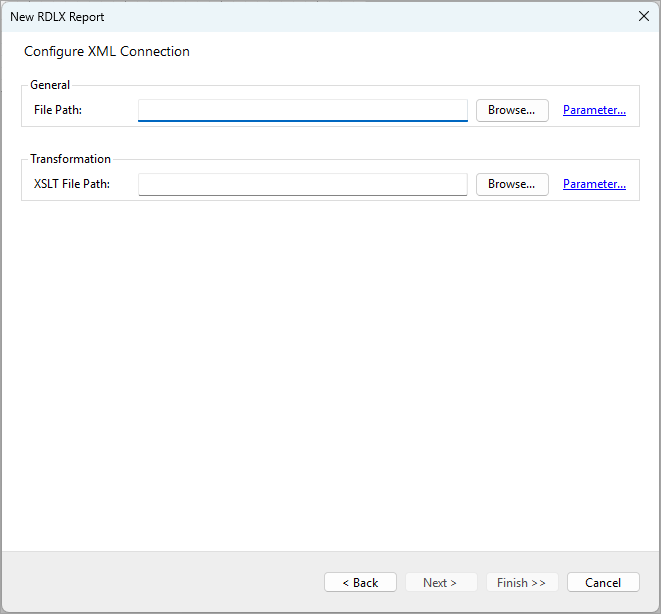
- File Path: Enter the path to the XML file that contains the data you want to connect to. You can either type the path directly, use the Browse... button to locate the file, or make the path dynamic by using a parameter, as described in the Fixed and Dynamic Settings section above.
Transformation Settings
- XSLT File Path: If your XML data requires transformation, specify the path to the XSLT file here. As with the file path, you can enter this directly, use the Browse... button, or make it dynamic by using a parameter.
Proceeding to Next Steps
Once you have the settings configured, click Next > to proceed to the Configuring XML Queries step of the report wizard.
Configuring CSV File Connection
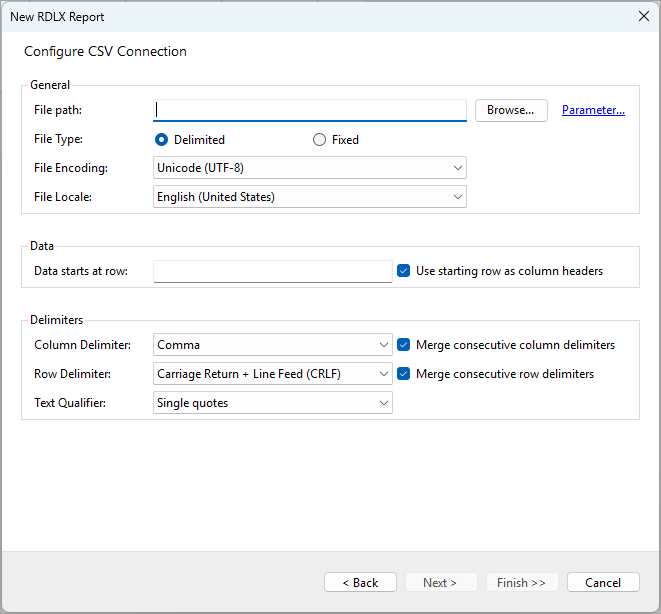
General Settings
File Path: Enter the path to the CSV file that contains the data you want to connect to. You can either type the path directly, use the Browse... button to locate the file, or make the path dynamic by using a parameter, as described in the fixed and dynamic settings section.
File Type:
Delimited: Select this option if your CSV file uses delimiters (such as commas, tabs, or other characters) to separate fields.
Fixed: Choose this option if the fields in your file have a fixed width.
File Encoding: Select the character encoding used in the CSV file. Common encodings include Unicode (UTF-8) and ANSI. Ensure you select the correct encoding to avoid issues with reading the file.
File Locale: Specify the locale that is used in the CSV file, which determines how numbers, dates, and other locale-specific data are interpreted.
Data Settings
- Data Starts at Row: Enter the row number where the data begins in the file. This is useful if there are header rows or other non-data rows at the beginning of the file.
- Use Starting Row as Column Headers: Check this box if the first row of your data contains the column headers. This will automatically treat the first row as the header in your report.
Delimiters
Column Delimiter: Select the character that is used to separate columns in the CSV file (Comma, Tab, Semicolon, Space).
Row Delimiter: Select the character sequence that is used to separate rows in the CSV file (Carriage Return + Line Feed (CRLF), Line Feed (LF), Carriage Return (CR)).
Text Qualifier: Choose the character that encloses text fields in the CSV file. This is typically a Single quotes or Quotes, and it is used to ensure that text fields that contain delimiters themselves are parsed correctly.
Merge Consecutive Delimiters:
Column Delimiters: Check this box to merge consecutive column delimiters in the file, which is useful if there are empty fields.
Row Delimiters: Check this box to merge consecutive row delimiters in the file, which is helpful if there are empty rows or if rows are split across multiple lines.
Proceeding to Next Steps
Once you have configured all the settings, click Next > to proceed to the Configure CSV Data Fields step of the report wizard.
Configuring Excel File Connection
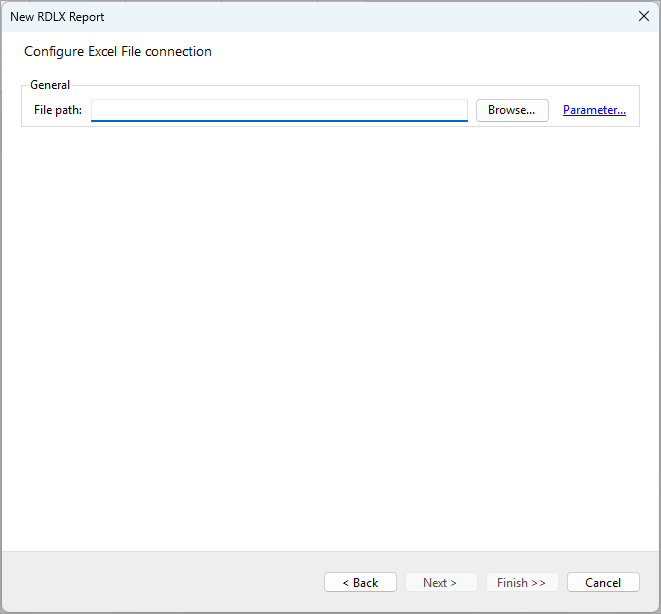
General Settings
- File Path: Enter the path to the Excel file that contains the data you want to connect to. You can either type the path directly, use the Browse... button to locate the file, or make the path dynamic by using a parameter, as described in the Fixed and Dynamic Settings section above.
Proceeding to Next Steps
Once you have the file path configured, click Next > to proceed to the Configure Excel Workbook Queries step of the report wizard.