You can add and customize the C1RadialGauge control's labeling in the Properties window, XAML, or through code. Although this topic sets the C1GaugeLabel properties of the C1RadialGauge control, the same steps can be used to customize the C1GaugeLabel of other controls.
At Design Time
To add labeling to the C1RadialGauge control in the Properties window at design time, complete the following steps:
This will set the control's label.
In XAML
To add labeling to the C1RadialGauge control in XAML add the <c1:C1GaugeLabel> tag to the <c1:C1RadialGauge> tag so that it appears similar to the following:
| XAML |
Copy Code
|
|---|---|
<c1:C1RadialGauge Height="189" Margin="42,29,188,31" Name="C1RadialGauge1" Width="189"> <c1:C1GaugeLabel Interval="20" Location="1" /> </c1:C1RadialGauge> |
|
In Code
Right-click the window and select View Code to open the Code Editor. Add code to the Window1_Loaded event handler or main class, so it appears similar to the following:
| Visual Basic |
Copy Code
|
|---|---|
Window1_Loaded(ByVal sender As System.Object, ByVal e As System.Windows.RoutedEventArgs) Handles MyBase.Loaded Dim c1gl As New C1.WPF.Gauge.C1GaugeLabel c1gl.Location = 1 c1gl.Interval = 20 Me.C1RadialGauge1.Decorators.Add(c1gl) End Sub Public Sub New() InitializeComponent() Dim c1gl As New C1.WPF.Gauge.C1GaugeLabel c1gl.Location = 1 c1gl.Interval = 20 Me.C1RadialGauge1.Decorators.Add(c1gl) End Sub |
|
| C# |
Copy Code
|
|---|---|
private void Window_Loaded(object sender, RoutedEventArgs e) { C1.WPF.Gauge.C1GaugeLabel c1gl = new C1.WPF.Gauge.C1GaugeLabel(); c1gl.Location = 1; c1gl.Interval = 20; this.c1RadialGauge1.Decorators.Add(c1gl); } public MainPage(){ InitializeComponent(); { C1.WPF.Gauge.C1GaugeLabel c1gl = new C1.WPF.Gauge.C1GaugeLabel(); c1gl.Location = 1; c1gl.Interval = 20; this.c1RadialGauge1.Decorators.Add(c1gl); } |
|
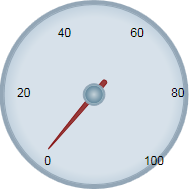
Run your project and observe:
The C1RadialGauge control will appear with labeling: