
Step 2 of 3: Adding a C1DockTabControl with C1DockTabItems
Next we are going to add a C1DockTabControl with C1DockTabItem.
In the XAML markup, place your cursor between the <c1:C1DockControl></c1:C1DockControl> tags and press ENTER.
Add a C1DockTabControl within these tags using the following XAML markup:
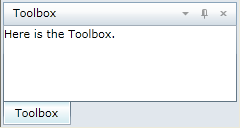
<c1:C1DockTabControl Dock="Left">
      <c1:C1DockTabItem Header="Toolbox">
          <TextBlock Text="Here is your Toolbox." />
      </c1:C1DockTabItem>
</c1:C1DockTabControl>
This XAML also includes a C1DockTabItem labeled Toolbox. If you run the application now, the C1DockTabControl will look similar to the following:
Let's add another C1DockTabItem and C1DockTabControl to show how you can select tabs and dock or float the C1DockTabControl when you run the application.
Add XAML for another C1DockTabItem and a C1DockTabControl after the closing </c1:C1DockTabItem> tag, so the full XAML for C1DockControl will look like the following:
<c1:C1DockControl>
            <c1:C1DockTabControl Dock="Left">
                <c1:C1DockTabItem Header="Toolbox">
                    <TextBlock Text="Here is the Toolbox." />
                </c1:C1DockTabItem>
               <c1:C1DockTabItem Header="Project">
                    <TextBlock Text="Tree of files" />
                </c1:C1DockTabItem>
            </c1:C1DockTabControl>
            <c1:C1DockTabControl DockWidth="500" ShowHeader="False">
                <c1:C1DockTabItem Header="myfile.ext">
                    <TextBlock Text="This is the text of myfile.ext" />
                </c1:C1DockTabItem>
            </c1:C1DockTabControl>
        </c1:C1DockControl>
In the next step you will run the application and change the docking mode for windows.