In This Topic
Creating a Custom Visual Style
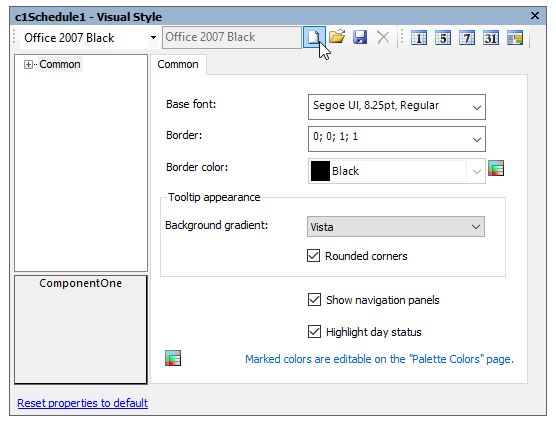
To create a custom Visual Style, add a copy of the selected Visual Style in the Visual Style dialog box:
Note: Selecting Customize from the drop-down menu in the C1Schedule Tasks menu, C1Calendar Tasks menu, or the Properties window opens the Visual Style dialog box.
- In the Visual Style dialog box, click the Add a Copy button to add a copy of the selected Visual Style.
 A new Visual Style will be created based on the predefined visual style, in this case on the Office 2007 Blue visual style.
- Enter a new name for the Visual Style in the text box or leave the name as (modified).
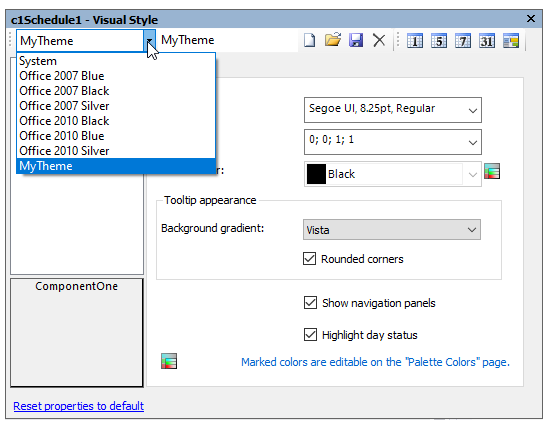
- The new Visual Style will now appear in the Visual Style drop-down list.
Saving Custom Visual Style
To save a custom Visual Style, click the Save button in the Visual Style dialog box.
Note: This will save all of the custom Visual Styles added to the Visual Style dialog box to an XML file.
Importing Saved Visual Style
To import a saved Visual Style, click the Load button in the Visual Style dialog box.
Note: This will load all of the custom Visual Styles in the XML file.
Deleting a Custom Visual Style
To delete a custom Visual Style, click the Delete button in the Visual Style dialog box.
Note: This will delete the current Visual Style. Predefined Visual Styles cannot be deleted.