Using the Modal Dialog Option
In This Topic
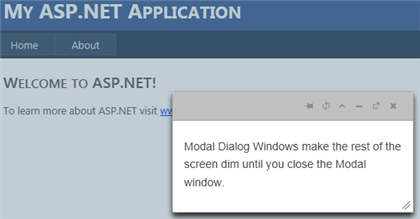
In this section you will learn how to set the WijDialog control as a Modal Dialog Window.
- Create an ASP.NET Web application with a ScriptManager control and install Juice UI and the Wijmo Juice libraries to your project via NuGet.
- Add a standard Panel control to the main content of your page.
- Insert the following markup within the Panel markup to create the dialog window:
<div>
<div>
<p>
Modal Dialog Windows make the rest of the screen dim until you close the Modal window.</p>
</div>
</div>
- Use the following markup to add a WijDialog control to the page and set the TargetControlID to Panel1.
<cc1:WijDialog ID="Panel1_WijDialog" runat="server"
TargetControlID="Panel1">
</cc1:WijDialog>
- Select View | Properties Window in the Visual Studio menu.
- Click the drop-down list at the top of the Properties window and select Panel1_WijDialog.
- Set the Modal property to True.
- Press F5 to run the application to view the Modal Dialog Window. It should look like the following image:

