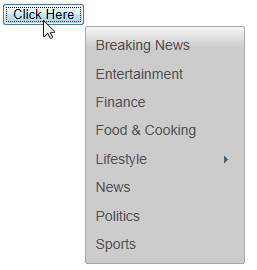
You can specify where the menu and submenus open relative to a trigger. For this tutorial, we will be using a button click to open the menu and trigger the Position property.
Complete the following steps:
<ul id="wijmenu1">
<li><a href="#">Breaking News</a></li>
<li><a href="#">Entertainment</a></li>
<li><a href="#">Finance</a></li>
<li><a href="#">Food & Cooking</a></li>
<li><a href="#">Lifestyle</a>
<ul><li><a href="#">submenu</a></li></ul>
</li>
<li><a href="#">News</a></li>
<li><a href="#">Politics</a></li>
<li><a href="#">Sports</a></li>
</ul>
<p>
<input type="button" id="previous" value="previous" />
<input type="button" id="next" value="next" />
<input type="button" id="previousPage" value="previousPage" />
<input type="button" id="nextPage" value="nextPage" />
</p>
<script type="text/javascript">
$(document).ready(function () {
$("#previous").click(function () {
$("#<%=Panel1.ClientID %>").focus().wijmenu("previous");
});
$("#next").click(function () {
$("#<%=Panel1.ClientID %>").focus().wijmenu("next");
});
$("#previousPage").click(function () {
$("#<%=Panel1.ClientID %>").focus().wijmenu("previousPage");
});
$("#nextPage").click(function () {
$("#<%=Panel1.ClientID %>").focus().wijmenu("nextPage");
});
});
</script>
<asp:Content ID="HeaderContent" runat="server" ContentPlaceHolderID="HeadContent">
<link href="http://cdn.wijmo.com/themes/rocket/jquery-wijmo.css" rel="stylesheet" type="text/css" />
<link href="http://cdn.wijmo.com/jquery.wijmo-open.x.x.x.css" rel="stylesheet" type="text/css" />
<link href="http://cdn.wijmo.com/jquery.wijmo-complete.x.x.x.css" rel="stylesheet" type="text/css" />
<script src="http://ajax.aspnetcdn.com/ajax/jquery/jquery-x.x.x.min.js" type="text/javascript"></script>
<script src="http://ajax.aspnetcdn.com/ajax/jquery.ui/x.x.x/jquery-ui.min.js" type="text/javascript"></script>
<script src="http://cdn.wijmo.com/external/jquery.bgiframe-x.x.x-pre.js" type="text/javascript"></script>
<script src="http://cdn.wijmo.com/external/globalize.min.js" type="text/javascript"></script>
<script src="http://cdn.wijmo.com/external/jquery.mousewheel.min.js" type="text/javascript"></script>
<script src="http://cdn.wijmo.com/external/raphael.js" type="text/javascript"></script>
<script src="http://cdn.wijmo.com/jquery.wijmo-open.x.x.x.min.js" type="text/javascript"></script>
<script src="http://cdn.wijmo.com/jquery.wijmo-complete.x.x.x.min.js" type="text/javascript"></script>
</asp:Content>