Scaffolding is a code generation framework for ASP.NET MVC applications. You add scaffolding to your project when you want to quickly add code that interacts with data models. Using scaffolding can reduce the amount of time to develop standard data operations in your project.
The ComponentOne ASP.NET MVC Edition provides scaffolding in Razor Pages for FlexGrid, MultiRow, FlexSheet, FlexChart, FlexPie, Sunburst Chart, FlexRadar and Input controls.
The steps to scaffold control for ASP.NET MVC are as follows:
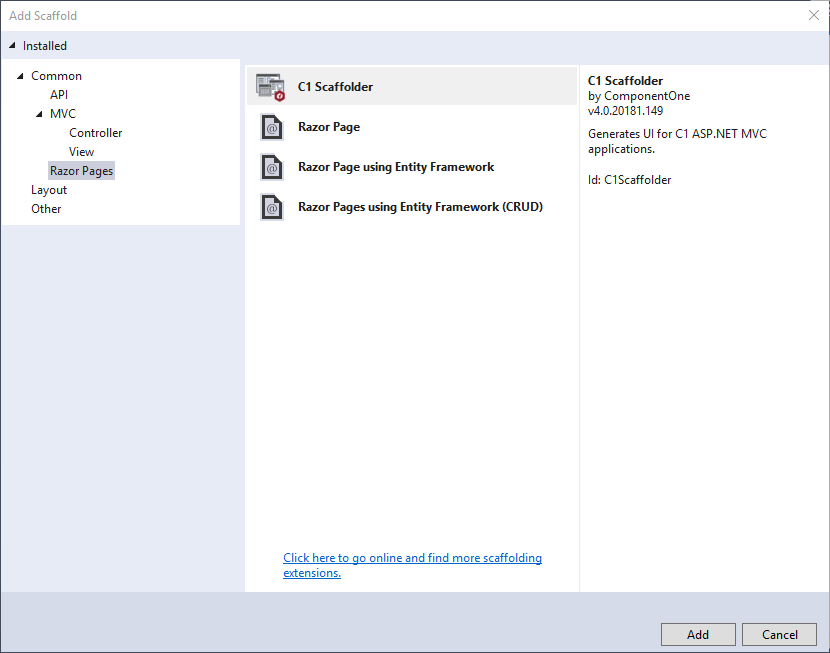
In the Solution Explorer, right-click the project name and select Add|New Scaffolded Item. The Add Scaffold wizard appears.
In the Add Scaffold wizard, select Common|Razor Pages and then select C1 Scaffolder from the right pane.

Click Add.
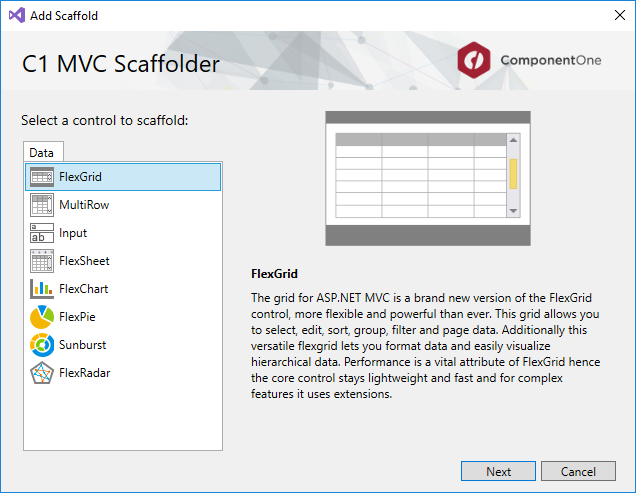
Select the control as per your requirements, and then click Next. In our case we have selected FlexGrid control.

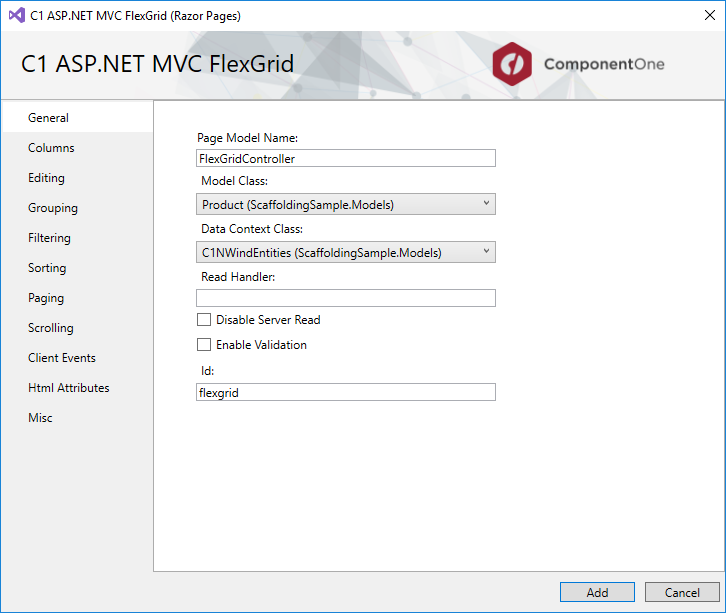
The C1 ASP.NET MVC FlexGrid wizard appears with the General tab selected by default.
In the General tab, specify the model as follows:

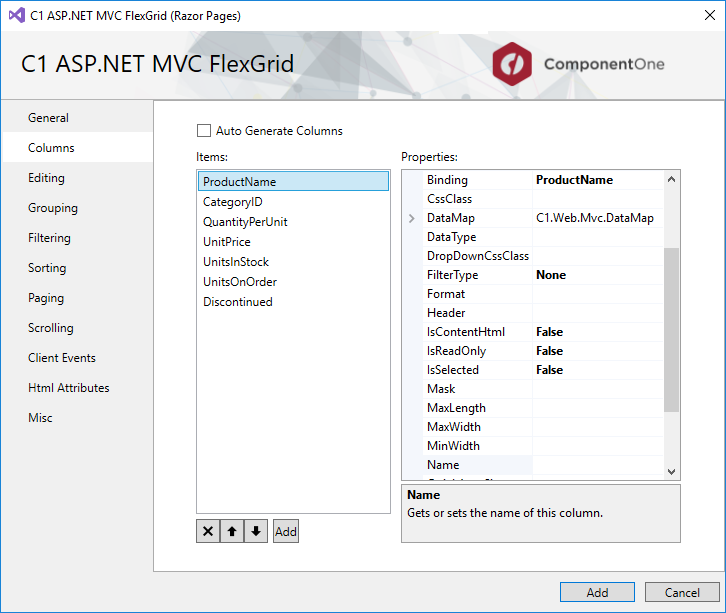
Go to Columns tab to specify the columns in the FlexGrid control. By default Auto Generate Columns is checked; if not, then you can add, delete, or move columns upward or downward in the sequence in which they should appear in the final view. In our case, we have selected columns as shown in the following image:

Go to Editing tab and check Allow Edit and Allow Delete check boxes.
Go to Grouping tab. In the Group Settings, check Show Groups and CategoryID check boxes from Group Descriptions, and give Group Header Format a name, say 'Group by Category ID'.
Go to Filtering tab and check Allow Filtering check box. Let the other settings be same as default.
Go to Sorting tab and let the setting be same as default - both Allow Sorting and Show Sort check boxes should be checked.
Go to Client Events and check BeginningEdit check box.
Click Add to create the code in FlexGridController.cshtml and FlexGridController.cshtml.cs files.