# Customizing Nodes
Learn how to customize nodes of Wijmo's TreeView in this tutorial
## Content
### Adding Images
Use the __imageMemberPath__ property to add images to nodes by specifying the name of a property on the data items that contains an image URL.
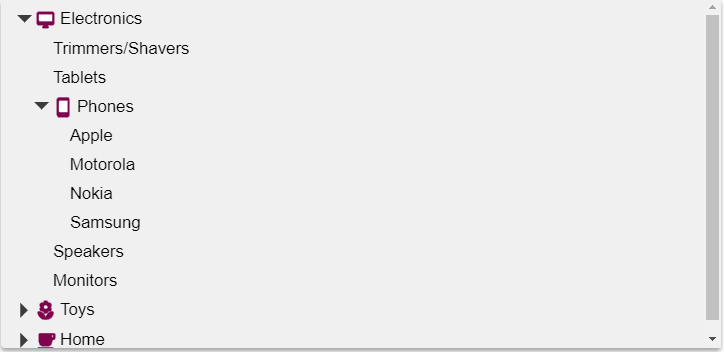
Example: Depicts some sample items in the array having an "img" property set to image URLs.
##### HTML
```html
```
##### Javascript
```javascript
import * as wjNav from '@mescius/wijmo.nav';
// create the tree
var tree = new wjNav.TreeView('#theTree', {
itemsSource: getData(),
displayMemberPath: 'header',
childItemsPath: 'items',
imageMemberPath: 'img'
});
// get the tree data
function getData() {
var imgUrl = 'https://demos.wijmo.com/5/PureJS/TreeViewIntro/TreeViewIntro/resources/';
return [
{ header: 'Electronics', img: imgUrl + 'electronics.png', items: [
{ header: 'Trimmers/Shavers' },
{ header: 'Tablets' },
{ header: 'Phones', img: imgUrl + 'phones.png', items: [
{ header: 'Apple' },
{ header: 'Motorola', newItem: true },
{ header: 'Nokia' },
{ header: 'Samsung' }]
},
{ header: 'Speakers', newItem: true },
{ header: 'Monitors' }]
},
{ header: 'Toys', img: imgUrl + '/toys.png', items: [
{ header: 'Shopkins' },
{ header: 'Train Sets' },
{ header: 'Science Kit', newItem: true },
{ header: 'Play-Doh' },
{ header: 'Crayola' }]
},
{ header: 'Home', img: imgUrl + 'home.png', items: [
{ header: 'Coffeee Maker' },
{ header: 'Breadmaker', newItem: true },
{ header: 'Solar Panel', newItem: true },
{ header: 'Work Table' },
{ header: 'Propane Grill' }]
}
];
}
```
### Using Checkboxes
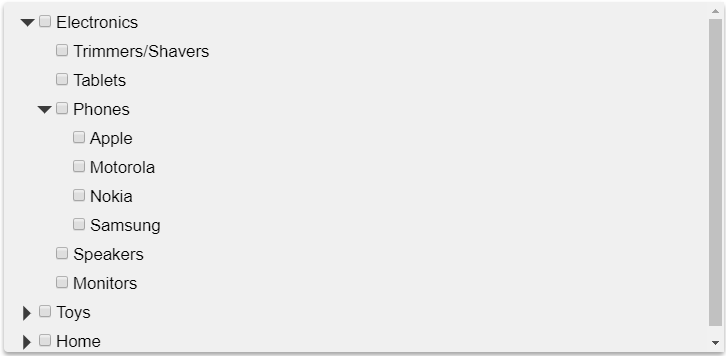
Set the __showCheckboxes__ property to true and the TreeView will add checkboxes to each node.
When checkboxes are displayed, the TreeView manages their hierarchy, so that when a checkbox is checked or cleared, the new value is automatically applied to all child nodes, and reflected on the state of the parent nodes. The __checkAllItems__ method can be used to toggle the state of all checkboxes on the tree.
When items are checked or unchecked, the __checkedItemsChanged__ event is raised, and the __checkedItems__ property is updated with a list of the items that are currently checked.
##### Javascript
```javascript
onload = function() {
// create the tree
var tree = new wijmo.nav.TreeView('#theTree', {
itemsSource: getData(),
displayMemberPath: 'header',
childItemsPath: 'items',
showCheckboxes: true
});
}
```
### Customizing Node Content
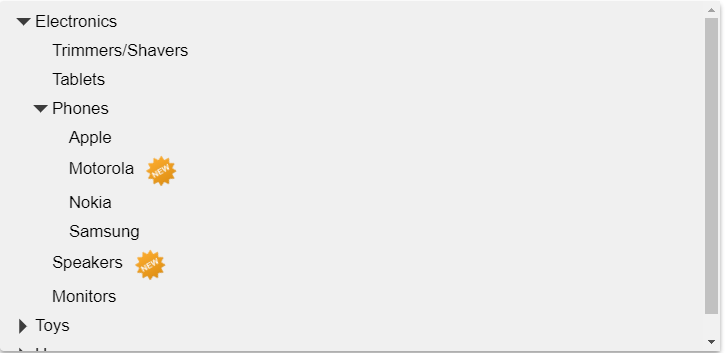
You can customize the content of the TreeView nodes using the __formatItem__ event. The event handler parameters include the element that represents the node and the data item being rendered.
Example: Uses the formatItem event to add a "new" badge to the right of new items on the tree.
##### Javascript
```javascript
onload = function() {
// create the tree
var tree = new wijmo.nav.TreeView('#theTree', {
itemsSource: getData(),
displayMemberPath: 'header',
childItemsPath: 'items',
formatItem: function(s, e) {
if (e.dataItem.newItem) {
var imgUrl = 'https://demos.wijmo.com/5/PureJS/TreeViewIntro/TreeViewIntro/resources/new.png';
e.element.innerHTML +=
' ';
}
}
});
```
';
}
}
});
```