# Tutorial: Real-Time Collaborative Text Editor
## Content
This tutorial guides you through using `js-collaboration` and `js-collaboration-ot` to build a real-time collaborative text editor based on Operational Transformation (OT). Users can edit rich text content in real-time within the same room, with all changes synchronized to other clients.
>type=note
> This example uses Quill as the rich text editor component, but you can replace it with other editor components.
## Prerequisites
* Installation of Node.js v16+ and npm
* Foundational knowledge of JavaScript and terminal operations
## Preview
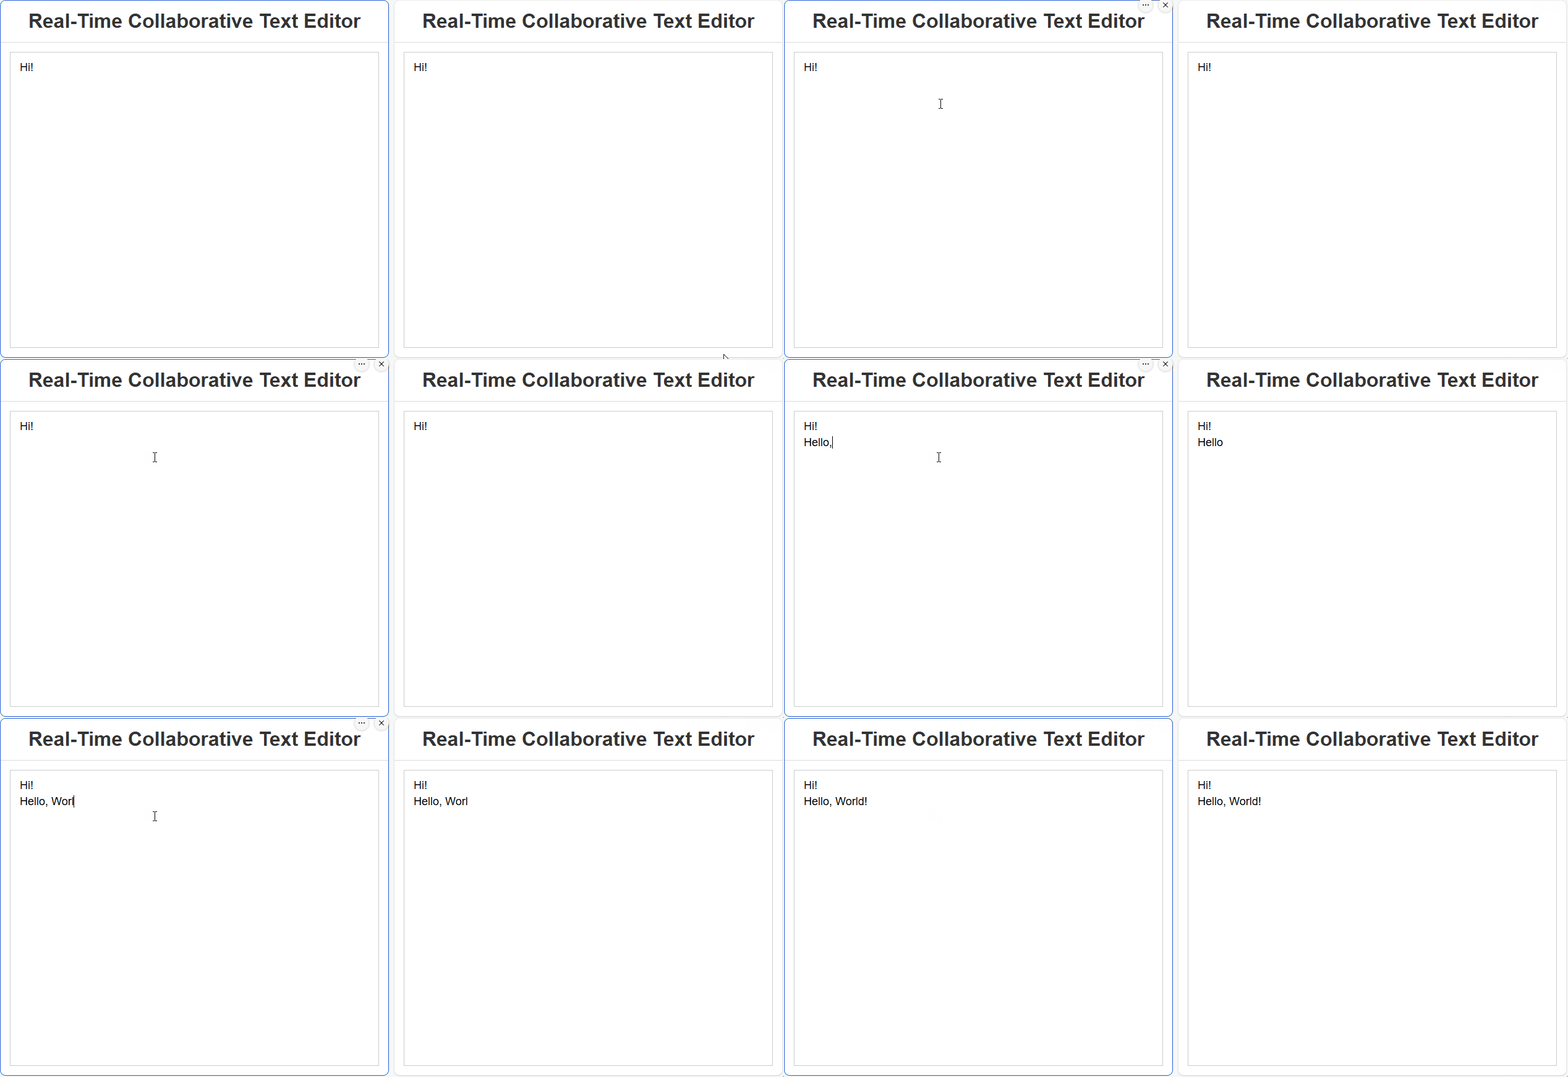
As illustrated in the figure below, when the user on the left inputs "Hello,world!" into the editor, the user on the right observes the real-time synchronized data.
## Step 1: Initialize the Project
1. Create the Project Folder
Create a new folder named ot-text-editor and navigate into it:
```bash
mkdir ot-text-editor
cd ot-text-editor
```
2. Initialize a Project of Node.js
Run the following command to create the file `package.json`:
```bash
npm init -y
```
Edit `package.json` to enable ESM modules and add the following scripts:
```json
{
"name": "ot-text-editor",
"version": "1.0.0",
"type": "module",
"scripts": {
"start": "node server.js",
"build": "webpack"
},
"dependencies": {}
}
```
3. Install Dependencies
Install the npm packages required for the server and client:
```bash
npm install @mescius/js-collaboration @mescius/js-collaboration-ot express
npm install @mescius/js-collaboration-client @mescius/js-collaboration-ot-client quill
npm install rich-text
```
Install the npm packages required for the frontend bundling tool:
```bash
npm install webpack webpack-cli --save-dev
```
4. Create the Webpack Configuration File
In the project root directory, create the file `webpack.config.js` with the following content:
```javascript
import path from "path";
import { fileURLToPath } from "url";
const __dirname = path.dirname(fileURLToPath(import.meta.url));
export default {
entry: "./public/client.js",
output: {
path: path.resolve(__dirname, "public"),
filename: "client.bundle.js"
},
mode: "development"
};
```
5. Create the Basic Directory Structure
1. Create the file `server.js` in the root directory.
2. In the root directory, create a folder named public. Create empty files within it: `index.html`, `styles.css`, and `client.js`.
Now the directory structure should look like this:
```bash
/ (project root)
├── public/
│ ├── index.html # Main page
│ ├── styles.css # Styles file
│ └── client.js # Client-side logic
├── server.js # Server-side logic
├── package.json # Project configuration
└── webpack.config.js # Webpack configuration
```
## Step 2: Set Up the Server
Add the following code to the file `server.js`:
```javascript
import express from "express";
import { createServer } from "http";
import { Server } from "@mescius/js-collaboration";
import OT from "@mescius/js-collaboration-ot";
import richText from "rich-text";
const app = express();
const httpServer = createServer(app);
const server = new Server({ httpServer });
// Register the rich-text type
OT.TypesManager.register(richText.type);
// Initialize OT document services
server.useFeature(OT.documentFeature());
// Serve static files
app.use(express.static("public"));
// Start the server
httpServer.listen(8080, () => {
console.log("Server running at http://localhost:8080");
});
```
**Code Explanation**
* Use [OT.TypesManager.register](/spreadjs/api/v18/collaboration/js-collaboration-ot/classes/TypesManager#register) to register the type `rich-text`.
* [OT.DocumentServices](/spreadjs/api/v18/collaboration/js-collaboration-ot/classes/DocumentServices) provides default OT document management functionality.
* [server.useFeature(OT.documentFeature()) ](/spreadjs/api/v18/collaboration/js-collaboration/classes/Server#usefeature)enables OT features.
## Step 3: Set Up the Client
The client will use the Quill editor and `js-collaboration-ot-client` to achieve real-time synchronization.
Write the HTML File (`public/index.html`)
```html
Real-Time Collaborative Text Editor
Real-Time Collaborative Text Editor
```
## Step 3: Set Up the Client
The client will use the Quill editor and `js-collaboration-ot-client` to achieve real-time synchronization.
1. Write the HTML File (`public/index.html`)
```html
Real-Time Collaborative Text Editor
Real-Time Collaborative Text Editor
```
2. Write the Styles File (`public/styles.css`)
```css
html,
body {
height: 100%;
margin: 0;
font-family: Arial, sans-serif;
background: #f0f2f5;
}
.container {
height: 100vh;
display: flex;
flex-direction: column;
background: #fff;
box-shadow: 0 0 10px rgba(0, 0, 0, 0.1);
}
h1 {
padding: 15px;
margin: 0;
color: #333;
text-align: center;
border-bottom: 1px solid #ddd;
}
#editor {
flex: 1;
border: 1px solid #ccc;
margin: 15px;
font-size: large;
}
```
3. Write the Client-Side JavaScript (`public/client.js`)
```javascript
import { Client } from "@mescius/js-collaboration-client";
import * as OT from "@mescius/js-collaboration-ot-client";
import richText from "rich-text";
import Quill from "quill";
// Register the rich-text type
OT.TypesManager.register(richText.type);
// Connect to the server and join a room
const connection = new Client().connect("room-id");
const doc = new OT.SharedDoc(connection);
const quill = new Quill("#editor", { theme: "bubble" });
// Subscribe to the document
doc.subscribe().then(async () => {
// Initialize content (if the document does not exist)
if (!doc.type) {
try {
await doc.create([{ insert: 'Hi!' }], richText.type.uri);
} catch (err) {
console.error("Error: " + err);
}
}
// Set initial content and bind events
quill.setContents(doc.data);
quill.on("text-change", (delta, oldDelta, source) => {
if (source !== "user") return;
doc.submitOp(delta, { source: connection.id });
});
// Listen for remote operations
doc.on("op", (op, source) => {
if (source === connection.id) return; // Ignore local operations
quill.updateContents(op);
});
});
// Error handling
connection.on('error', (err) => console.error("Error: " + err));
doc.on("error", (err) => console.error("Error: " + err));
```
**Code Explanation**
1. **Shared Document**: [OT.SharedDoc](/spreadjs/api/v18/collaboration/js-collaboration-ot-client/classes/SharedDoc) manages the document state and integrates with Quill.
2. **Operation Submission**: `quill.on("text-change")` captures user edits and submits operations.
3. **Synchronization Updates**: [doc.on("op")](/spreadjs/api/v18/collaboration/js-collaboration-ot-client/classes/SharedDoc#on) receives remote operations and updates the local editor.
## Step 4: Run and Test
1. Bundle the Client Code
```bash
npm run build
```
2. Start the Server
```bash
npm run start
```
You should see the output: `Server running at http://localhost:8080`.
3. Test the Functionality
1. Open a browser and visit *http://127.0.0.1:8080/index.html*.
2. Open the same address in multiple windows, edit the content and observe real-time synchronization.
## Next Steps
* [Tutorial: Add History Functionality](/spreadjs/docs/v18/spreadjs-collaboration-server/collaboration-framework/js-collaboration-ot/tutorial-real-time-collaborative-text-editor/tutorial-add-history-functionality)
* [Tutorial: Configure Database Adapter](/spreadjs/docs/v18/spreadjs-collaboration-server/collaboration-framework/js-collaboration-ot/tutorial-real-time-collaborative-text-editor/tutorial-configure-database-adapter)
* [Tutorial:Add Presence Functionality to a Real-Time Collaborative Text Editor](/spreadjs/docs/v18/spreadjs-collaboration-server/collaboration-framework/js-collaboration-presence/tutorialadd-presence-functionality-to-a-real-time-collaborative-text-editor)