# Step 1: Creating a TabControl Application
## Content
In this step you'll begin in Visual Studio to create a WPF application which will use **TabControl for WPF** to manage user interactions.
To set up and add controls to your application, complete the following steps:
1. In Visual Studio, select **File \| New Project**.
2. In the **New Project dialog box**, select either **Windows Desktop** from the **Templates** in the left-hand pane.
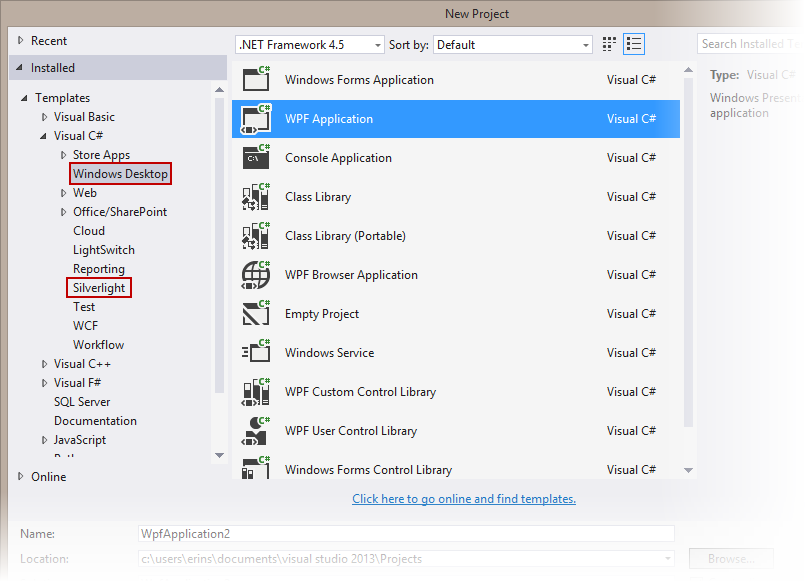
New Project Dialog Box
3. Select **WPF Application**, depending on the template you chose.
4. Enter a **Name** for your project, for example "QuickStart", and click **OK**. In a **WPF Application**, the **MainWindow.xaml** file will open.
5. Add the following assemblies to your application by right-clicking the **References** folder and selecting add **Reference** or adding the following **Nuget Package**:
* **C1.WPF.TabControl**
6. In the Toolbox, double-click the C1TabControl icon to add the **C1TabControl** control to the application.
7. Add three tabs to the control by completing the following steps:
1. Click the **C1TabControl** control once to select it.
2. In the Properties window, click the **Items** ellipsis button .
The **Collection Editor: Items** dialog box opens.
3. Click the **Add** button three times to add three C1TabItems to the **C1TabControl**.
8\. Click **OK** to close the **Collection Editor: Items** dialog box.
You have completed the first step of the **TabControl for WPF** quick start. In this step, you created a project and added a **C1TabControl** with three tabs to the project. In the next step, you will customize the control's tab pages.