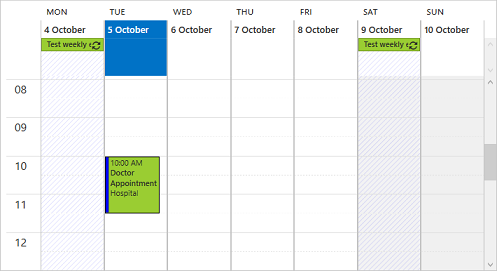
# Quick Start
## Content
The following quick start guide is intended to get you up and running with **Scheduler for WPF**. In this quick start you'll create a new Expression Blend project, add Scheduler to your application, bind to a data source, and customize the schedule.
>type=note
> **Note**: In this quick start guide you will use the C1NWind.mdb database installed by default to **Documents\\ComponentOne Samples\\Common**.
## Set up the Application
1. Create a new **WPF App** in **Visual Studio**.
2. Drag and Drop the **C1Scheduler** control from the toolbox onto the **UI Designer Window**. The following references automatically get added to the **References**.
* C1.WPF.Schedule
* C1.WPF
or
Add the NuGet packages by following these steps:
1. In the **Solution Explorer**, right click **Dependencies** and select **Manage NuGet Packages**.
2. In **NuGet Package Manager**, select **nuget.org** as the **Package source**.
3. Search and select the following package and click **Install**.
* **C1.WPF.Schedule**
3. In the **XAML Editor** and add name for the Scheduler control using the following code:
```xml
```
## Configure the Data Source
1. In the **Solution Explorer**, right-click on the project and select **Add \| New Item**.
2. In the **Add New Item** dialog, select **Data** from the installed templates pane, select **DataSet** from the middle pane and click **Add**.
3. From the **View** menu, select **Server Explorer** to open it.
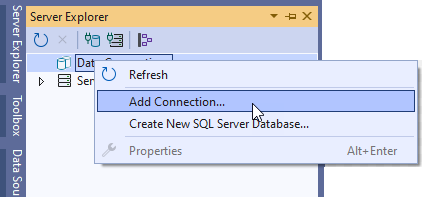
4. Right-click on the **DataCollections** and select **Add Connection**.
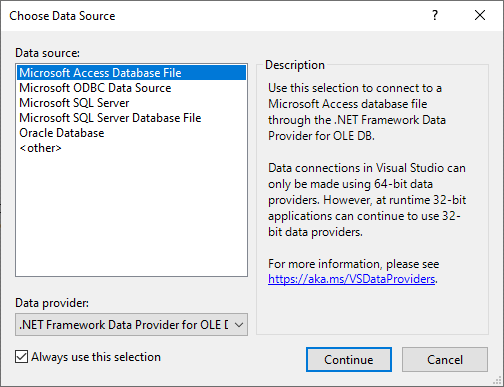
5. From the **Choose Data Source** dialog, select **Microsoft Access Database** File and click **Continue**.
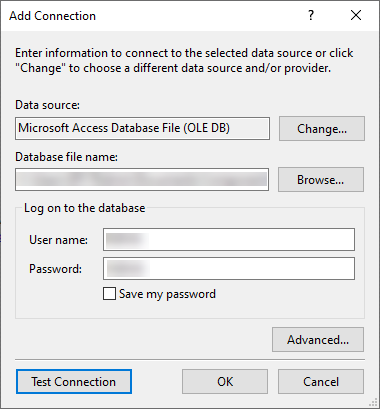
6. In the **Add Connection** dialog, browse and select the **C1NWind.mdb** file, enter your username and password, and and click the **Advanced** button available towards the bottom-left.
7. In the **Advanced Properties** dialog, navigate to the **Provider** property and change the Provider to **Microsoft.ACE.OLEDB.12.0** and click **OK**. Observe that a new connection will be added under **ServerExplorer \| DataConnections**.
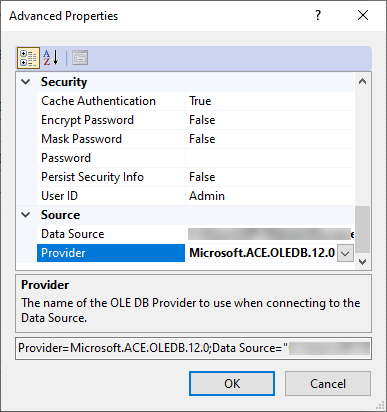
> Note: In case you have a 32-bit system with .NET Framework API, please select Microsoft.Jet.OLEDB.4.0 as a provider in this step.
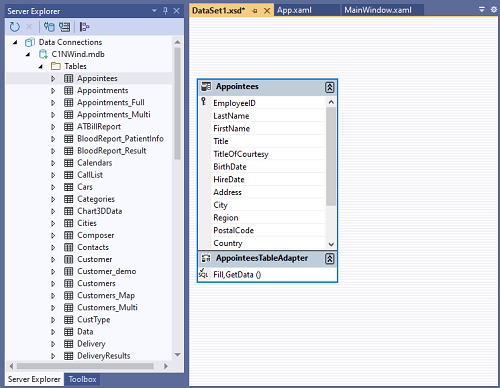
8. In the **Solution Explorer**, double-click the added DataSet.xsd file, say DataSet1, to open the designer.
9. Expand the DataConnections \| Tables and drag\-drop a table\, say Appointees\, to the designer\.
10. Switch to the code view and add the following using statements:
```csharp
using C1.C1Schedule;
using System.Windows.Controls;
using ProjectNAME.C1NWindDataSetTableAdapters;
```
Note that the using statement should contain the name of your project in order to work correctly. It will be used to set up the table adapter for your data set. The Imports statement should be used for Visual Basic projects.
11. Add the following code to use the data from the dataset to fill the scheduler.
```csharp
public partial class MainWindow : Window
{
private AppointmentsTableAdapter _appointmentsTableAdapter;
private AppointeesTableAdapter _appointeesTableAdapter;
private C1NwindDataSet _dataSet;
public C1NwindDataSet DataSet => _dataSet;
public MainWindow()
{
InitializeComponent();
_dataSet = new C1NwindDataSet();
_appointeesTableAdapter = new AppointeesTableAdapter();
_appointmentsTableAdapter = new AppointmentsTableAdapter();
_appointmentsTableAdapter.Fill(_dataSet.Appointments);
_appointeesTableAdapter.Fill(_dataSet.Appointees);
}
}
```
# Bind Scheduler to the Data Source
Map the database to the **Appointment Storage** by adding the following XAML code between the `` tag or adding the following C# code in the MainWindow() constructor:
```xml
c1:NestedPropertySetter PropertyName="DataStorage.AppointmentStorage.DataMember" Value="Appointments"/>
```
```csharp
// set mappings and DataSource for the ContactStorage
ContactStorage cstorage = scheduler.DataStorage.ContactStorage;
cstorage.Mappings.IndexMapping.MappingName = "EmployeeID";
cstorage.Mappings.TextMapping.MappingName = "FirstName";
cstorage.DataMember = "Appointees";
cstorage.DataSource = _dataSet.Appointees;
// set mappings and DataSource for the AppointmentStorage
AppointmentStorage storage = scheduler.DataStorage.AppointmentStorage;
storage.Mappings.AppointmentProperties.MappingName = "Properties";
storage.Mappings.Body.MappingName = "Body";
storage.Mappings.End.MappingName = "End";
storage.Mappings.IdMapping.MappingName = "Id";
storage.Mappings.Location.MappingName = "Location";
storage.Mappings.Start.MappingName = "Start";
storage.Mappings.Subject.MappingName = "Subject";
storage.DataMember = "Appointments";
storage.DataSource = _dataSet.Appointments;
DataContext = this;
```
## Run the Application
Now that you've created a scheduler application and bound the schedule to a data source, the only thing left to do is run the application.
To run the schedule application and observe Scheduler for WPF's run-time behavior:
1. Press **F5** or select **Test Solution** from the **Project** menu. The schedule and a **Reminder** dialog box appears. Click **Dismiss All**.
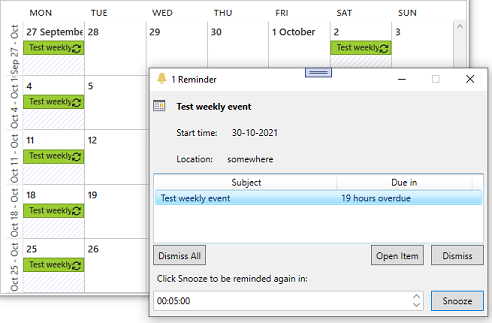
2. Set up an appointment by double-clicking the time for the appointment under the desired day and time. In this example, create an appointment for 10AM on Tuesday, October 5th. The **Appointment** dialog box opens.
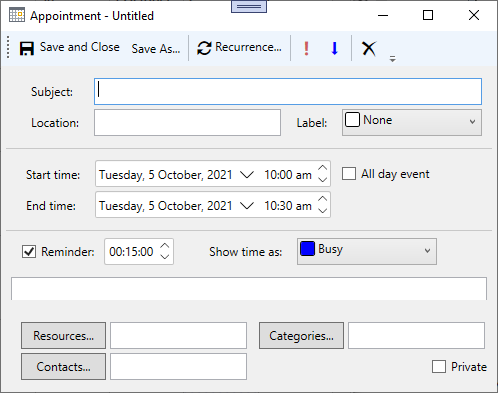
3. Enter “Doctor Appointment” for the **Subject**, “Hospital” for the **Location**, and “11:00AM” for the **End time**.
4. Click the drop-down arrow next to the **Label** and select **Personal**.
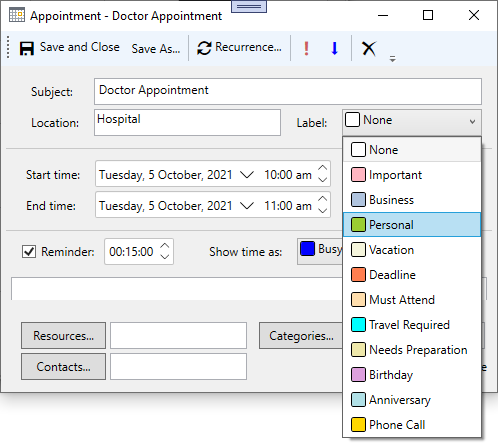
5. Click the **Save and Close** button. The appointment now appears in the schedule.