# QuickStart
Get started with FlexReport, a WinForms control, which is a fast-paced reporting engine that enables you to create, preview, export and print modern and dynamic reports for all your applications. See more in documentation here.
## Content
Learn how to create a simple report application using the WPF FlexReport control. Follow the steps below to get started:
>type=note
> **Note**: The [C1ControlPanel installer](https://developer.mescius.com/componentone/docs/wpf/online-studio/GettingStartedwithStudioforWPF/installingwpfedition) installs the latest FlexReportDesigner app for 64-bit platform, which is **C1FlexReportDesigner.exe** and for 32-bit platform, which is **C1FlexReportDesigner32.4.exe.** These apps get installed at **C:\\Program Files (x86)\\ComponentOne\\Apps\\vx.x** on your computer.
## Using FlexReportDesigner
### Create a Report Definition
You can create report definitions using the FlexReport Designer application (with zero code) as well as programmatically. The easiest way to create a report definition using the [FlexReportDesigner app](/componentone/docs/wpf/online-flexreport/flexreport-designer), which is a stand-alone application similar to the report designer in Microsoft Access and Crystal Reports.
FlexReportDesigner provides the **FlexReport Wizard,** a report engine to create reports. With this wizard, you can choose a suitable data source, select fields, layouts and style etc.
To begin, complete the following steps:
1. Run the **C1FlexReportDesigner.exe** file.
2. Go to **File** menu in the menu bar and select the **New** command to create a new empty report definition file.
3. Click **New Report** dropdown from the **Reports** tab located on the extreme left of designer and select **Report Wizard**.
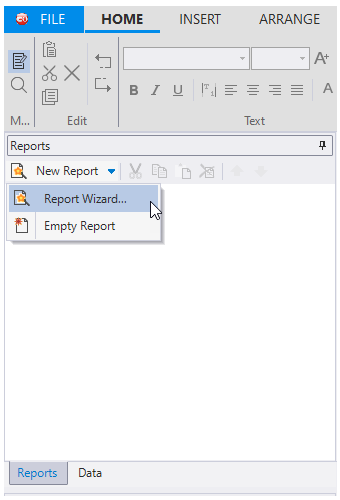
The **FlexReport Wizard** opens.
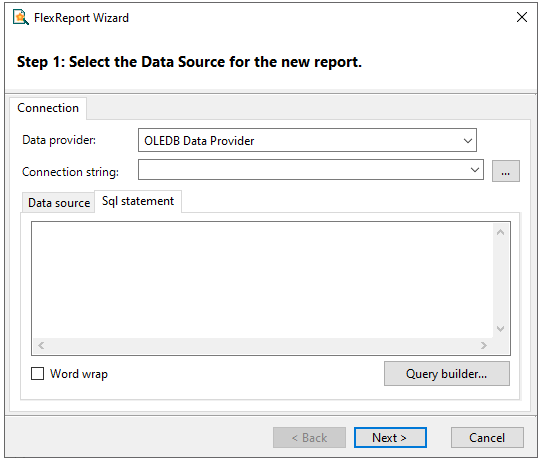
Here, we have used 'OLEDB Data Provider' as the data provider. You can also choose any other data provider from the drop-down button.
### Add a DataSource to Report
Using the **FlexReport Wizard**, complete the following steps to add a data source in the new report:
1. Click the ellipsis button to bring up the standard connection string builder. The **Data Link Properties** dialog box opens.
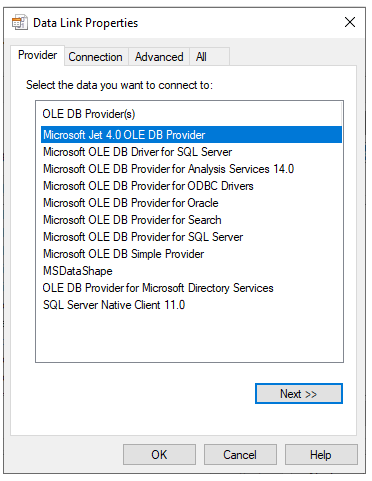
2. Select the **Provider** tab and select a data provider from the list. For this example, select **Microsoft Jet 4.0 OLE DB Provider**.
3. Click the **Next** button or select the **Connection** tab. Now, you must choose a data source.
4. Click the **ellipsis** button to select a database. The **Select Access Database** dialog box appears. For this example, select the **C1NWind.mdb** located in the **Common** folder in the **ComponentOne Samples** directory (by default installed in the **Documents** folder). Note that this directory reflects the default installation path and its path may be different if you made changes to the installation path.
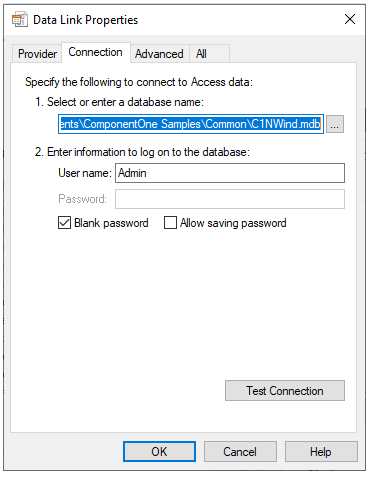
You can test the connection and click **OK**.
5. Click **OK** to close the **Data Link Properties** dialog box.
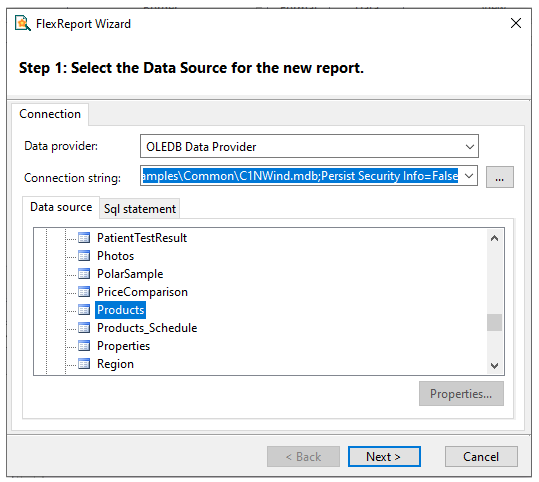
6. Once you have selected your data source, you can select a table, view, or stored procedure to provide the actual data.Click **Next**.
7. Select the **Data source** tab and select the **Products** table from the **Tables** list.
### Select Data Fields
1. Select the fields you want to include in the report using the FlexReport Wizard.
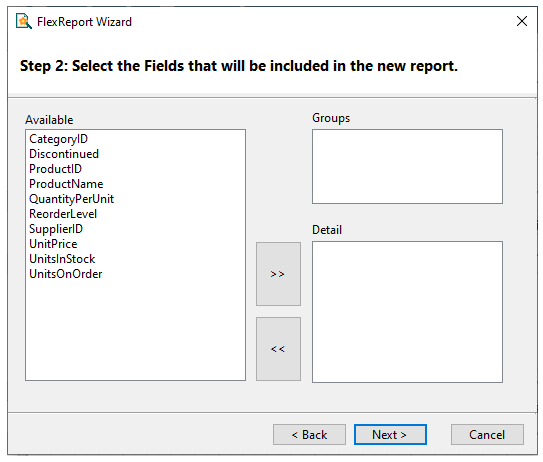
This page in the Wizard contains a list of fields available from the recordset you selected, and the two lists that define the group and detail fields for the report. **Group** fields define how the data will be sorted and summarized, and **Detail** fields define what information you want to appear in the report.
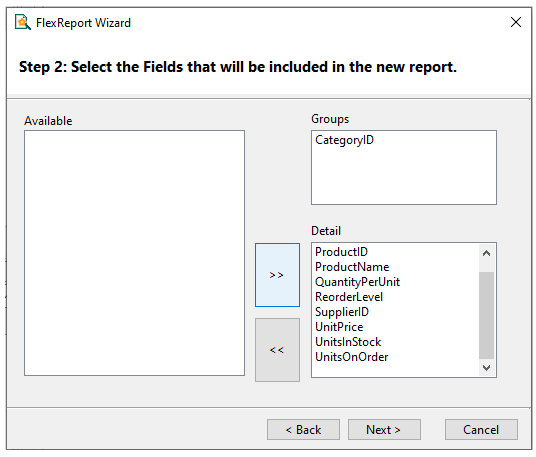
You can move fields from one list to another by dragging them with your mouse pointer. Drag fields into the **Detail** list to include them in the report, or drag within the list to change their order. Drag fields back into the **Available** list to remove them from the report. With your mouse pointer, select the **CategoryID** field and drag it into the **Groups** list.
2. Press the >> button to move the remaining fields into the **Detail** list.
Click **Next**.
### Select Layout and Style
1. Select the layout for the new report. FlexReport Wizard lets you select data layouts, page orientation and choose to adjust fields to fit the page. Keep the **Outline** layout.
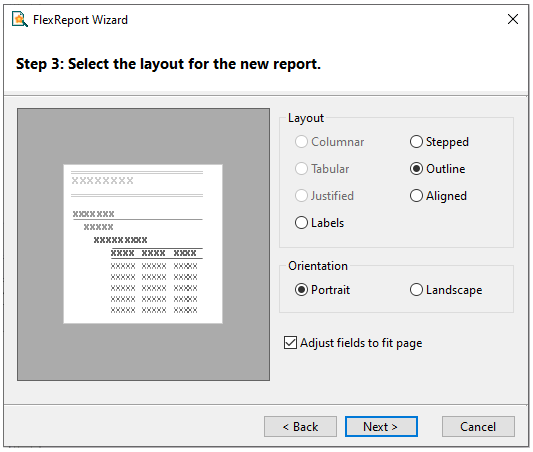
2. Click **Next**.
3. Select the style for the new report. The FlexReport Wizard lets you to select the fonts and colors that will be used in the new report.
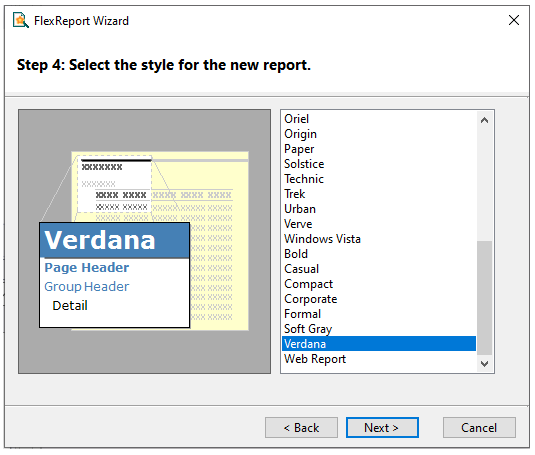
4. Click **Next**.
### Add Title and Preview the Report
1. Select a title for the new report.
Enter a title for the new report, **Products Report**, for example.
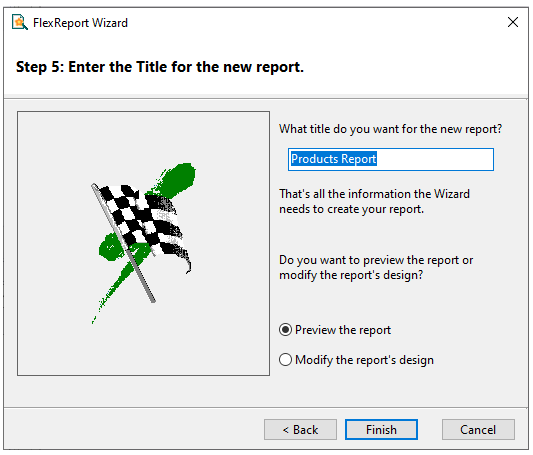
2. Choose **Preview the report** option and click **Finish**. You will immediately see the report in the preview pane of the **Designer**.
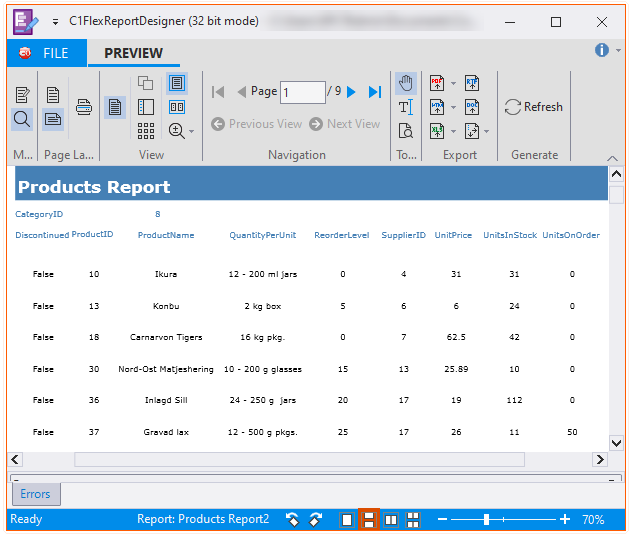
### Load and Render the Report
To load a report definition from a file at design time, complete one of the following tasks:
* Right-click the [C1FlexReport](/componentone/api/wpf/online-flexreport/dotnet-framework-api/C1.WPF.FlexReport.4.6.2/C1.WPF.FlexReport.C1FlexReport.html)[ ](https://developer.mescius.com/componentone/docs/wpf/online-flexreport/C1.WPF.FlexReport.4.6.2~C1.WPF.FlexReport.AllowedValuesDefinition.html)component and select the **Load Report** menu option.
OR
* Click the smart tag () above the **C1FlexReport** component and select **Load Report** from the **C1FlexReport Tasks** menu.
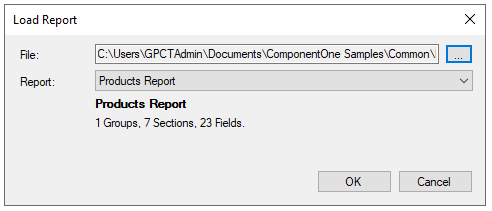
Using the **Load Report** dialog box, select the report you want and complete the following tasks:
1. Click the **ellipsis** button. The **Open** dialog box appears.
2. Browse to the location that you just saved your **Products Report.flxr** file, select it, and click **Open**.
3. The available report definitions are listed in the **Report** drop-down box. Select the **Products Report** definition to load.
4. Click **Load** and **OK** to close the dialog box.
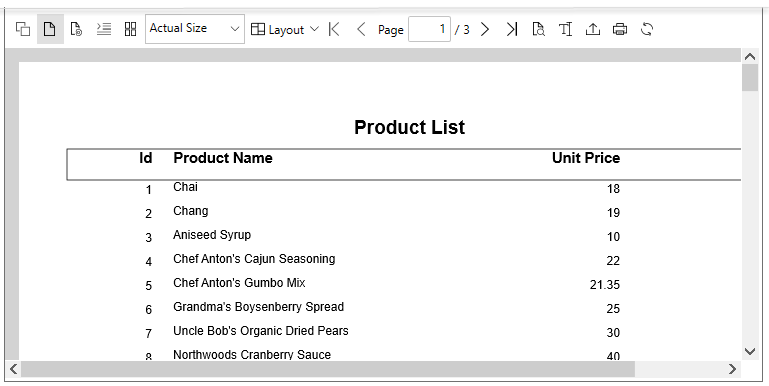
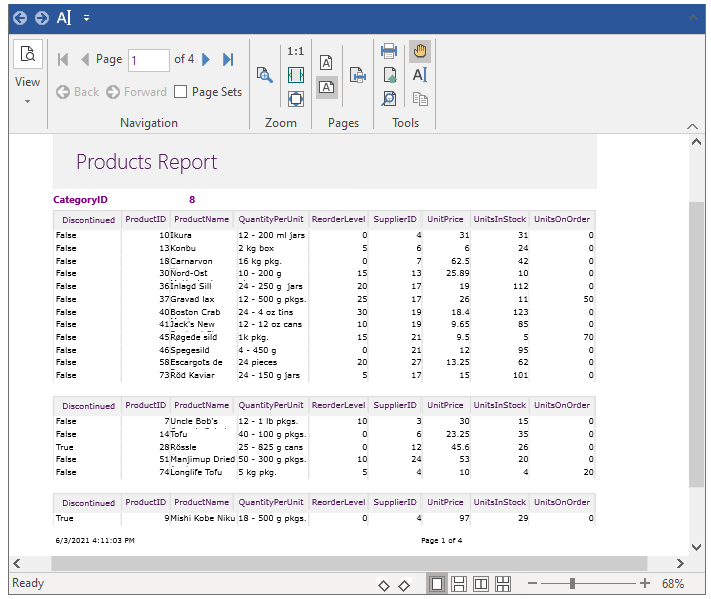
The output will be as shown below:
## Using Code
To create a simple WPF application via code using the **FlexReport for WPF**, follow these steps:
### Step 1: Creating a Report Definition
Create a new report definition in **FlexReportDesigner** application using FlexReport Wizard. To create a report definition, follow these steps:
1. Run the 32-bit version of the report designer app, and select **New** from the **File** Menu.
2. Click **New Report** drop down in the **Reports** tab located on the extreme left of designer and select **Report Wizard**.
3. Select **OLEDB Data Provider** from the **Data provider** dropdown and click the ellipsis button next to the **Connection string** textbox to select the Microsoft.ACE.OLEDB.4.0 Provider under the **Provider** tab and **C1NWind.mdb** database under the **Connection** tab.
>type=note
> You can find the **C1Nwind.mdb** database in **Documents\\ComponentOne Samples\\Common** folder.
4. Select a table from **Data source** tab and Click **Next**. In our case, we have selected **Products** table.
5. Select the fields, layout, and style for the report after connecting the reports to a data source, give a suitable Title to the Report, and click **Finish**.
### Step 2: Loading the Report
To load a report definition from a file, follow these steps:
* Create a new **WPF Application** in Visual Studio.
* Add the **C1FlexViewer** control to the **XAML** design. Set the Name of **C1FlexViewer** control as **Viewer**.2. Add the report definition file, created using the designer in **Step 1: Creating a Report Definition**, to your project. In our case, we have used a report named Products Report.
3. Add the reference to **C1.WPF.FlexReport.dll** to the application.
4. Add the following namespace in the code:
* C1.WPF.FlexReport
5. Add the following code in the **Window\_Loaded** event in code view to load the report:
```csharp
FlexReport flexReport = new FlexReport();
flexReport.Load(@"../../Resources/FlexDataBinding.flxr", "SimpleData");
DataSource ds1 = new DataSource();
ds1.Name = "Main";
ds1.DataProvider = DataProvider.OLEDB;
```
### Step 3: Rendering the Report
Once the report definition has been created and loaded into [C1FlexReport](/componentone/api/wpf/online-flexreport/dotnet-framework-api/C1.WPF.FlexReport.4.6.2/C1.WPF.FlexReport.C1FlexReport.html), you can render the report to the **FlexViewer** control. To render the report, add the following code to the **Window\_Loaded** event in the code view:
```csharp
ds1.ConnectionString = "Provider=Microsoft.Jet.OLEDB.4.0;Data Source=Resources\\C1NWind.mdb;Persist Security Info=False";
ds1.RecordSource = "Products";
ds1.RecordSourceType = RecordSourceType.TableDirect;
flexReport.DataSources.Add(ds1);
flexViewer.DocumentSource = flexReport;
```
This is how the report appears on rendering to FlexViewer.