# Custom Filter
This topic covers customization in datafilters.
## Content
The DataFilter control allows you to create custom filters which can replace the default filter editors at runtime. It provides CustomFilter class which needs to be inherited for defining a custom filter. Inheriting the **CustomFilter** class provides access to its properties and methods which can further be used to create a custom filter in **.NET** and **.NET Framework** editions.
### .NET Framework
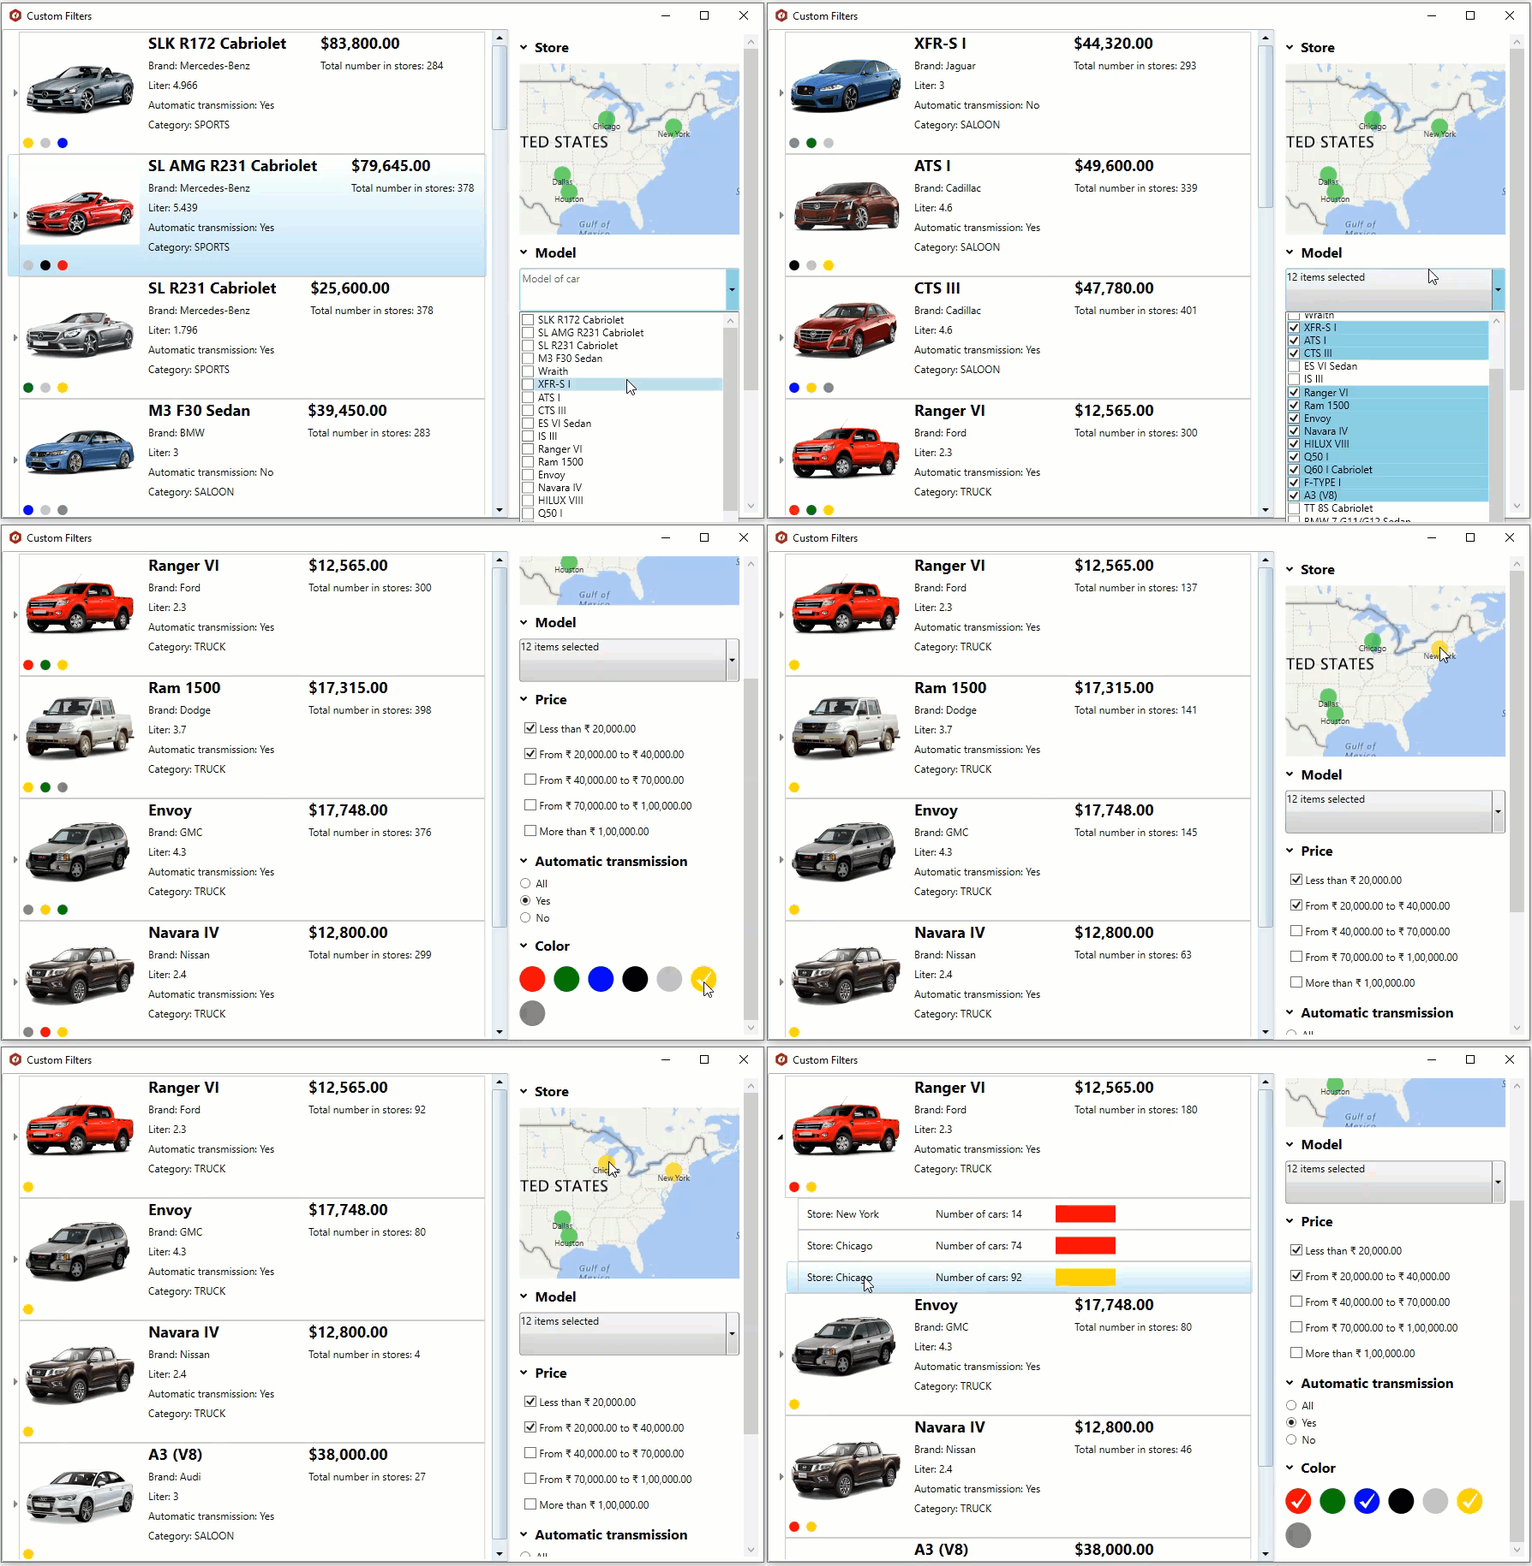
Following example shows how you can create and add custom filter to the DataFilter control. It demonstrates how you can filter the car models using the MultiSelect control as a part of the DataFilter control UI.
1. Define a custom filter by creating a new class which inherits the **CustomFilter** class. In the class constructor, use [Control](/componentone/api/wpf/online-datafilter/dotnet-api/C1.WPF.DataFilter/C1.WPF.DataFilter.CustomFilter.Control.html) property of the **CustomFilter** class to specify the custom control that you want to use to perform filtering in the DataFilter control.
**vbnet**
```vbnet
Public Sub New()
_modelFilterPresenter = New ModelFilterPresenter()
Control = _modelFilterPresenter
AddHandler _modelFilterPresenter.SelectedChanged, AddressOf OnValueChanged
End Sub
```
**csharp**
```csharp
public ModelFilter()
{
Control = _modelFilterPresenter = new ModelFilterPresenter();
_modelFilterPresenter.SelectedChanged += (s, e) => OnValueChanged();
}
```
2. Bind the MultiSelect control with data. In this example, we are binding the control with data using the SetTagList method.
**vbnet**
```vbnet
Public Sub SetTagList(ByVal itemSource As IEnumerable(Of Car))
_modelFilterPresenter.SetTagList(itemSource)
End Sub
```
**csharp**
```csharp
public void SetTagList(IEnumerable itemSource)
{
_modelFilterPresenter.SetTagList(itemSource);
}
```
3. Raise the **SelectionChanged** event of the MultiSelect control. This notifies the DataFilter control about the change in filter values.
**vbnet**
```vbnet
Private Sub MultiSelect_SelectionChanged(ByVal sender As Object, ByVal e As EventArgs)
SelectedChangedEvent?.Invoke(Me, e)
End Sub
Public Sub SetTagList(ByVal itemSource As IEnumerable(Of Car))
For Each item As C1MultiSelect In Items
RemoveHandler item.SelectionChanged, AddressOf MultiSelect_SelectionChanged
Next item
Items.Clear()
Dim ms = New C1MultiSelect With {
.Height = 50,
.PlaceHolder = "Model of car",
.ItemsSource = itemSource,
.DisplayMemberPath = "Model",
.SelectedValuePath = "Model",
.AutoCompleteMode = AutoCompleteMode.SuggestAppend
}
AddHandler ms.SelectionChanged, AddressOf MultiSelect_SelectionChanged
Items.Add(ms)
End Sub
```
**csharp**
```csharp
private void MultiSelect_SelectionChanged(object sender, EventArgs e) => SelectedChanged?.Invoke(this, e);
public void SetTagList(IEnumerable itemSource)
{
foreach (C1MultiSelect item in Items)
{
item.SelectionChanged -= MultiSelect_SelectionChanged;
}
Items.Clear();
var ms = new C1MultiSelect
{
Height = 50,
PlaceHolder = "Model of car",
ItemsSource = itemSource,
DisplayMemberPath = "Model",
SelectedValuePath = "Model",
AutoCompleteMode = AutoCompleteMode.SuggestAppend
};
ms.SelectionChanged += MultiSelect_SelectionChanged;
Items.Add(ms);
}
```
4. Implement the [GetExpression](/componentone/api/wpf/online-datafilter/dotnet-api/C1.WPF.DataFilter/C1.WPF.DataFilter.CustomFilter.GetExpression.html) abstract method of the **CustomFilter** class to create and return the filter expression which is to be used to filter the values in the data aware control.
**vbnet**
```vbnet
Protected Overrides Function GetExpression() As Expression
Dim tags = _modelFilterPresenter.GetSelectedTagList()
Dim expr = New CombinationExpression() With {.FilterCombination = FilterCombination.Or}
For Each tag In tags
expr.Expressions.Add(New OperationExpression() With {
.Value = tag,
.FilterOperation = FilterOperation.Equal,
.PropertyName = PropertyName
})
Next tag
Return expr
End Function
```
**csharp**
```csharp
protected override Expression GetExpression()
{
var tags = _modelFilterPresenter.GetSelectedTagList();
var expr = new CombinationExpression() { FilterCombination = FilterCombination.Or };
foreach (var tag in tags)
{
expr.Expressions.Add(new OperationExpression() { Value = tag, FilterOperation = FilterOperation.Equal, PropertyName = PropertyName });
}
return expr;
}
```
5. Add the created custom filter, ModelFilter, to the DataFilter control to filter the car models shown in the FlexGrid control.
**vbnet**
```vbnet
Dim _carsTable As DataTable
Dim _dataProvider As New DataProvider()
Dim _data As IEnumerable(Of car)
Sub New()
' This call is required by the designer.
InitializeComponent()
_carsTable = _dataProvider.GetCarTable()
Dim Data = New C1DataCollection(Of car)(_dataProvider.GetCarDataCollection(_carsTable))
grid.ItemsSource = Data
c1DataFilter.ItemsSource = Data
Dim mdf = New ModelFilter()
mdf.HeaderText = "Model"
mdf.PropertyName = "Model"
mdf.SetTagList(_dataProvider.GetCarDataCollection(_carsTable))
c1DataFilter.Filters.Add(mdf)
End Sub
Private Sub c1DataFilter_FilterChanged(sender As Object, e As EventArgs)
grid.ItemsSource = c1DataFilter.View.Cast(Of car)().ToList()
End Sub
```
**csharp**
```csharp
private DataProvider _dataProvider = new DataProvider();
private IEnumerable _data;
public CustomFiltersSample()
{
InitializeComponent();
_data = _dataProvider.GetCarsInStores().ToList();
c1DataFilter.ItemsSource = _data;
UpdateTreeViewData(_data);
InitFilters();
}
private void InitFilters()
{
//Model filter
var mdf = new ModelFilter()
{
HeaderText = "Model",
PropertyName = "Car.Model"
};
mdf.SetTagList(_data.GroupBy(x => x.Car).Select(g => g.Key));
c1DataFilter.Filters.Add(mdf);
}
private void c1DataFilter_FilterChanged(object sender, System.EventArgs e)
{
UpdateTreeViewData(c1DataFilter.View.Cast());
}
private void UpdateTreeViewData(IEnumerable data)
{
treeView.ItemsSource = data.GroupBy(x => x.Car).Select(g => new CarStoreGroup { Car = g.Key, CountInStores = g.ToList() });
}
```
Similarly, you can create any other custom filter.
### .NET
In DataFilter .NET version, there is an additional approach to the style the filters using **ItemContainerStyle** property of C1DataFilter class. The property allows setting the style of the expander where you can make it non-expandable, hide the icon, border, change the font, and more as shown in the image below.
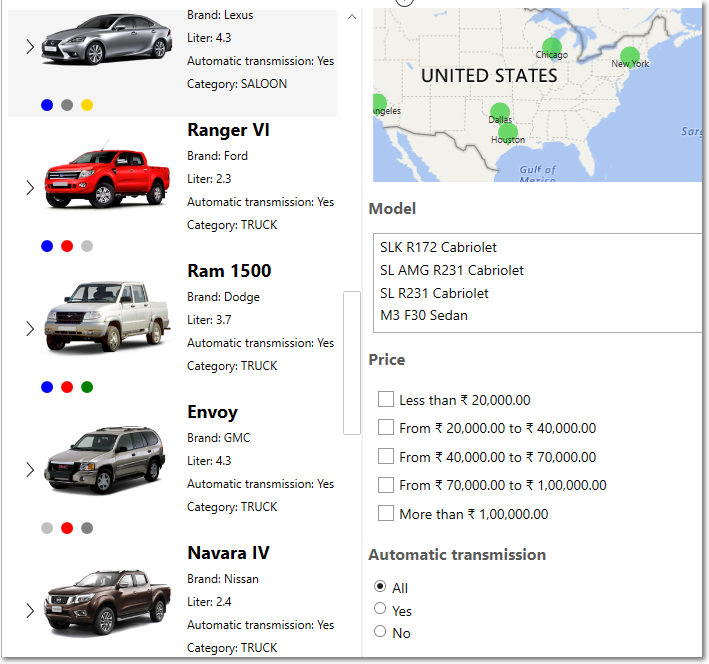
The above example can be created using the following XAML code for .NET verion.
```xml
```