
-
WPF and Silverlight Edition Basic Library
- Combo Box
- DragDrop Manager
- Drop Down
- FilePicker
- HeaderedContentControl
- HyperPanel
- LayoutPanels
- ListBox
- Masked Text Box
- Menu and ContextMenu
- NumericBox
- Progress Bar
- Progress Indicator
- RadialMenu
- RangeSlider
- TabControl
- TreeView
- Windows
Step 1 of 5: Creating a C1Menu Application
Complete the following steps:
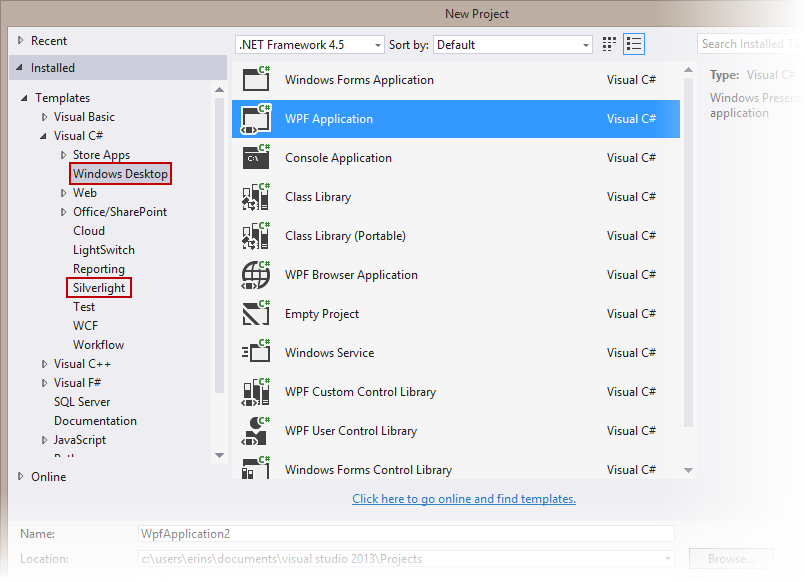
In Visual Studio, select File | New Project.
In the New Project dialog box, select either Windows Desktop or Silverlight from the Templates in the left-hand pane.
New Project Dialog Box
Select Silverlight Application and enter a Name for your project, for example "QuickStart". Click OK. The New Silverlight Application dialog box will appear.
Click OK to accept default settings. This will close the New Silverlight Application dialog box and create your project.
The MainPage.xaml file should open.
Add the following assemblies to your application by right-clicking the References folder and selecting Add Reference:
Silverlight: C1.Silverlight.5.dll
Navigate to the Visual Studio Toolbox and add a C1Menu control by double-clicking.
Edit the control's markup to add Height= "Auto" and Width= "Auto" to the <c1:C1Menu> tag. It should resemble the following:
<c1:C1Menu HorizontalAlignment="Left" VerticalAlignment="Top" Height="Auto" Width="Auto"/>You have completed the first step of the Menu and ContextMenu for Silverlight quick start. In this step, you created a project and added a C1Menu control to it. In the next step, you will add top-level menu items to the control.