# DockPanel Quick Start
## Content
The following quick start guide is intended to get you up and running with **DockPanel for WPF and Silverlight**. In this quick start, you'll create a new project in Visual Studio, and add elements docked on the top, bottom, left, right, or even fill the [C1DockPanel](/componentone/api/wpf/online-basiclibrary/dotnet-framework-api/C1.WPF.4.6.2/C1.WPF.C1DockPanel.html).
### Step 1
To set up your project, complete the following steps:
1. In Visual Studio, select **File \| New Project**.
2. In the **New Project dialog box**, select either **Windows Desktop** or **Silverlight** from the **Templates** in the left-hand pane.
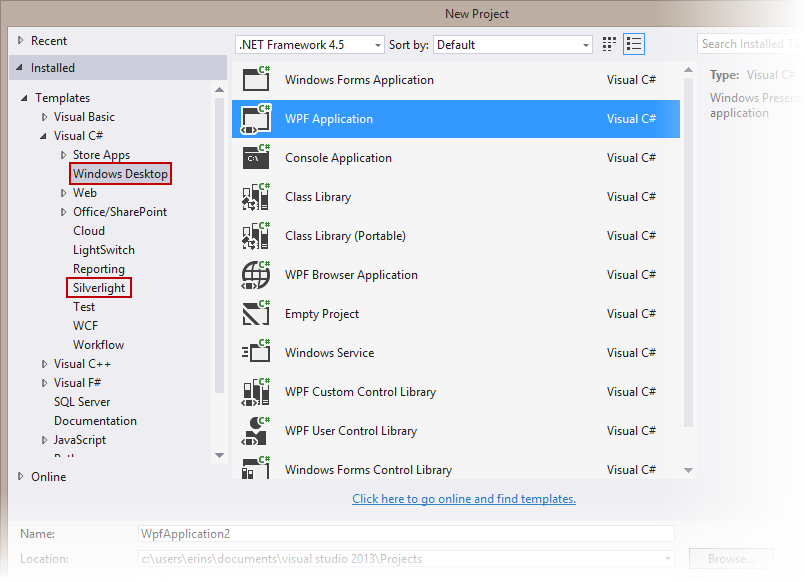
New Project Dialog
3. Select **WPF Application** or **Silverlight Application**, depending on the template you chose.
4. Enter a **Name** for your project, for example "QuickStart", and click **OK**. In a **WPF Application**, the **MainWindow.xaml** file will open.
1. If you selected a **Silverlight Application**, when you click **OK**, the **New Silverlight Application** dialog box will appear.
2. Click **OK** to accept default settings. This will close the **New Silverlight Application** dialog box and create your project.
3. The **MainPage.xaml** file should open.
5. Add the following assemblies to your application by right-clicking the **References** folder and selecting **Add Reference**:
* **WPF**: C1.WPF.4.dll
* **Silverlight**: C1.Silverlight.5.dll
In the next step, you'll add and style **C1DockPanel**s.
### Step 2
In this step we'll add and style several **C1DockPanel**s.
1. First, remove the Grid tags from your project.
2. From the Visual Studio Toolbox, drag a **C1DockPanel** control to the page.
3. Place your cursor in between the **\** tags and enter the following XAML to add **C1DockPanel**s on the left, right, top, and bottom and to fill the center of the screen:
```xml
```
In the next step, you'll run the application.
### Step 3
Now you're ready to run the application. From the **Debug** menu, select **Start Debugging**. Your application will look similar to the following, with four **C1DockPanels** on the top, right, left, and bottom and the center block filled:
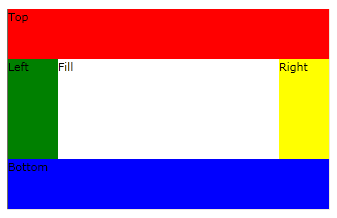
Congratulations! You have successfully completed the **DockPanel for WPF/Silverlight** quick start.