Tutorial 3: Linking Multiple True DBGrid Controls
In This Topic
This tutorial demonstrates how to link multiple True DBGrid for WinForms controls using a Master Detail dataset.
Complete the following steps:
- Create a new .NET project.
- Navigate to the Visual Studio Toolbox and double-click the C1TrueDBGrid item twice to add two C1TrueDBGrid controls to the form (C1TrueDBGrid1 and C1TrueDBGrid2).
- In the C1TrueDBGrid1 control's C1TrueDBGrid Tasks menu, locate the Choose Data Source drop-down and select Add Project Data Source.
- In the adapter's Data Source Configuration Wizard, either select a connection to C1NWind.mdb or create a new connection to this database. On the Choose your database objects page of the wizard, select all fields in the Composer table and all fields in the Opus table, and type "DsMasterDetail" into the DataSet name box, and then finish out the wizard.
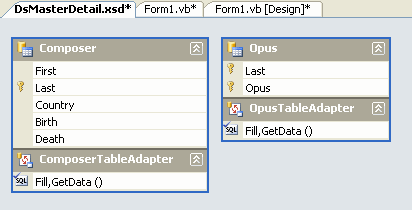
- Double-click DsMasterDetail.xsd in the Solution Explorer window. This will open the DsMasterDetail.xds file, which will appear similar to the following:

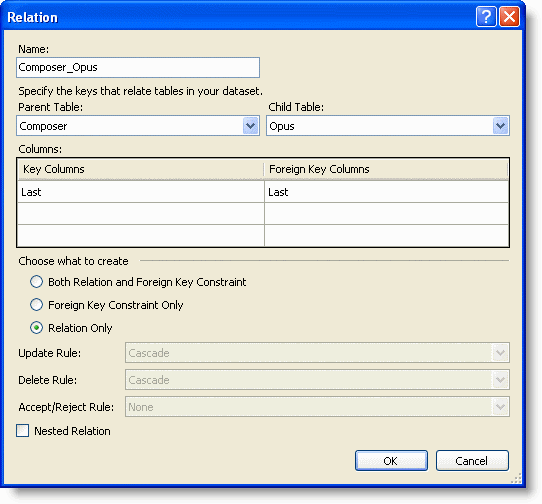
- To make a relation between two tables, click and hold down the mouse button in the area next to the Last field in Composer, and then drag the mouse up over the Composers table over to the Opus table, then release the mouse over the area next to the Last field. This will bring up the Relation dialog box:

Make sure Parent Table is set to Composer and the Child Table is set to Opus. In addition make sure both fields are set to the Last column and that the Relation Only is selected (as in the preceding screenshot). Click OK and exit the Edit Relation dialog box. - Now go to the Build menu of Visual Studio and choose Build Solution. This will ensure that this new relation is available in the project.
- Return to the form's Design view and in the Toolbox, locate the <Your Project Name> Components tab. Add an instance of the DsMasterDetail, ComposerTable, and OpusTableAdapter to the form.

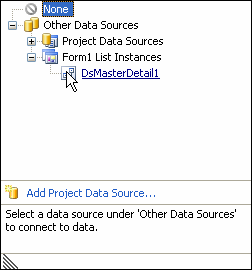
- Now in the Properties window, set the DataSource property for the first C1TrueDBGrid control to DsMasterDetail1 and the DataMember property to Composer.

If prompted to replace the column layout, click Yes. - For the second C1TrueDBGrid control, set the DataSource property to DsMasterDetail1 and the DataMember property to Composer.Composer_Opus.

If prompted to replace the column layout, click Yes. - All that is left is to populate the DataAdapters.
- Double-click the form to switch to Code view and create the Form_Load event handler. Add the following code to the Load event of Form1:
To write code in Visual Basic
Visual Basic Copy CodeMe.ComposerTableAdapter1.Fill(Me.DsMasterDetail1.Composer) Me.OpusTableAdapter1.Fill(Me.DsMasterDetail1.Opus)
To write code in C#
C# Copy Codethis.composerTableAdapter1.Fill(this.dsMasterDetail1.Composer); this.opusTableAdapter1.Fill(this.dsMasterDetail1.Opus);
Run the program and observe the following:
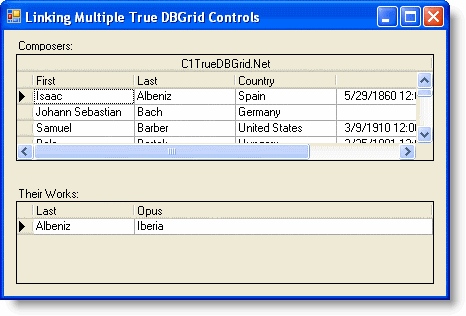
- When Form1 is loaded, C1TrueDBGrid1 and C1TrueDBGrid2 retrieve the database schema information from DsMasterDetail:

- Change the current record position of the first grid by clicking on different rows. Observe that C1TrueDBGrid2 (the detail grid) will configure itself to display a new record set every time the row changes in C1TrueDBGrid1 (the master grid).
This concludes this tutorial; you've successfully completed linking multiple True DBGrid controls.