# QuickStart
## Content
This quick start guide will walk you through the steps of creating a **True DBGrid for WinForms** application, binding the grid to a data source, and customizing the grid's appearance and behavior settings. You'll discover that you can easily create powerful database applications using **True DBGrid for WinForms**.
The quick start uses an Access database, **C1NWind.mdb**. The C1NWind.mdb database file is located in the **Common** subdirectory of the **WinForms** **Edition** program, the **Documents\\ComponentOne Samples\\Common** directory.
## .NET
To create a simple WinForms application in .NET for True DBGrid control, complete the following steps:
1. Create a new **Windows Forms** application.
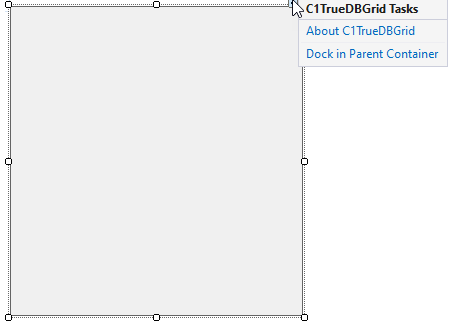
2. Add reference to **C1.Win.TrueDBGrid** NuGet package. Drag and drop the TrueDBGrid control from Toolbox to the form. Click 'Dock in Parent Container' option from the C1TrueDBGrid tasks menu.
3. Create a sample datasource class '[DataSource](/componentone/api/win/online-truedbgrid/dotnet-api/C1.Win.TrueDBGrid.10/C1.Win.TrueDBGrid.BaseGrid.Frame.DataSource.html)'.
4. Bind the True DBGrid to this datasource using the **DataSource** property of the [C1.Win.TrueDBGrid.BaseGrid.Frame](/componentone/api/win/online-truedbgrid/dotnet-api/C1.Win.TrueDBGrid.10/C1.Win.TrueDBGrid.BaseGrid.Frame.html) class. This will populate the True DBGrid control with data.
```csharp
//bind to data source
var data = C1.DemoData.DataSource.GetRows("Select * from Data");
c1TruedbGrid1.DataSource = data;
```
5. You can also customize the grid using the Caption, [AllowAddNew](/componentone/api/win/online-truedbgrid/dotnet-api/C1.Win.TrueDBGrid.10/C1.Win.TrueDBGrid.C1TrueDBGrid.AllowAddNew.html), [AlternatingRows](/componentone/api/win/online-truedbgrid/dotnet-api/C1.Win.TrueDBGrid.10/C1.Win.TrueDBGrid.C1TrueDBGrid.AlternatingRows.html) and [EvenRowStyle](/componentone/api/win/online-truedbgrid/dotnet-api/C1.Win.TrueDBGrid.10/C1.Win.TrueDBGrid.C1TrueDBGrid.EvenRowStyle.html) properties.
```csharp
//customize TrueDbGrid
c1TruedbGrid1.Caption = "Data";
c1TruedbGrid1.AllowAddNew = true;
c1TruedbGrid1.AlternatingRows = true;
c1TruedbGrid1.EvenRowStyle.BackColor = Color.LightBlue;
```
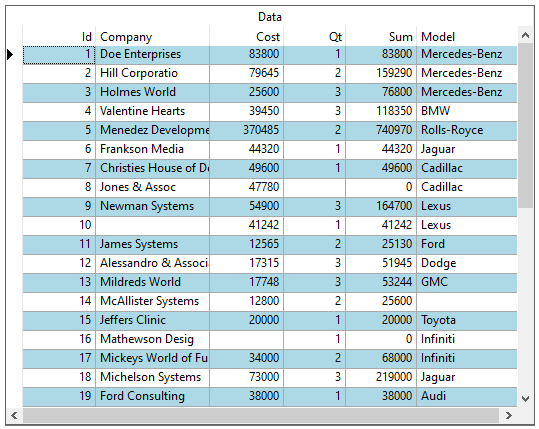
Run the code and observe the output:
>type=note
> **Note**: WinForms .NET6 Edition does not include rich design-time support yet. We will enhance it in future releases.
## .NET Framework
This section demonstrates how to create a TrueDBGrid application in .NET Framework by binding it to an external datasource using the TrueDBGrid Tasks menu. We will also learn how to customize the grid application using the Tasks menu.
## Step 1: Creating a True DBGrid for WinForms Application
In this step you will add a **C1TrueDBGrid** control to the form and create a simple grid application. Complete the following steps:
1. Create a new .NET project.
2. Open the Visual Studio Toolbox and double-click the **C1TrueDBGrid** icon .
The grid is added to the form and the **C1TrueDBGrid Tasks** menu appears.
3. In the **C1TrueDBGrid Tasks** menu, click **Dock in parent container** to dock the grid within the entire form.
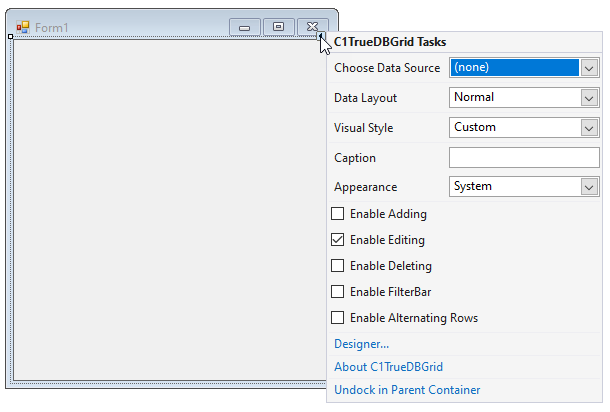
You've successfully created a simple grid application. In the next step, you'll learn how to bind the **C1TrueDBGrid** control to a data source.
## Step 2: Binding True DBGrid for WinForms to a DataSet
In this step, you'll learn how to bind a **C1TrueDBGrid** control to a **DataSet**. You will also learn about the basic **True DBGrid** properties and observe the run-time features of the grid. Complete the following steps to bind a **C1TrueDBGrid** control to a **DataSet**:
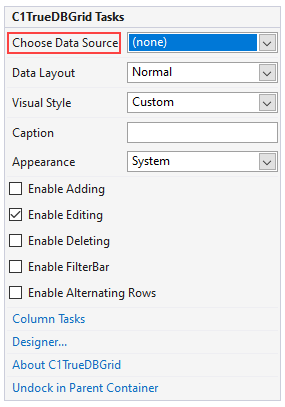
1. Click **C1TrueDBGrid1**'s smart tag to open the **C1TrueDBGrid Tasks** menu, select the **Choose Data Source** drop-down arrow, and click **Add Project Data Source** to add a new data source to your project.
2. The **Data Source Configuration Wizard** appears and **Database** is selected. Click **Next**.
3. Click the **New Connection** button to locate and connect to a database.
4. Click the **Browse** button and locate **C1NWind.mdb** in the **Documents\\ComponentOne Samples\\Common** directory. Select it and click **Open**.
5. Click the **Test Connection** button to make sure that you have successfully connected to the database or server and click **OK**. The new string appears in the data connection drop-down list.
6. Click the **Next** button to continue. A dialog box will appear asking if you would like to add the data file to your project and modify the connection string. Click **No**.
7. In the next window, the **Yes, save the connection as** check box is checked by default and a name has been automatically entered in the text box. Click **Next** to continue.
8. In the **Choose Your Database Objects** window, you can select the tables and fields that you would like in your dataset. Select the **Composer** table.
The DataSet is given a default name in the **DataSet name** text box.
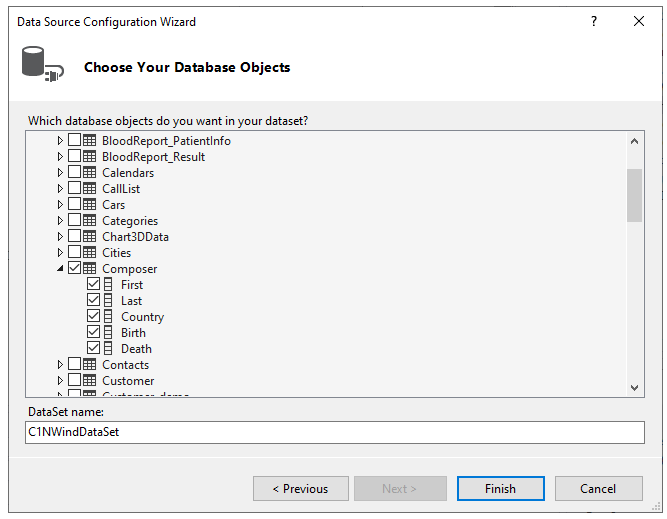
9. Click **Finish** to exit the wizard. The **DataSet**, **BindingSource** and **TableAdapter** now appear on your form.
10. Double-click the form. Notice that Visual Studio has added the following code to the **Form\_Load** event:
```csharp
this.composerTableAdapter.Fill(this.c1NWindDataSet.Composer);
```
### Run the program and observe the following:
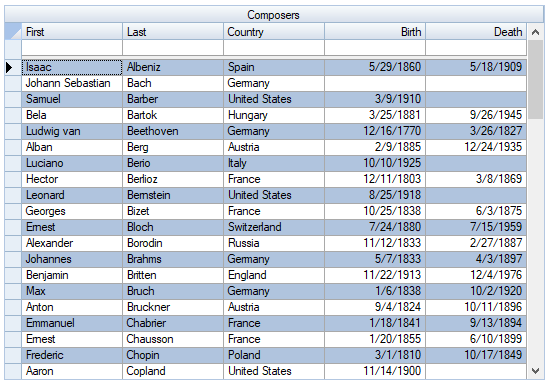
Notice that the data from the **Composers** table is reflected in the grid:
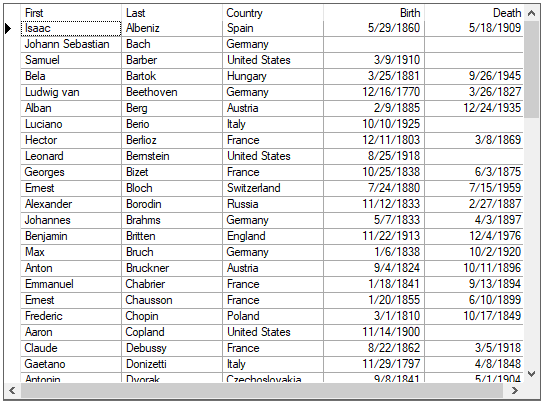
**True DBGrid** retrieves the database schema information from the DataSet and automatically configures itself to display all of the fields contained in the database table. Note that the field names are used as the default column headings.
Congratulations, you have successfully completed binding a **C1TrueDBGrid** control to a DataSet. In the next section you will customize the **C1TrueDBGrid** control's appearance and behavior settings.
## Step 3: Customizing True DBGrid for WinForms Settings
In the previous steps you've added **C1TrueDBGrid** to a project, set up the grid, and bound the grid to a data source. In this step you'll customize the grid's appearance and behavior settings. Complete the following steps:
1. Switch to **Design** view and click on **C1TrueDBGrid1**'s smart tag to open the **C1TrueDBGrid Tasks** menu.
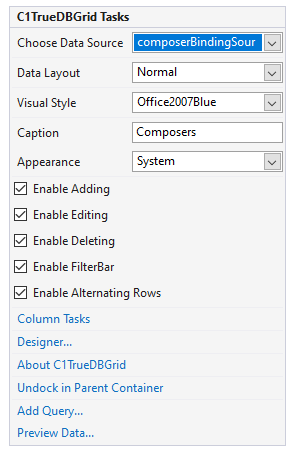
2. In the **C1TrueDBGrid Tasks** menu set the following properties:
* Set [Caption](/componentone/docs/win/online-truedbgrid/) property to "Composers" to add a caption to the grid.
* Select the **Enable Adding** and **Enable Editing** check boxes to set the [AllowAddNew](/componentone/docs/win/online-truedbgrid/) and [AllowUpdate](/componentone/docs/win/online-truedbgrid/) properties to **True** and allow users to edit the grid.
* Select **Enable Alternating Rows** to set the [AlternatingRows](/componentone/docs/win/online-truedbgrid/) property to **True**.
* Set the [VisualStyle](/componentone/docs/win/online-truedbgrid/) property to **Office2007Blue** to set the grid's appearance.
3. In the Properties window, set the [EvenRowStyle](/componentone/docs/win/online-truedbgrid/).**BackColor** property to **LightSteelBlue**.
### Run the program and observe:
You've customized the **C1TrueDBGrid** control. Notice that you've changed the appearance of the grid and can now add and edit the grid's content.