# Quick Start
The page gives an idea about the basic steps to create an easy application and lets you get started with C1Ribbon.
## Content
The following quick-start guide takes you through steps to add the Ribbon control to the application through designer and code.
### Add Ribbon Through Designer
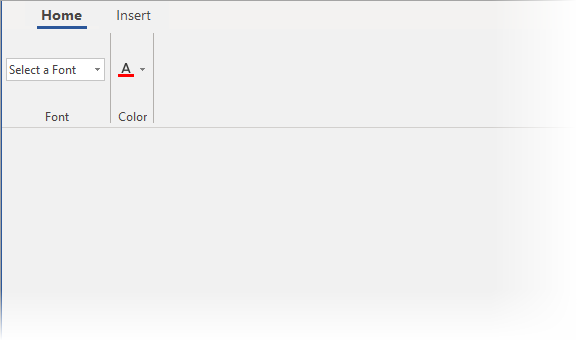
This section demonstrates creating a simple WinForms App to add Ribbon control that includes Tabs, Groups and few controls, as shown in the below image:
1. Create a new **Windows Forms** App.
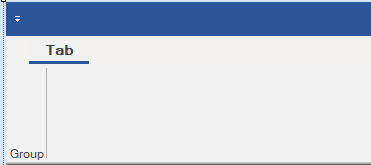
2. Drag and drop **C1Ribbon** control to your form. The Ribbon control is positioned at the top of the form. By default, an empty **Tab** and a **Group** is added automatically.
3. Select the **C1Ribbon** control to view its floating toolbar. From the toolbar, click the **Action** button and choose **AddTab** from the list of actions. Observe, the newly created tab contains an empty group, by default.
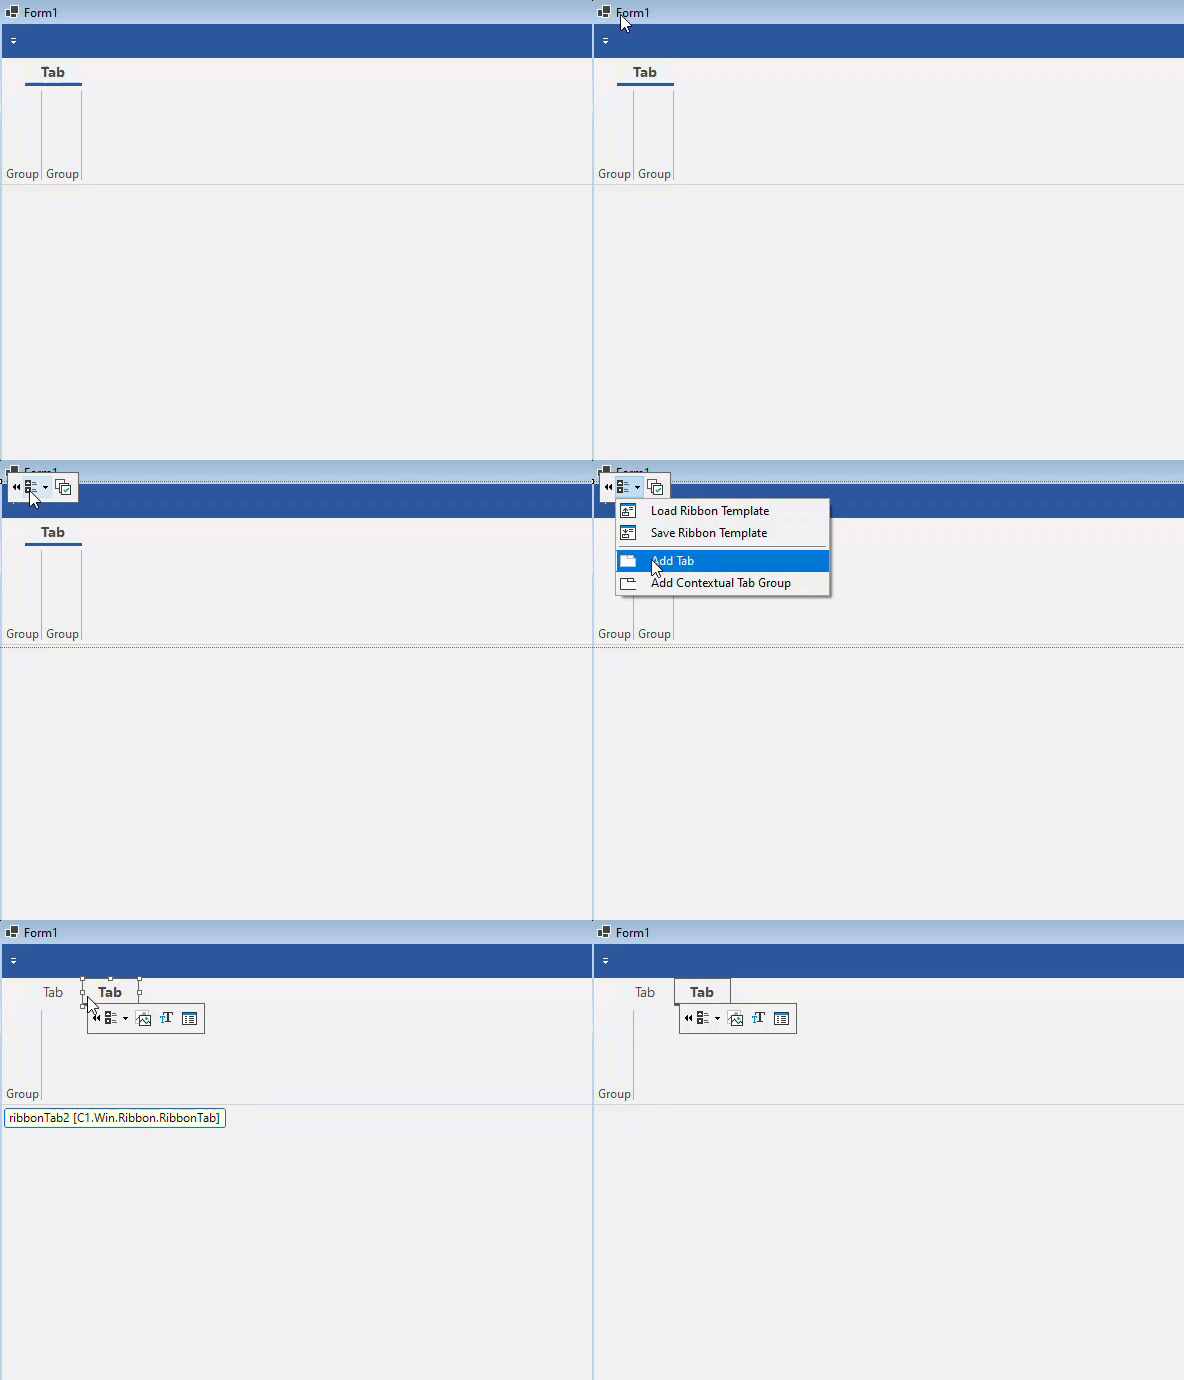
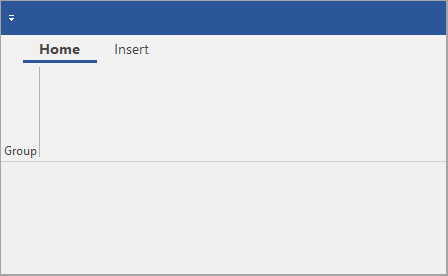
4. Rename the tabs in the Ribbon control through in-place text editing, **Text Settings** in the floating toolbar, or by setting the **Text** property from the **Properties** window. For example, two tabs are added with the names **Home** and **Insert,** respectively, as shown in the following image.
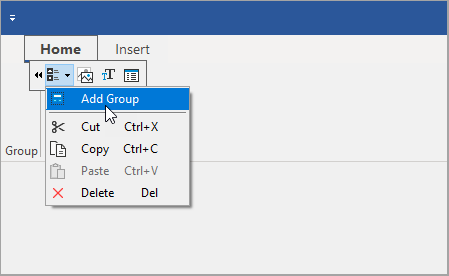
5. Click the **Home** tab to open its floating toolbar, select **Add Group** from the list of available actions to add a new group to the tab.
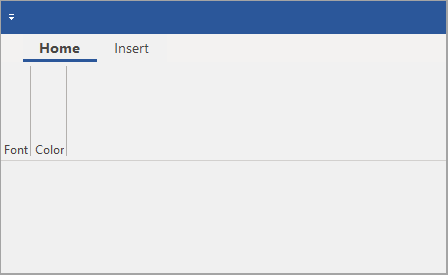
6. Change names of the two groups added to the **Home** tab to **Font** and **Color** through in-place text editing, **Text Settings** in the floating toolbar, or by setting the **Text** property from the **Properties** window.
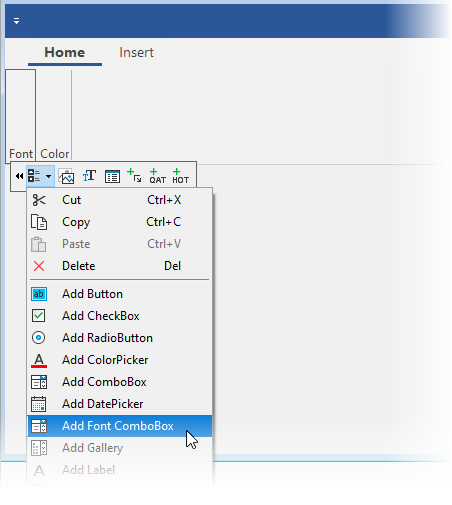
7. Select a group to open its floating toolbar, then add control from the available list of controls. For example, here we have added **Font ComboBox** control to the **Font** group.
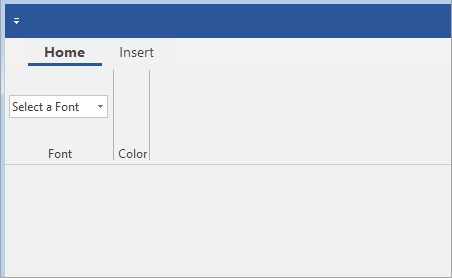
8. In **Font ComboBox** control, add placeholder text, say "Select a Font", as shown in the below image.
9. Under **Color** group, add **ColorPicker** from the list of available **Actions**.
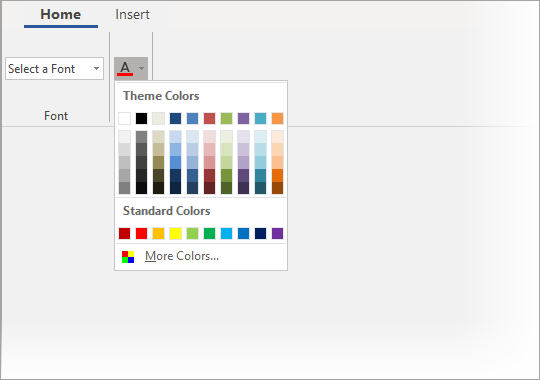
You can also add other items from the group item list to this group as per your requirement.
10. Run the application and observe the output.
Optionally, you can also convert a Windows Form to a Ribbon Form by following these steps.
1. Include C1.Win.Ribbon namespace.
```csharp
using C1.Win.Ribbon
```
2. Inherit the Windows Form from the C1RibbonForm as shown in the below code section.
```csharp
partial class Form1 : C1RibbonForm
{
//...
}
```
>type=note
> Note: RibbonForm is an extension that enables you to apply different visual styles to Ribbon. The basic difference between the Windows Form and Ribbon Form is that, the Ribbon Form does not include the title bar of the Windows Form.
### Add Ribbon Through Code
This section demonstrates creating a simple WinForms App to add Ribbon control that includes Tabs, Groups and a few controls through code, as shown in the below image.

Complete the following steps to add Ribbon control to the Windows Form:
1. Create a new **Windows Forms** **App**.
2. Open the code view, create and instantiate an object of **C1Ribbon** class and add it to the form as illustrated in the below code.
```csharp
C1Ribbon customRibbon = new C1Ribbon();
this.Controls.Add(customRibbon);
```
3. Create an instance of **RibbonTab** class, assign value to its **Text** property, then add it to the Ribbon control using **Add** method of **RibbonTabCollection** class. For example, we created two instances of **RibbonTab** class to show two tabs in the Ribbon, named **Home** and **Insert** using the following code.
```csharp
///Adding home tab.
RibbonTab homeTab = new RibbonTab();
homeTab.Text = "Home";
customRibbon.Tabs.Add(homeTab);
///Adding insert tab.
RibbonTab insertTab = new RibbonTab();
insertTab.Text = "Insert";
customRibbon.Tabs.Add(insertTab);
```
4. Create an instance of **RibbonGroup** class to add group under specific tab. Assign value to its **Text** property, then add it to the a tab using **Add** method of **RibbonGroupCollection** class. For example, we created two instances of **RibbonGroup** class to add two groups to Home tab, named Font and Color using the following code.
```csharp
///Adding group named "Font" to the "Home" tab
RibbonGroup fontGroup = new RibbonGroup();
fontGroup.Text = "Font";
homeTab.Groups.Add(fontGroup);
///Adding group named "Color" to the "Home" tab
RibbonGroup colorGroup = new RibbonGroup();
colorGroup.Text = "Color";
homeTab.Groups.Add(colorGroup);
```
5. Under the **home** tab, add the FontPicker and ColorPicker controls, as items to the Font and Color groups respectively.
```csharp
///Add item fontpicker to fontgroup in Home tab
RibbonFontComboBox fontComboBox = new RibbonFontComboBox();
fontComboBox.Text = "Select a Font";
fontGroup.Items.Add(fontComboBox);
///Add item colorpicker to color group in Home tab
RibbonColorPicker colorPicker = new RibbonColorPicker();
colorGroup.Items.Add(colorPicker);
//Define the iconset to display next to Colorpicker control
colorPicker.IconSet.Add(new C1BitmapIcon(null, new Size(20, 20), Color.Transparent, Image.FromFile(@"images\fontcolor.png")));
```
6. Run the application and observe the output.
Optionally, you can convert a Windows Form to a Ribbon Form by following the below steps.
1. Include C1.Win.Ribbon namespace.
2. Inherit the Windows form from the C1RibbonForm as shown in the below code section.
```csharp
partial class Form1 : C1RibbonForm
{
//...
}
```
>type=note
> Note: RibbonForm is an extension that enables you to apply different visual styles to Ribbon. The basic difference between the Windows Form and Ribbon Form is that, the Ribbon Form does not include the title bar of the Windows Form.