# State Indicator
Learn how to create a state indicator in C1Gauge control. See more demos, documentation, and samples here.
## Content
To create a state indicator, follow these steps:
1. Click the **ellipsis** button next to the [Gauges](/componentone/docs/win/online-gauges/) property in the Properties window. The **C1Gauge.Gauges Collection Editor** dialog box opens.
2. Click the **ellipsis** button next to **Decorators**. The **Decorators Collection Editor** opens.
3. Click the **Add** drop-down arrow and select [C1GaugeSingleMark](/componentone/docs/win/online-gauges/).
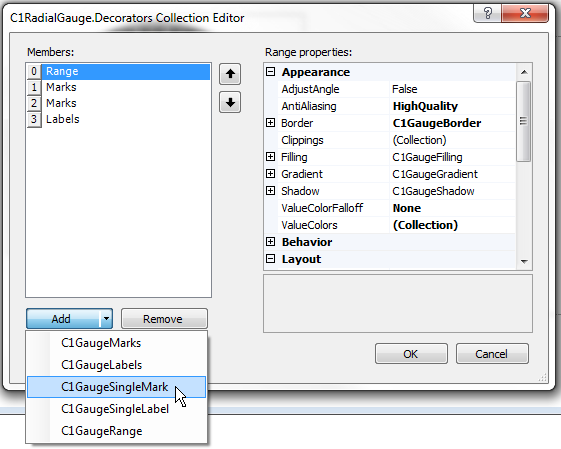
4. To make the **SingleMark** visible, set the [PointerIndex](/componentone/docs/win/online-gauges/) property to **1**. You will notice it appears on the minimum value of your scale.
5. To position the **SingleMark**, set the [Angle](/componentone/docs/win/online-gauges/) property to **270**. Then set the [Location](/componentone/docs/win/online-gauges/) property to **40**. You will notice now it appears to the left of the pointer (around value 20).
6. Also, set the [Width](/componentone/docs/win/online-gauges/) value to **15** and [Shape](/componentone/docs/win/online-gauges/) to **Round**.
7. Expand the **Border** node and set the **Color** property to **DarkGray**.
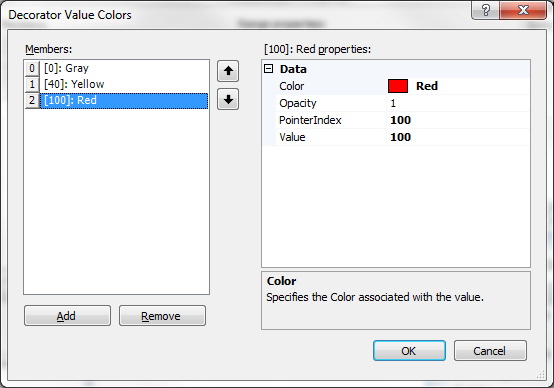
8. We need this indicator to show the same color as the value of the gauge, as determined by our Range we set up in the [Adding Ranges](/componentone/docs/win/online-gauges/gaugesforwinformstas/addingranges) topic. To do this, we need to add the same color to value thresholds in the **ValueColors** collection for our **SingleMark**. Click the **ellipsis** button next to **ValueColors**. In the **Decorator Value Colors** window, add 3 members: **Gray**, **Yellow** and **Red** with the corresponding **Values** of **0**, **40** and **100** respectively. This is just like we did for the range.
1\. Select the first member 0\, click the drop\-down arrow next to **Color**, and select **Gray**. Set the [PointerIndex](/componentone/docs/win/online-gauges/) and [Value](/componentone/docs/win/online-gauges/) properties to **0**.
2\. Select the next member 1\, click the drop\-down arrow next to **Color**, and select **Yellow**. Set the PointerIndex and Value properties to **40**.
3\. Select the last member 2\, click the drop\-down arrow next to **Color**, and select **Red**. Set the PointerIndex and Value properties to **100** and click **OK** to close the window.
9. Finally, set the [ValueColorFalloff](/componentone/docs/win/online-gauges/) property to **None** so that it matches the same colors as our range (without gradient blending).
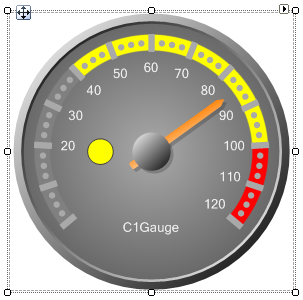
Notice that since we have declared the value colors separately for the **SingleMark**, we do not need the range anymore on our gauge.
## See Also
[Creating a Numeric Indicator](/componentone/docs/win/online-gauges/gaugesforwinformstas/creatingastateornume/creatinganumericindi)