# Columns
## Content
A grid comprises of rows and columns to record information. A column generally contains information of the same type, whereas a row can contain information of different data types.
In **GanttView**, the collection of columns is represented by the ColumnCollection class which is accessible through the **Columns** property of the C1GanttView class.
This section walks you through different operations that can be performed on columns in the GanttView control.
### Add Columns to Grid
You can add a column to the **ColumnCollection** by using the **Columns** property of the **C1GanttView** class. To add columns to the grid, please refer to the code snippet provided below.
```csharp
C1.Win.GanttView.TaskPropertyColumn taskPropertyColumn1 = new C1.Win.GanttView.TaskPropertyColumn();
taskPropertyColumn1.Caption = "Duration";
taskPropertyColumn1.ID = 1437604830;
taskPropertyColumn1.Property = C1.Win.GanttView.TaskProperty.Duration;
this.c1GanttView1.Columns.Add(taskPropertyColumn1);
```
You can also add columns at run time. To add columns using the ColumnCollection of the GanttView, follow the steps below:
1. Click the Grid Columns button, , to open the Grid Columns dialog box.
2. Select the respective checkboxes to add new columns to the grid.
3. Click **OK**.
The two columns **Duration** and **Start** get added to the grid.
### Move Columns in Grid
GanttView allows you to move columns to occupy new position in the grid.
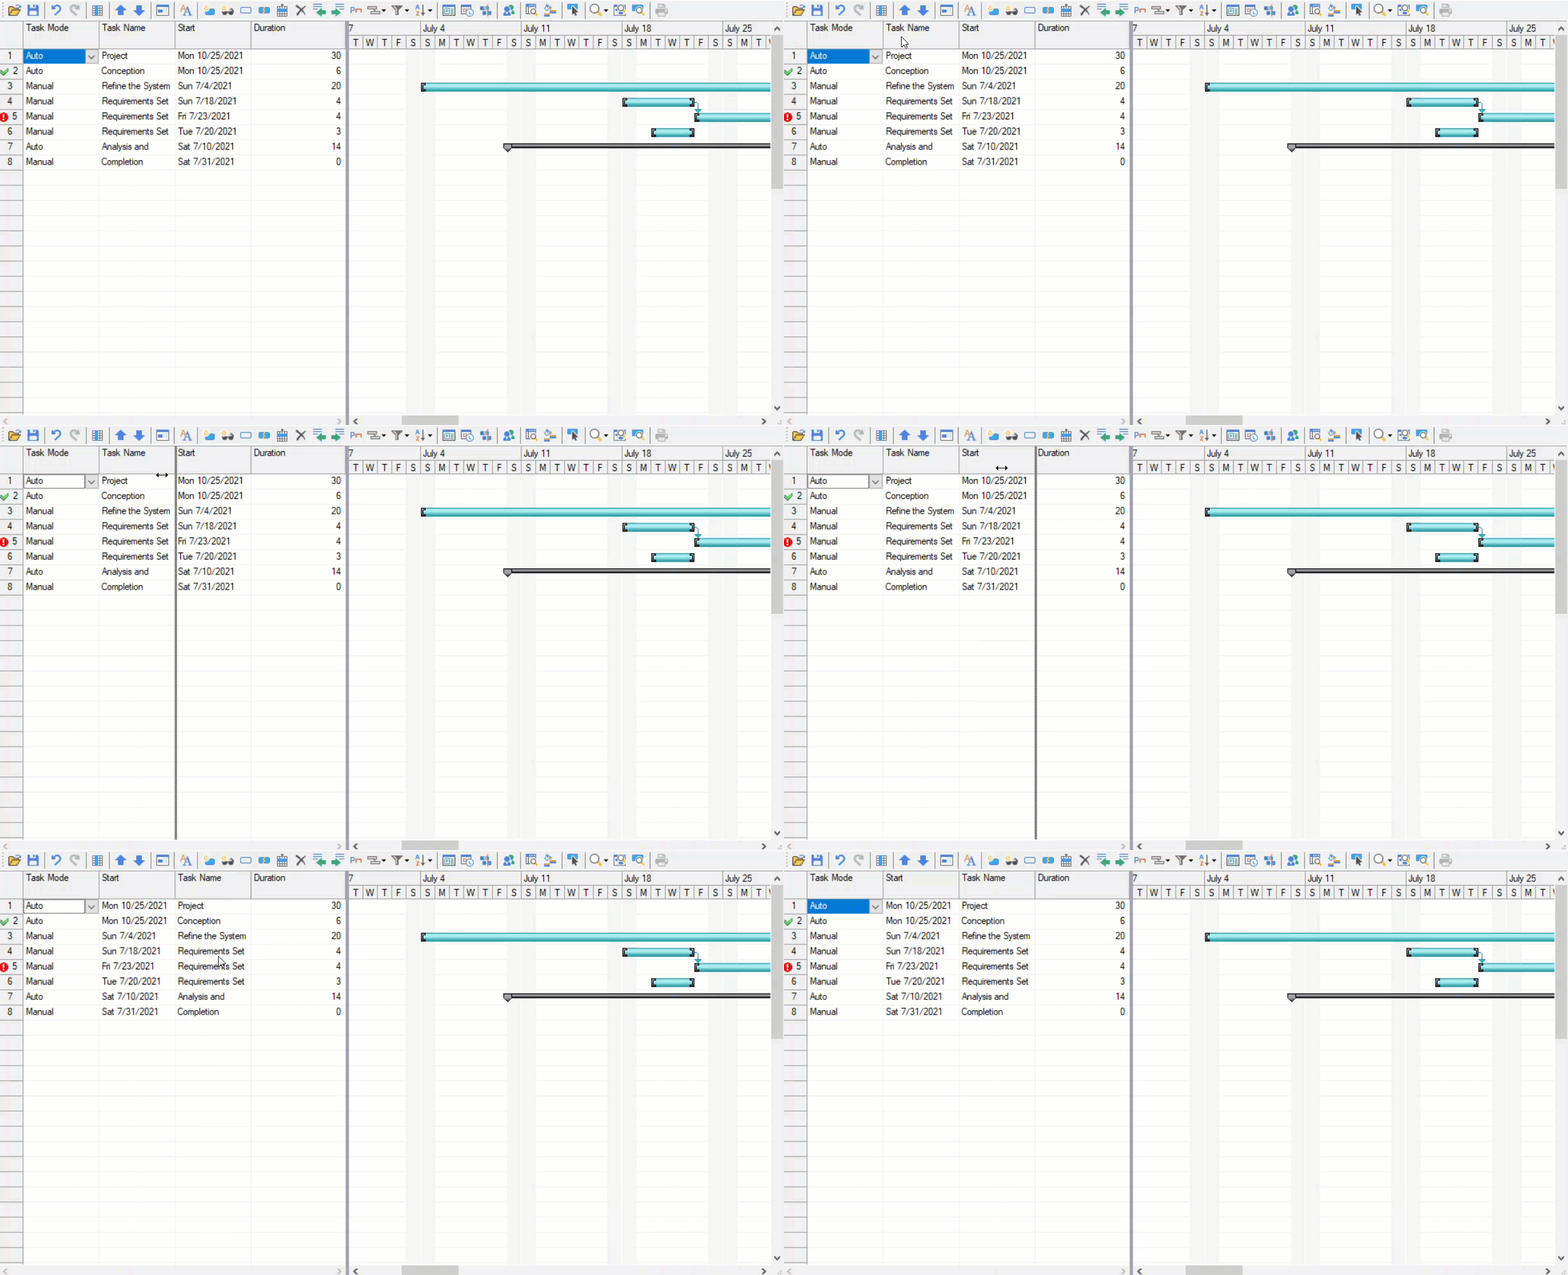
To move the column at run time, follow the steps below:
1. Select the column you wish to move.
2. Drag the column and drop it to the target position.
### Custom Columns
GanttView allows you to create custom columns as per your requirements. In **GanttView**, custom columns are represented by the **CustomFieldColumn** class. Other than this, you can also set various attributes of a custom column.
Below code snippet shows how you can create a custom column in the GanttView control.
```csharp
CustomFieldColumn cc = new CustomFieldColumn();
cc.Caption = "My Numeric Column";
cc.DataType = typeof(decimal);
cc.Format = "$#0";
cc.Name = "MyNumericColumn";
cc.TextAlign = System.Windows.Forms.HorizontalAlignment.Right;
cc.Width = 65;
c1GanttView1.Columns.Add(cc);
```
### Dropdown in Custom Column
A dropdown can be added to a custom column in the GanttView, as shown in the image below
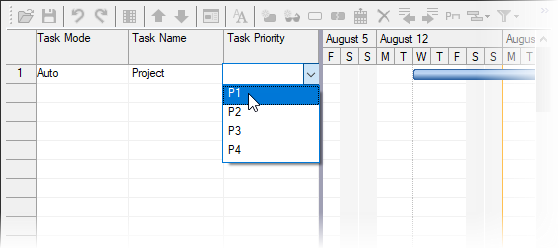
To add a dropdown in custom column, follow the steps below:
1. Create an object of **C1FlexGrid** class and retrieve it as a child control of **C1GanttView**. This helps to access the custom column as an individual entity.
```csharp
C1FlexGrid gridView = c1GanttView1.Controls[2] as C1FlexGrid;
```
2. Add **BeforeEdit** event using the object of **C1FlexGrid** class as shown in the below code:
```csharp
gridView.BeforeEdit += GridView_BeforeEdit;
```
3. Create and add a ComboList to the custom column under the **BeforeEdit** event. The name passed for the grid column should match the caption of the custom column. In the following code, Task Priority is the caption of custom column and the values P1, P2, P3, and P4, are the values added to the combo list.
```csharp
C1FlexGrid gridView = sender as C1FlexGrid;
gridView.BeginUpdate();
if (gridView.Cols[e.Col].Name == "Task Priority")
gridView.Cols[e.Col].ComboList = "P1|P2|P3|P4";
gridView.EndUpdate();
```
### Custom Multiple Rows and Columns
Rows and columns in GanttView control can easily be customized. GanttView enables you to select multiple rows or columns and customize them according to your needs. You can indent and outdent the selected tasks, delete the tasks, and change their field styles. You can also select several cells to change field styles for the selected tasks/fields. Other than this, you can highlight a particular task by changing the font color and background style for that task name.
To customize multiple rows and columns at the same time, follow the steps below:
1. Select the rows/columns you want to customize.
2. To change the height of the rows, place the cursor at the bottom of the selected row and drag it to adjust the height.
3. To highlight a field, select **Field Styles** on the GanttView toolbar.
Field Styles dialog box will appear.
4. Select the field you want to customize from the drop down.
5. Select the font style and background color that you want to apply.
6. Click **OK**.
The selected style and background color gets applied to the selected fields.
### Show Duration Columns in Grid
Duration columns displays the total amount time taken to complete task. This is generally the length of time it takes to complete a task from beginning to end. You can show the duration columns in the grid by using the Duration and DurationUnits properties of the **Task** class.
To programmatically show/hide the values of the Duration and DurationUnits properties in the grid, add the code given below:
```csharp
private void chkShowDuration_CheckedChanged(object sender, EventArgs e)
{
TaskPropertyColumn durationCol = c1GanttView1.Columns.Search(TaskProperty.Duration);
TaskPropertyColumn unitsCol = c1GanttView1.Columns.Search(TaskProperty.DurationUnits);
if (durationCol != null && unitsCol != null)
{
bool visible = chkShowDuration.Checked;
durationCol.Visible = visible;
unitsCol.Visible = visible;
}
}
```