# Deployment
Get started with, FlexReport comprehensive reporting tool that provides complete reporting solution - from building complex reports to previewing, exporting, and printing.
## Content
FlexReport supports azure deployment on Windows and can be used in Web API’s for exporting reports. Let us explore how to deploy FlexReport on Azure Windows Environment.
In this tutorial, we are deploying FlexReport on Azure Windows Environment to export it to Pdf.
## Create Web API project and Export PDF
Create a Web API project, add FlexReport and export it to PDF by performing the following steps:
1. Create a new Web API project in Visual Studio by selecting the **NET Core Web App [Model-View-Controller\]** template. 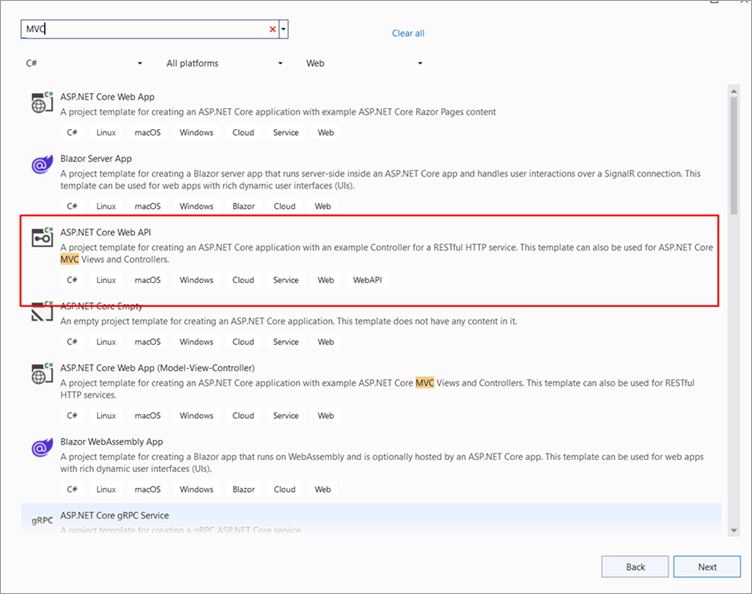
2. Setup a basic Web API project with the following given configurations. 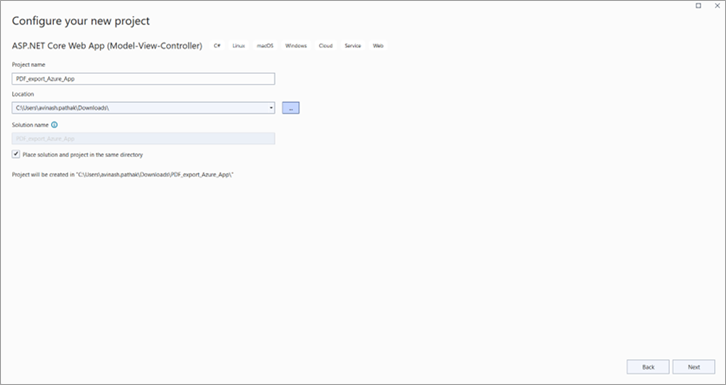 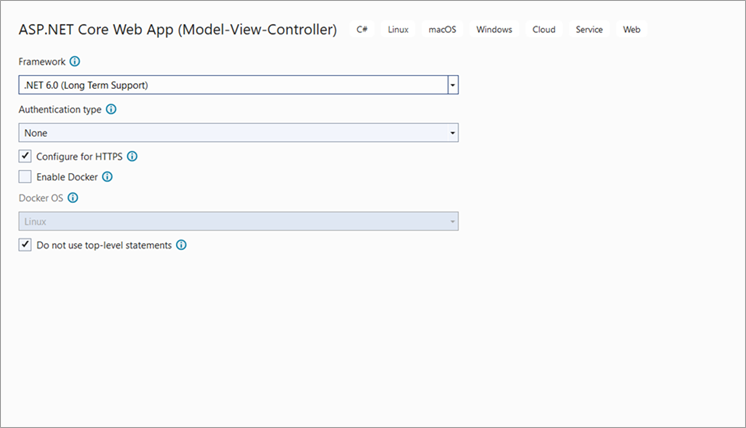
3. Right-click on the Project file, click **Edit Project File** option and add the following lines in the \\ tag. `true`
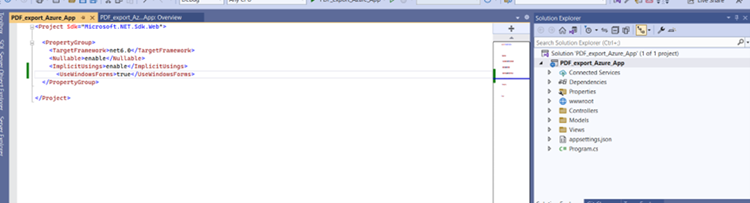
4. Open the project properties and set the **Target OS** to **Windows**. 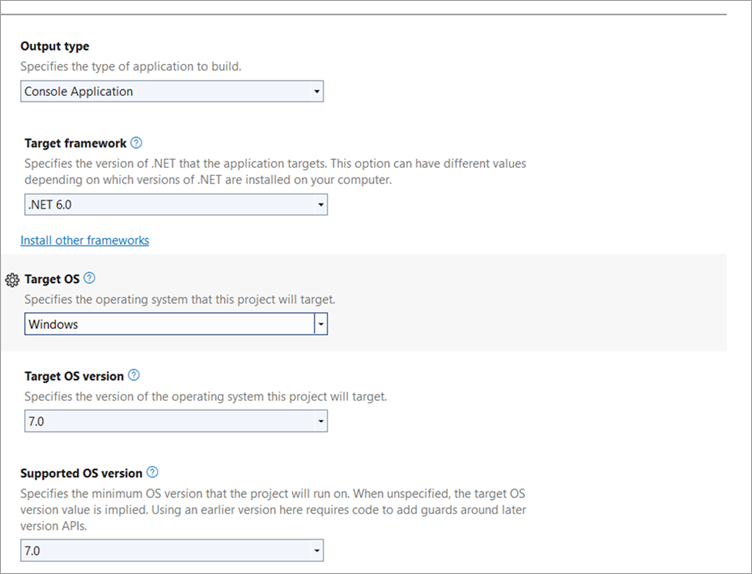 Observe that the basic application setup is done.
5. Add the following FlexReport dependencies (NuGet package) to the project.
* C1.Win.FlexReport
6. Open **Views | Home | Index.cshtml** and add the following code to insert a link to export a PDF document via FlexReport.
```razor
Export PDF
```
7. Add the report (\*.flxr) file in **wwwroot | files** folder of the project and add export endpoint in the **HomeController.cs** class as given in code below.
```csharp
public IActionResult Export() {
try {
//get Report path
var path = Path.Combine(Directory.GetCurrentDirectory(), @ "wwwroot\files", "TestReport.flxr");
var reportName = "Test";
if (!System.IO.File.Exists(path)) {
return Content("Unable to fnd Reprt");
}
C1FlexReport report = new C1FlexReport();
report.Load(path, reportName);
report.Render();
//Create PdfFilter object
var stream = new MemoryStream();
//using (var stream = new MemoryStream())
{
PdfFilter filter = new PdfFilter();
filter.ShowOptions = false;
filter.Stream = stream;
report.RenderToFilter(filter);
stream.Position = 0;
return File(stream, "application/pdf");
}
} catch (Exception ex) {
//Show Error message on screen
return Content($"For {ex.Source} => {ex.Message} \n {ex.StackTrace}");
}
}
```
Observe that the export functionality is added to the WebAPI project and the App works as showcased in the following GIF. Here, on clicking the Export PDF hyperlink, it generates the report in PDF format on the server side and gets downloaded at client-side. 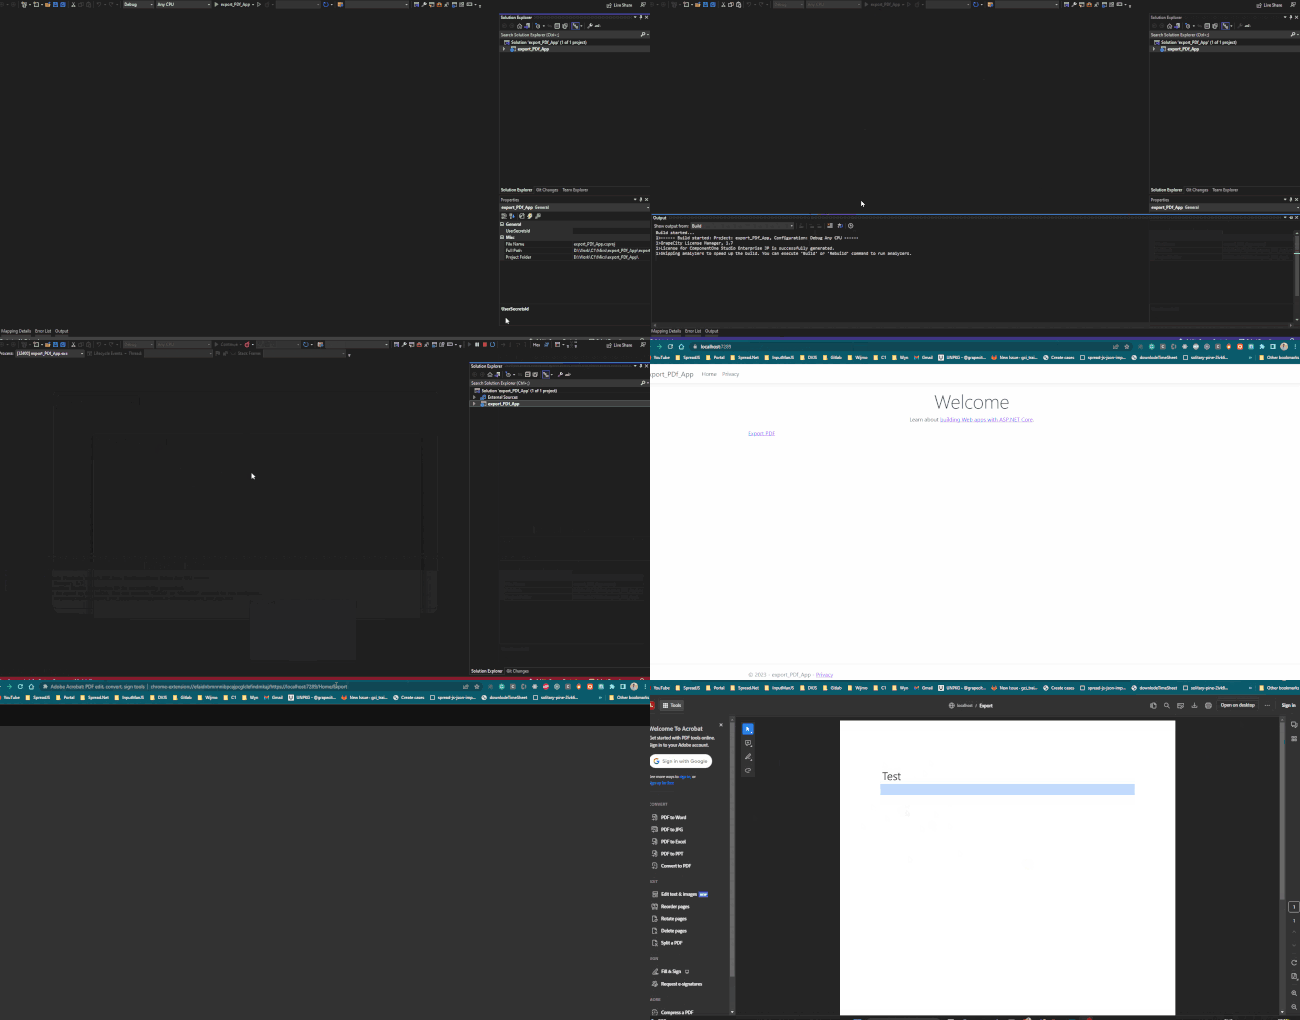
## Create App Service Resources
Follow these steps to create your App Service resources and publish your project to Azure Windows Environment platform:
1. In the **Solution Explorer**, right-click the project name, and select **Publish**. 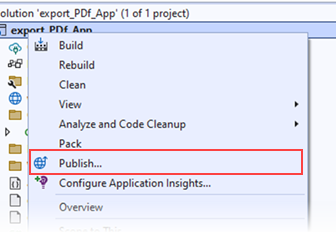
2. In **Publish** window, select **Azure** and click **Next**. 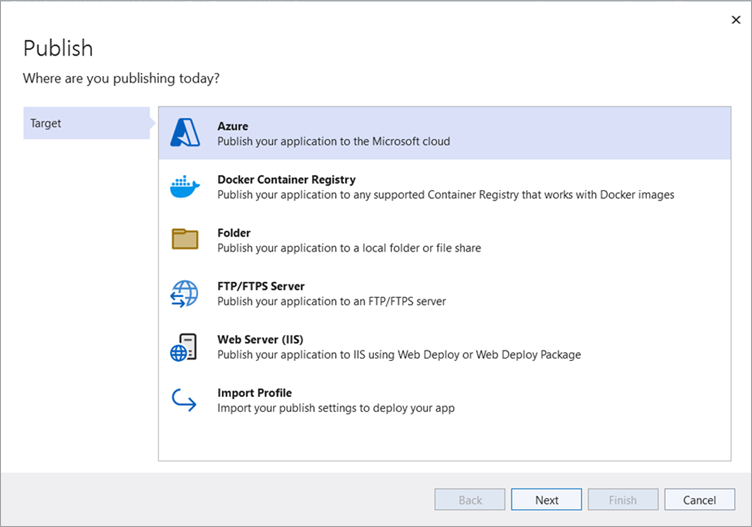
3. Select **Azure App Service (Windows)** azure service. Then, click **Next**. 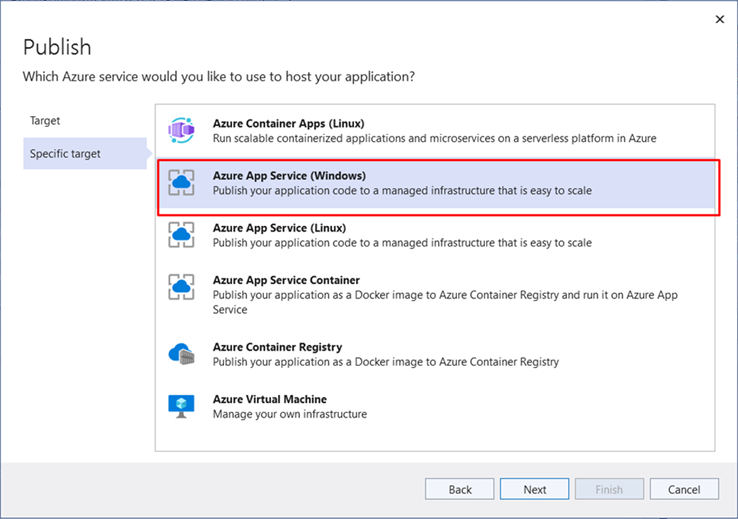
4. Select your subscription name and click on create new instance. 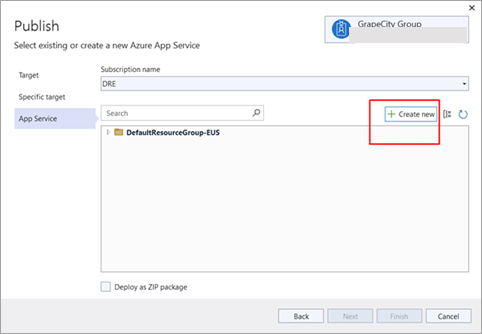 In this step, you can select either add an account or sign in to sign into your Azure subscription. This depends on whether you are already signed into Azure and have a Visual Studio account linked to an Azure account. If you're already signed in, select the account you want.
5. Create a new instance and provide a unique app name in the **Name** field that includes only the valid characters (a-z, A-Z, 0-9, and -). Here, you can also accept the automatically generated unique name. The URL of the web app is **http://\.azurewebsites.net**, where \ is your app name and click **Create**. 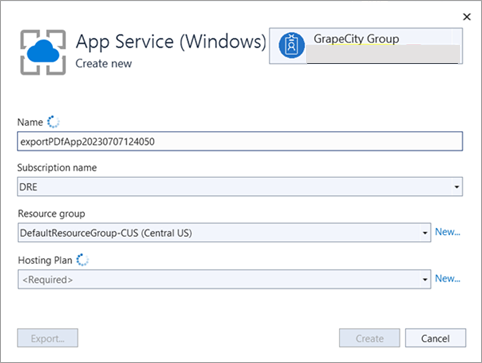 Once the wizard completes, the Azure resources are created and the project is ready to be published.
6. Click **Finish** to complete the deployments. 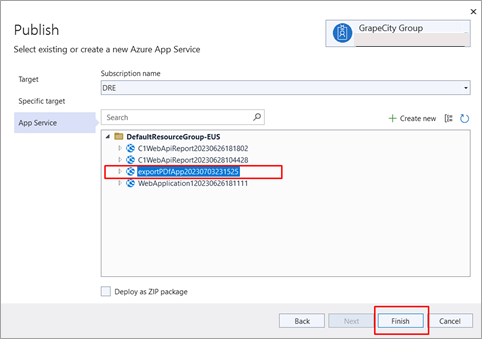
7. Change the Deployment Configuration as shown below: 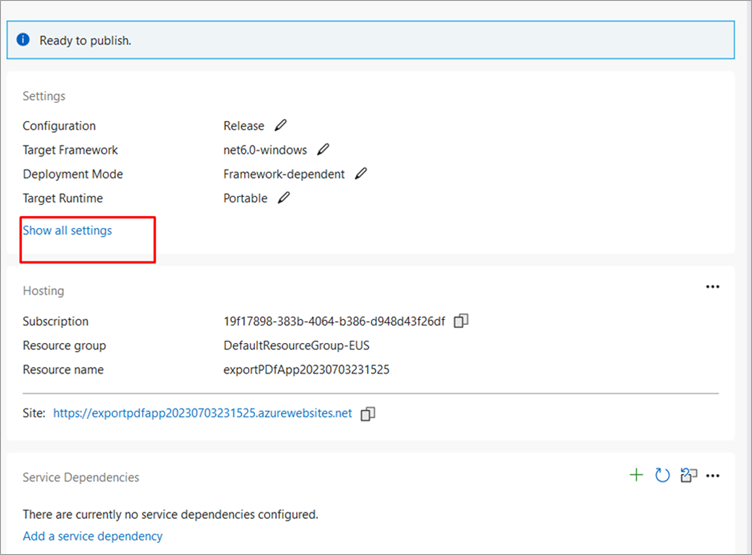 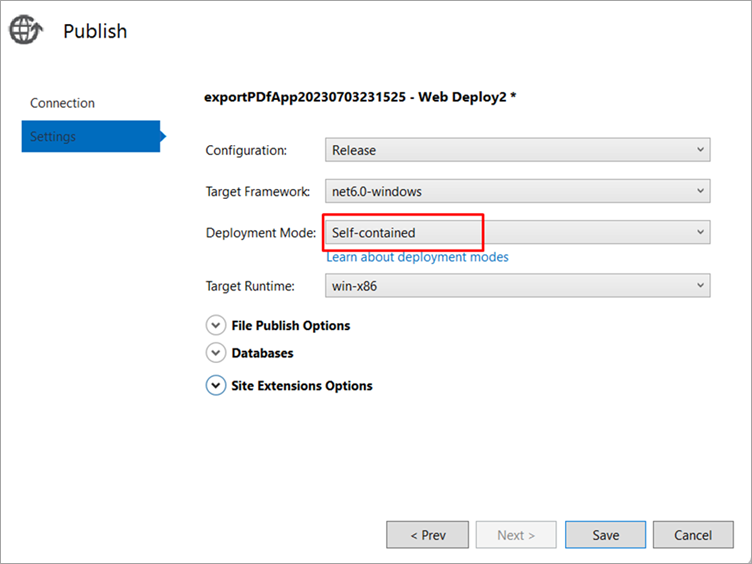
8. In the **Publish** page, select **Publish**. 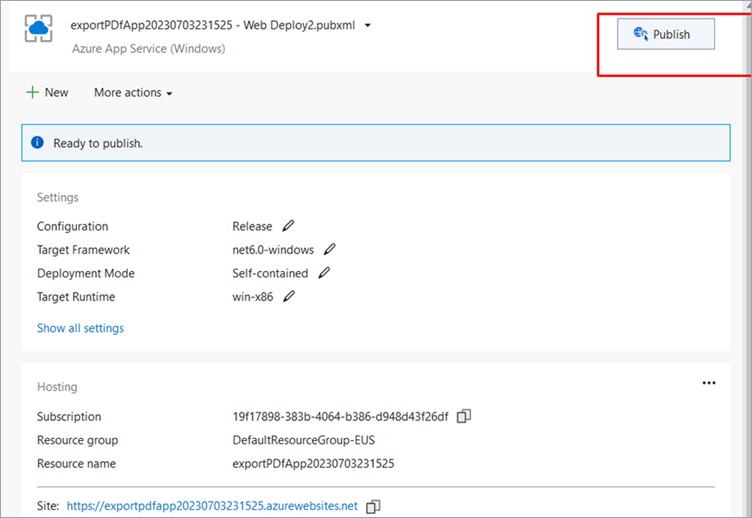 Visual Studio builds, packages, and publishes the app to Azure, and then launches the app in the default browser. Once all the steps are followed, the website is deployed on Azure.
**Note**: Azure support in the FlexReport API has been added for the Windows environment only so it cannot be hosted on any other environment.