# Using VS Template
## Content
This topic demonstrates how to create a Web API service application using Visual Studio template in Visual Studio.
### WebAPI Core 3.0
1. Open Visual Studio 2019 and select **Create a new project**.
2. In the **Create a new project** window, select Web project type and then select ASP.NET Core Web Application template.
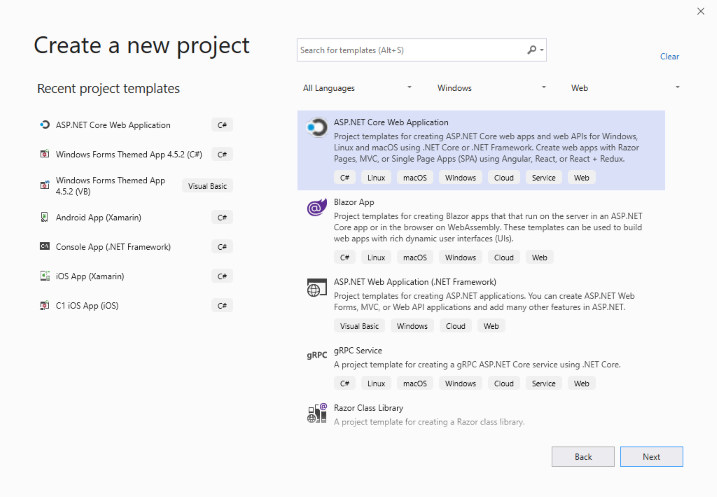
3. Specify the Project name and Location and then click on Create.
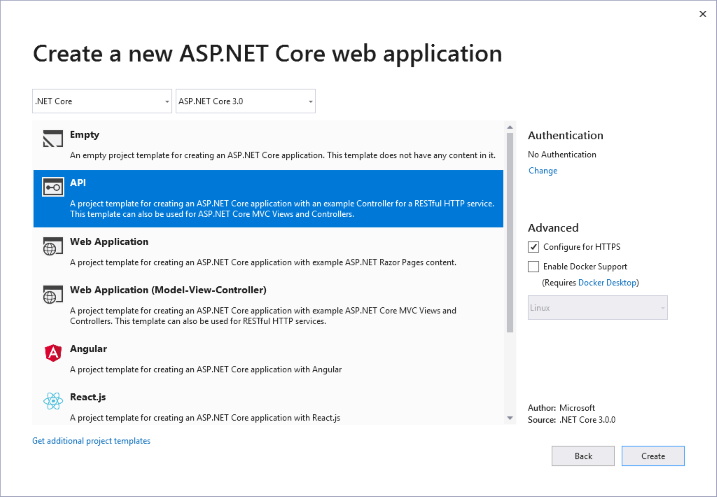
4. Select the .NET Core version as ASP.NET Core 3.0 and the project type as API from the template wizard and then click on Create to setup the WebApi application.
5. Add the C1 WebApi references to the project. In the Solution Explorer, right click Dependencies and select Manage NuGet Packages. In NuGet Package Manager, select **https://api.nuget.org/v3/index.json** as the Package source. Search for **C1.AspNetCore.Api** package, and click **Install**.
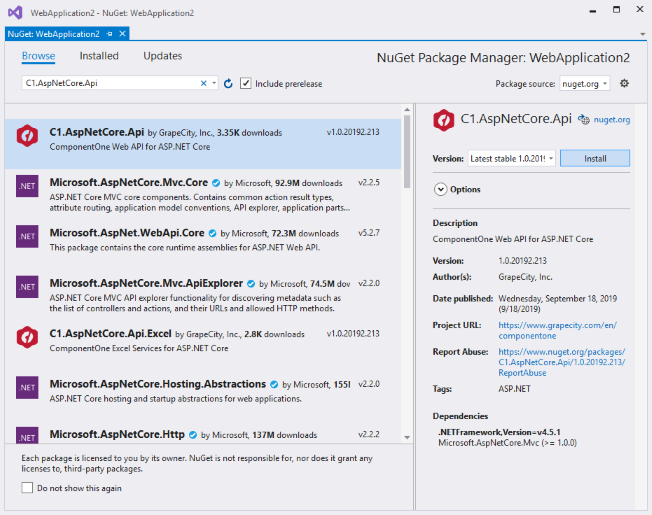
6. To use specific services in your application, add the following NuGet Packages based on the service.
| **Service** | **Assembly (Location - C:\\Program Files (x86)\\ComponentOne\\Packages)** |
| --- | --- |
| Barcode | C1.AspNetCore.Api.Barcode |
| Cloud | C1.AspNetCore.Api.Cloud |
| Excel | C1.AspNetCore.Api.Excel |
| Data Engine | C1.AspNetCore.Api.DataEngine |
| Visitor | C1.AspNetCore.Api.Visitor |
7. To add a license, right-click the solution name from the Solution Explorer or go to the Tools menu, and then select **GrapeCity > GrapeCity License Manager**. Optionally, you can also generate runtime license key and add it to your application. For more information, see **Licensing** topic.
8. To use C1 WebApi in ASP.NET Core 3.0 application, you need to add the following code lines in the **cs** methods.
```csharp
public void ConfigureServices(IServiceCollection services)
{
...
services.AddC1Api();
}
public void Configure(IApplicationBuilder app, IWebHostEnvironment env, ILoggerFactory loggerFactory)
{
app.UseC1Api();
...
}
```
### WebAPI Core 2.2
1. Open Visual Studio and select File | New | Project to create a new Web API Service Project.
2. Under installed templates, select **Visual C# | Web | ASP.NET Web Application (.NET Framework)**.
3. Specify the Project name and Location and then click on Create.
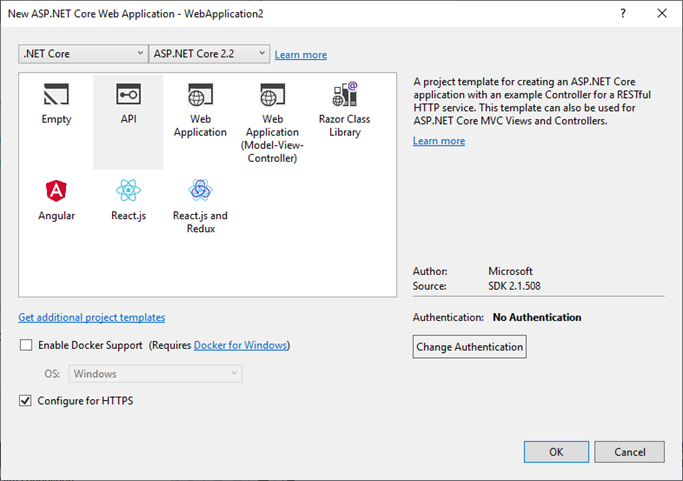
4. Select the .NET Core version as **ASP.NET Core 2.2** and the project type as **API** from the template wizard and click **OK** to setup the WebApi application.
5. Add the C1 WebApi references to the project. In the Solution Explorer, right click Dependencies and select Manage NuGet Packages. In NuGet Package Manager, select https://api.nuget.org/v3/index.json as the Package source. Search for **C1.AspNetCore.Api** package, and click **Install**.
6. To use specific services in your application, add the following NuGet Packages based on the service.
| **Service** | **Assembly (Location - C:\\Program Files (x86)\\ComponentOne\\Packages)** |
| --- | --- |
| Barcode | C1.AspNetCore.Api.Barcode |
| Cloud | C1.AspNetCore.Api.Cloud |
| Excel | C1.AspNetCore.Api.Excel |
| Data Engine | C1.AspNetCore.Api.DataEngine |
| Visitor | C1.AspNetCore.Api.Visitor |
7. To add a license, right-click the solution name from the Solution Explorer or go to the Tools menu, and then select **GrapeCity > GrapeCity License Manager**. Optionally, you can also generate runtime license key and add it to your application. For more information, see **Licensing** topic.