# Cube Data Binding
## Content
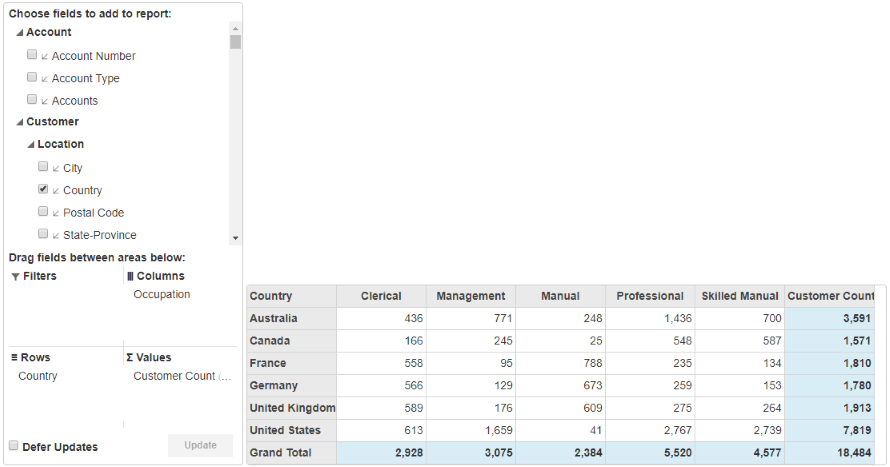
The OLAP control allows you to directly bind cube data that is created using SSAS (SQL Server Analysis Services). The PivotEngine component of the OLAP control allows you to directly bind cube data with the help of **BindCubeService** method. This method accepts two parameters; URL (URL of the SSAS server) and Cube (OLAP cube in the SSAS server). The **PivotPanel** control and **PivotGrid** control binds to **PivotEngine**.
Complete the following steps to bind cube data in the OLAP control.
1. [Create an MVC application](/componentone/docs/mvc/online-mvc-core/WorkingwithControls/OLAP/Work-with-OLAP/OlapData-Binding/Cube-Data-Binding#step-1-create-an-mvc-application)
2. [Add the OLAP control](/componentone/docs/mvc/online-mvc-core/WorkingwithControls/OLAP/Work-with-OLAP/OlapData-Binding/Cube-Data-Binding#step-2-add-the-olap-control)
3. [Build and Run the Project](/componentone/docs/mvc/online-mvc-core/WorkingwithControls/OLAP/Work-with-OLAP/OlapData-Binding/Cube-Data-Binding#step-3-build-and-run-the-project)
### Step 1: Create an MVC Application
Create a new MVC application using the ComponentOne or VisualStudio templates. For more information about creating an MVC application, see [Configuring your MVC Application](/componentone/docs/mvc/online-mvc-core/Configuring-your-MVC-Application) topic.
### Step 2: Add the OLAP control
To add an OLAP control to the application, follow these steps:
**Add a new Controller**
1. In the **Solution Explorer**, right click the folder **Controllers.**
2. From the context menu, select **Add | Controller**. The **Add Scaffold** dialog appears.
3. In the **Add Scaffold** dialog, follow these steps:
1. Select the **MVC 5 Controller - Empty** template, and then click **Add**.
2. Set name of the controller (for example: `CubeController`).
3. Click **Add**.
```csharp
public class CubeController : Controller
{
// GET: Cube
public ActionResult Index()
{
return View();
}
}
```
**Add a View for the Controller**
In the view, we create an instance **PivotEngine** and bind it a cube data using the BindCubeService property.
1. From the **Solution Explorer**, expand the folder **Controllers** and double click the `CubeController`.
2. Place the cursor inside the method `Index()`.
3. Right click and select **Add View**. The **Add View** dialog appears.
4. In the **Add View** dialog, verify that the View name is **Index** and View engine is **Razor (CSHTML).**
5. Click **Add** to add a view for the controller. Copy the following code and paste it inside **Index.cshtml**.
```razor
```
### Step 3: Build and Run the Project
1. Click **Build | Build Solution** to build the project.
2. Press **F5** to run the project.
> type=note
> Append the folder name and view name to the generated URL (for example: http://localhost:1234/**Cube/Index**) in the address bar of the browser to see the view.