# Manually Configuring ReportViewer
## Content
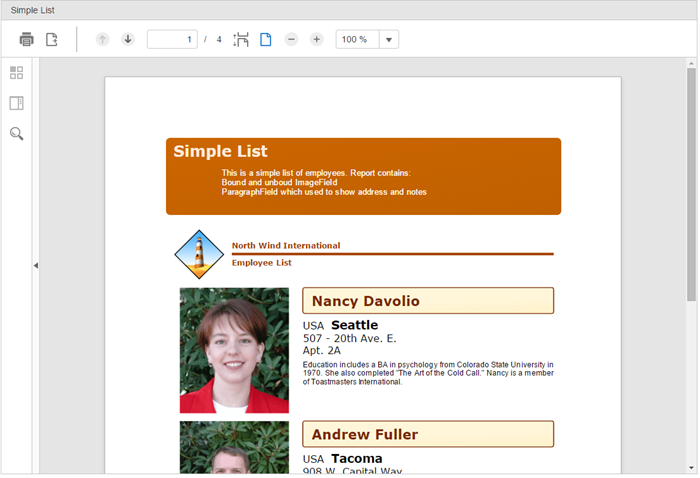
FlexViewer is available as MVC Core control that can be used in an MVC applications to view reports using C1 Web API Report Services. Complete the following steps to use the control to view a report.
>type=note
> **Note**: The **C1 ASP.NET Core MVC Application** template for ASP.NET MVC Edition automatically registers the required resources, and adds the relevant references and packages to your application. Therefore, you only need to follow Steps 6 to 8 above if your application is created using **ComponentOne** template.
***
## Create an MVC Application
Create an ASP.NET Core Web Application using Visual Studio templates. For more information, see [Configuring MVC application using Visual Studio template](/componentone/docs/mvc/online-mvc-core/Configuring-your-MVC-Application/Using-Visual-Studio-Template).
## Add the relevant references
1. In the **Solution Explorer**, right click **References** and select **Manage NuGet Packages**.
2. In **NuGet Package Manager**, select **https://api.nuget.org/v3/index.json** as the Package source. Search for **C1.AspNetCore.Mvc** package, and click **Install**.
3. To work with **FlexViewer** control in your application, add **C1.AspNetCore.Mvc.FlexViewer** package. Once you restore the packages, "C1.AspNetCore.Mvc.FlexViewer" gets added under the "dependencies" in project.json file.
>type=note
>
> **Note**: Once you have added the resources to ASP.NET Core application, you can license the resources and your application using the MESCIUS License Manager. For more information, see [Licensing](/componentone/docs/mvc/online-mvc-core/GettingStarted/Licensing) topic.
***
## Configure the application to use FlexViewer
1. From the **Solution Explorer**, expand the folder **Views** and double click the \_ViewImports.cshtml file to open it.
2. Add the following references to work with FlexViewer control in your ASP.NET Core application.
```csharp
@addTagHelper *, C1.AspNetCore.Mvc
@addTagHelper *, C1.AspNetCore.Mvc.FlexViewer
```
***
## Register Resources
Complete the following steps to register the required resources for using ASP.NET MVC FlexViewer control:
1. From the **Solution Explorer**, open the folders **Views \| Shared**.
2. Double click `_Layout.cshtml` to open it.
3. Add the following code between the `` tags.
```razor
```
For more information on how to register resources for **FlexViewer**, refer to [Registering Resources](/componentone/docs/mvc/online-mvc-core/Configuring-your-MVC-Application/Registering-Resources).
***
## Add Controller
Complete the following steps to add controller to your application:
1. In the **Solution Explorer**, right click the folder **Controllers.**
2. From the context menu, select **Add \| Controller\.\.\. \.** The **Add Scaffold** dialog appears.
3. Complete the following steps in the **Add New Item** dialog:
1. Select the **Controller** tab towards left, and then select **MVC Controller - Empty**.
2. Click **Add**, and then set a name for the controller. (for example: Report`Controller`)
3. Click **Add**.
A new controller is added to the application within the folder **Controllers**.
***
## Add a View for the Controller
Complete the following steps to add corresponding view for the controller.
1. From the **Solution Explorer**, right click the folder **Views** and select **Add \| New Folder**.
2. Name the new folder. Provide the same name as the name of your controller, minus the suffix Controller (in our example: Report).
3. Right click the **Report** folder, and select **Add \| New Item**. The **Add New Item** dialog appears.
4. Complete the following steps in the **Add New Item** dialog:
1. Expand the **Installed** tab towards left, and select **ASP\.NET\|MVC View Page**.
2. Set name of the view (for example: Index.cshtml).
3. Click **Add**.
5. Once the **index.cshtml** page is added to your project, add the following code to view your report in the FlexViewer.
A view is added for the controller. In the code below, we have specified the **Service URL**, **FilePath**, and **Report Name**.
```razor
```
A view is added for the controller.
***
## Build and Run the Project
* Click **Build** \| **Build Solution** to build the project.2. Press **F5** to run the project, and view your report in FlexViewer. For more information about FlexViewer, see [FlexViewer Elements](/componentone/docs/mvc/online-mvc-core/WorkingwithControls/FlexViewer/ReportViewer/ReportViewer-Elements).
>type=note
> **Note**: Append the folder name and view name to the generated URL (for example: http://localhost:1234/Report/Index) in the address bar of the browser to view the report.