# Quick Start
## Content
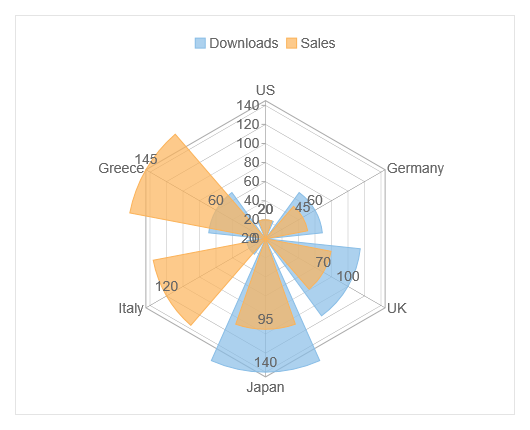
The quick start guides you through the steps of adding a FlexRadar chart to your MVC web application and add data to it.
Follow the steps given below to get started:
### Create an MVC Application
Create a new MVC application using the ComponentOne or VisualStudio templates. For more information about creating an MVC application, see [Configuring your MVC Application](/componentone/docs/mvc/online-mvc-core/Configuring-your-MVC-Application) topic.
### Create a Data Source for FlexRadar
1. Add a new class to the **Models** folder (for example: `Sale.cs`). For more information on how to add a new model, see [Adding Controls](/componentone/docs/mvc/online-mvc-core/Adding-Controls).
2. Add the following code to `Sale.cs` model. We are using `Sale` class to represent sales data in the database. Each instance of **Sale** object will correspond to the data on the FlexChart.
```csharp
using System.Collections.Generic;
namespace FlexRadarChart.Models
{
public class Sale
{
public int Id { get; set; }
public string Country { get; set; }
public int Downloads { get; set; }
public int Sales { get; set; }
public static List GetData()
{
var countries = "US,Germany,UK,Japan,Italy,Greece".Split(new char[] { ',' });
List data = new List();
for (var i = 0; i < countries.Length; i++)
{
data.Add(new Sale()
{
Country = countries[i],
Downloads = ((i % 4) * 40) + 20,
Sales = ((i % 7) * 25) + 20
});
}
return data;
}
}
}
```
### Add a FlexRadar chart
To add a FlexRadar chart to the application, follow these steps:
**Add a new Controller**
1. In the **Solution Explorer**, right click the folder **Controllers.**
2. From the context menu, select **Add | Controller**. The **Add Scaffold** dialog appears.
3. In the **Add Scaffold** dialog, follow these steps:
1. Select the **Empty MVC Controller** template.
2. Set name of the controller (for example: `FlexRadarController`).
3. Click **Add**.
4. Include the MVC references as shown below.
```csharp
using C1.Web.Mvc;
using C1.Web.Mvc.Serializition;
using C1.Web.Mvc.Chart;
```
5. Replace the method **Index()** with the following method.
```csharp
public ActionResult Index()
{
return View(Models.Sale.GetData());
}
```
**Add a View for the Controller**
1. From the **Solution Explorer**, expand the folder **Controllers** and double click the `FlexRadarController.`
2. Place the cursor inside the method `Index()`.
3. Right click and select **Add View**. The **Add View** dialog appears.
4. In the **Add View** dialog, verify that the View name is **Index** and View engine is **Razor (CSHTML).**
5. Click **Add** to add a view for the controller. Copy the following code and paste it inside **Index.cshtml**.
```razor
@model IEnumerable
@using C1.Web.Mvc.Chart
```
### Build and Run the Project
1. Click **Build | Build Solution** to build the project.
2. Press **F5** to run the project.
> type=note
> Append the folder name and view name to the generated URL (for example: http://localhost:1234/**FlexRadar/Index**) in the address bar of the browser to see the view.