# QuickStart
Blazor Edition provides a set of native UI controls built for Blazor such as FlexGrid, Chart, ListView, and input controls including AutoComplete and ComboBox.
## Content
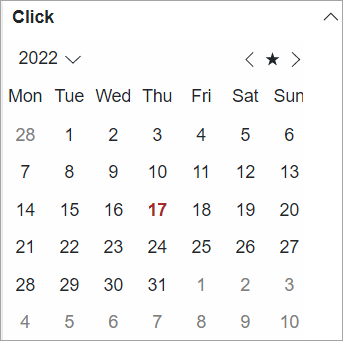
The following quick start guides you how to create a simple application using Expander. In this quick start, you'll create a new project in Visual Studio, add the Expander control to your application, and then add calendar control to content area of the Expander control.
## Create a Blazor App
1. In Visual Studio, select **Create a new project** from the **Get started** pane.
2. In the **Create a new project** dialog, select **Blazor WebAssembly App**, and click **Next**. Alternatively, you can also create a Blazor Server App.
> type=note
> **Note**: **Blazor Server App** or server-side app can be created using the Blazor Server App template. For more details, see [Blazor Server](/componentone/docs/blazor/online-blazor/blazortypes/blazorserver) topic under Blazor Project Types.
3. In the **Configure your new project** dialog, provide name of the project you want to create in the **Project name** field and location for the project in the **Location** field. Click **Next**.
4. In the **Additional information** dialog, select the target framework from the **Framework** dropdown, if required and click **Create**. By default, the selected framework is **.NET 8.0**. A new client-side Blazor app is created.
## Configure References
1. In the **Solution Explorer**, right click **Dependencies** and select **Manage NuGet Packages**.
2. In **NuGet Package Manager**, select **nuget.org** as the **Package source**.
3. Search for the following NuGet packages and install them by clicking **Install**.
* **C1.Blazor.Accordion**
* **C1.Blazor.Calendar**
4. Navigate to the **wwwroot**, open **index.html** file.
5. Register the client resources by adding the following lines of code to the **\** tag.
```html
```
6. Add the following code to the **\** tag.
```html
```
7. Right click on **Pages** folder, click **Add |** **Razor Component** to add a new Razor page and then provide a name, say _ExpanderQuickStart._
8. Add the required directives to initialize and use the Expander control in the new Razor page.
```razor
@using C1.Blazor.Core
@using C1.Blazor.Accordion
@using C1.Blazor.Calendar
```
## Configure the Accordion control
Display **Expander** using the following code with Calendar control added to the content area and header text set as "Content" using **Header** property of the **C1Expander** class.
```razor
```
## Build and Run the Project
1. Click **Build | Build Solution** to build the project.
2. Press **F5** to run the project.