# Quick Start
This quick start guides you through the steps of adding the FlexGrid control in your Blazor application, binding data to it and displaying the data in the control.
## Content
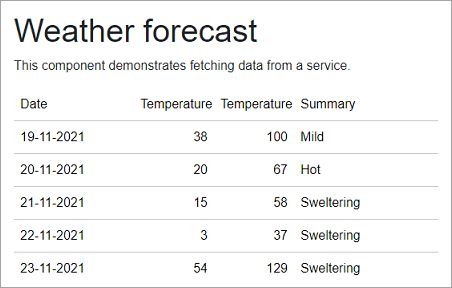
This quick start guides you through the steps of adding the FlexGrid control in your Blazor application, binding data to it and displaying the data in the control. In this example, we are using weather forecast service for binding its data to the FlexGrid control. This displays date & time, temperatures and summary in the control.
## Create a Blazor App
1. In Visual Studio, select **Create a new project** from the **Get started** pane.
2. In the **Create a new project** dialog, select **Blazor Server App**, and click **Next**. Alternatively, you can also create a Blazor WebAssembly App.
> type=note
> **Note**: Blazor **Client-side app** or **WebAssembly app** can be created using the Blazor WebAssembly App template. For details, check the [Blazor WebAssembly](/componentone/docs/blazor/online-blazor/blazortypes/blazorwebassembly) topic in Blazor templates.
3. In the **Configure your new project** dialog, provide name of the project you want to create in the **Project name** field and location for the project in the **Location** field. Click **Next**.
4. In the **Additional information** dialog, select the target framework from the **Framework** dropdown, if required and click **Create**. By default, the selected framework is **.NET 8.0**.
## Configure References & Data Source
Now, rebuild the project to restore basic dependencies. After completion of the steps above.
1. From the **Project** menu, select **Manage NuGet Packages**.
2. In the **NuGet Package Manager** window, select **nuget.org** as the **Package source**.
3. Search for **C1.Blazor.Grid** package and click **Install**.
4. Navigate to the **Pages** folder, open **\_Layout.cshtml** file and register the client resources by adding the following lines of code.
5. Add the following code to the **\** tag.
```html
```
6. Add the following code to the **\** tag.
```html
```
7. Right click on **Pages** folder, click **Add**, and select **Razor Component** to add a new Razor component. Provide name to the new Razor component, say Flexgridintro_._
8. Add the following directives for setting the route for the @page directive and to initialize and use the FlexGrid control in the new Razor component
```razor
@page "/FlexGridintro"
@using C1.Blazor.Grid
```
9. Add the following references to access the data classes as demo data in the razor component. In this example, FlexGridColumnReorder.Data containing the service WeatherForecastService is added which creates WeatherForecast.cs and WeatherForecastService.cs classes in the **Data** folder. This example adds FlexGridColumnReorder.Data but you can add your own sample project's Data folder (YourSampleProjectName.Data) reference.
```razor
@using FlexGridColumnReorder.Data
@inject WeatherForecastService ForecastService
```
## Bind FlexGrid to Data
To bind FlexGrid to data, follow the steps mentioned below.
1. Fetch the data from WeatherForecastService, initialize the FlexGrid control and bind the fetched data to FlexGrid by adding the following code.
```razor
Weather forecast
This component demonstrates fetching data from a service.
@if (forecasts == null)
{
Loading...
}
else
{
}
@code {
WeatherForecast[] forecasts;
protected override async Task OnInitializedAsync()
{
forecasts = await ForecastService.GetForecastAsync(DateTime.Now);
}
}
```
2. Navigate to **Shared | NavMenu.razor** page and add a navigation path for the FlexGridintro razor component by appending the following HTML markup inside the
\
tag just after the first \
\
tags which contains the link to the homepage of the application.
```razor
FlexGridintro
```
## Build and Run the Project
1. Click **Build | Build Solution** to build the project.
2. Press **F5** to run the project.