# SQLite
Learn about the SQLite Data Provider in ActiveReports.
## Content
This article explains connecting a Page or an RDLX report to a SQLite data source. You can connect to this data source while creating a new report (via report wizard) or using report explorer (via report data source dialog). SQLite data source is a custom data provider, so the data provider needs to be configured. See section **Custom Data Provider** in [Configure ActiveReports using Config file](/activereportsnet/docs/v20.1/devops/customization/configure-ar) topic before you begin connecting to the SQLite Provider.
## Connect to SQLite Data Source using Report Wizard
The steps to connect to the SQLite data source are:
1. Create a New Report.
2. In the **New Report** dialog, choose the Report Type as RDLX, RDLX Dashboard, or Page and click **Next**.
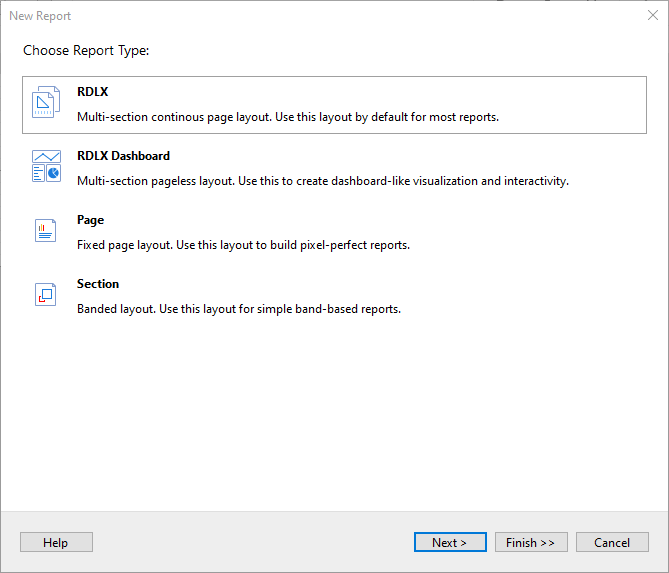
3. Configure page settings if you need to customize the report page settings and click **Next >**.
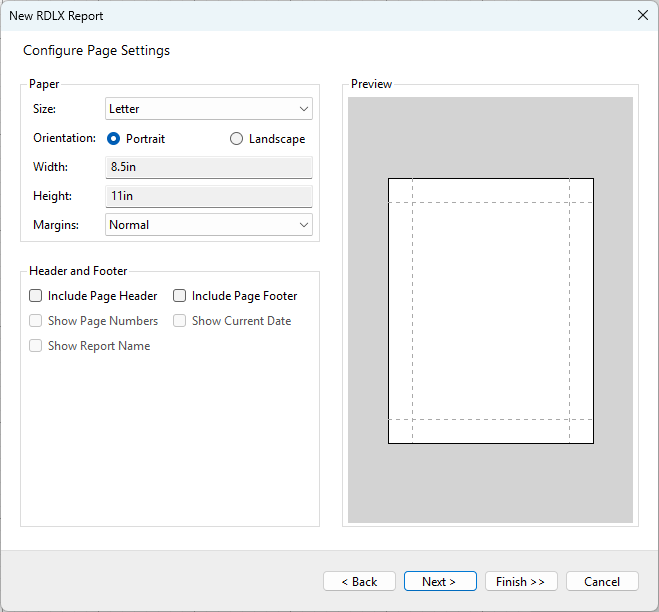
4. Select the Data Source Type as **SQLite** and click **Next**.
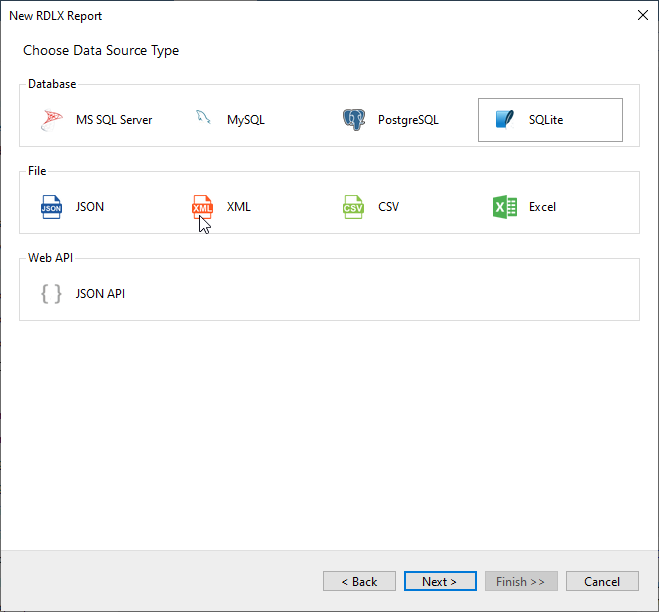
5. To specify the **Database Path**, click **Browse** and navigate to the desired file on your system.
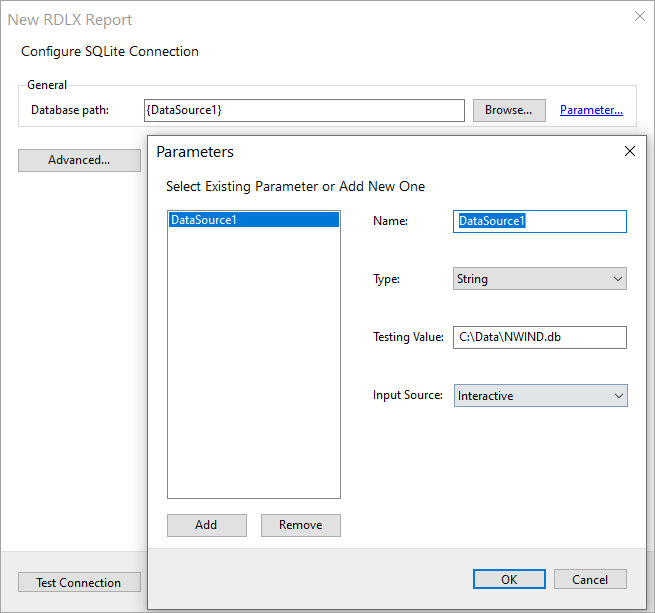
6. To specify the runtime connection values for database path, let us add a parameter as follows:
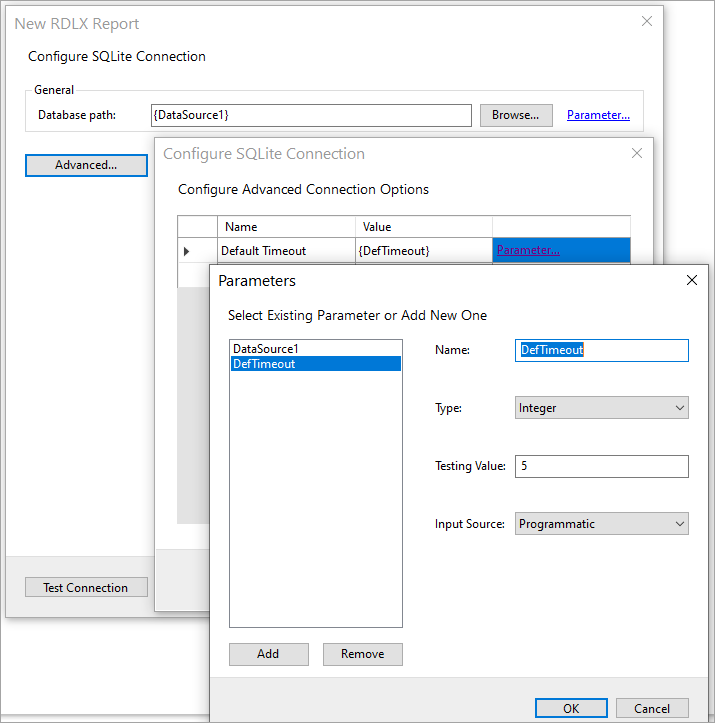
1. Click on the **Parameter** link to open the **Parameters** dialog, and then click the **Add** button to add a new parameter.
2. Specify the below details:
* **Name**: Specify the name of the parameter.
* **Type**: Select the value type (string by default) from the drop-down list.
* **Testing Value**: Specify the runtime value for the connection properties, eg 'C:\\Data\\NWIND.db'.
* **Input Source**: Select **Interactive** (in our case) for non-hidden parameters and **Programmatic** for hidden parameters from the drop-down list.
3. Click **OK** to finish adding the parameter.
7. Select **Advanced** to specify key-value pairs for additional configuration, and add a new parameter with details as in the previous step.
Let us add the 'Default Timeout' option to specify the hidden parameter 'DefTimeout' of type 'Integer' to '5'.
8. Click **Test Connection** to test the connection.
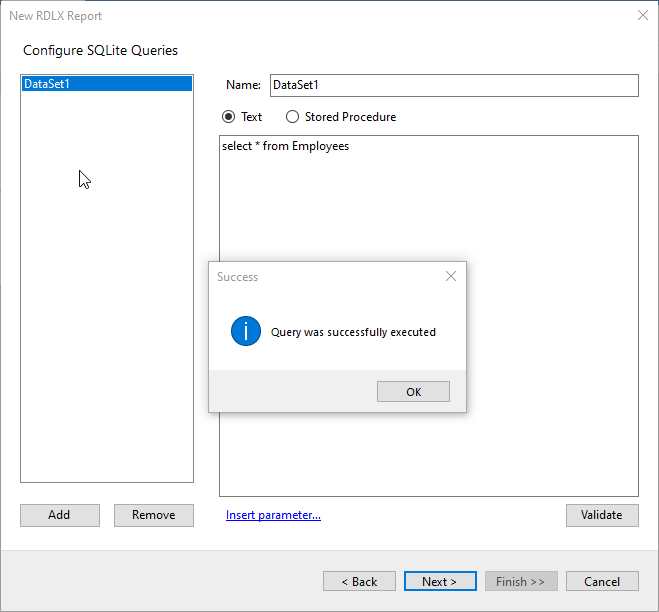
9. Click **Next**, and configure the dataset to retrieve the fields by adding a valid query.
You can also provide a parameterized query by first using the 'Insert parameter' option to create a parameter and then utilizing the parameter in the query.
10. On the final screen of the Report Wizard, review the summary of the report and click **Finish** to successfully add the report with the SQLite data source.
## Connect to a SQLite Data Source using Report Data Source dialog
1. In the designer, go to the **Report Explorer**, right-click the **Data Sources** node and select the **Add Data Source** option or click the **Add** button and then select the **Data Source** option.
2. In the **Report Data Source** dialog that appears, select the **General** page and enter the name of the data source in the **Name** field. By default, the data source name is set to DataSource1. This name appears as a child node to the Data Sources node in the Report Explorer.
3. Under the **Type** field, select SQLite Provider.
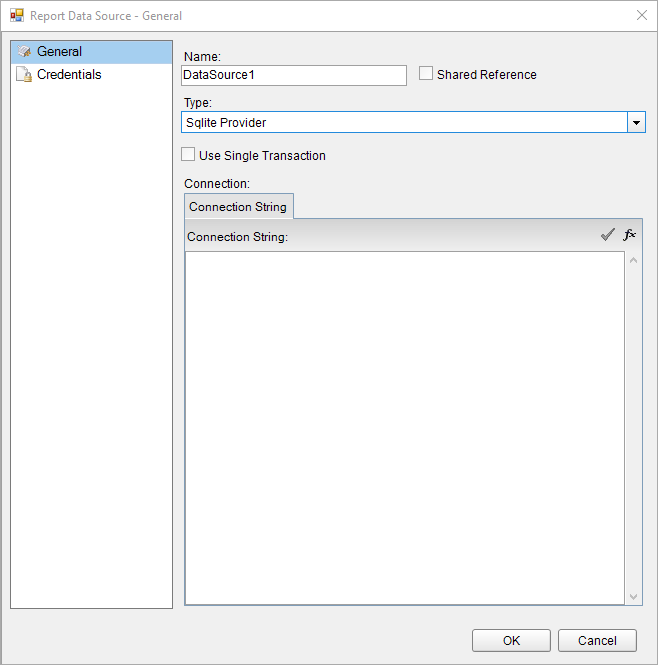
4. In the **Connection Properties** tab, enter the connection string to connect to the data source. For example, you can connect to the 'NWIND.db' sample data source that can be downloaded from [GitHub](https://github.com/activereports/Samples19/tree/main/Data) and write the connection string as shown below:
`data source=C:\NWIND.db;`
5. Click the **Validate DataSource** icon to verify the connection string.
6. Click **OK** to close the **Report Data Source** dialog. Your report is now connected to the SQLite data source successfully.
7. To specify the authentication method for the data source connection, go to the **Credentials** page and select the **Use Windows Authentication** or **Use a specific user name and password** option.