# Deploy on Google Cloud using a Linux Environment
This topic explains how to deploy the JSViewer_MVC_Core sample on Google Cloud platform using Google App Engine flexible environment.
## Content
In this tutorial we will be deploying our JSViewer\_MVC\_Core sample on Google Cloud platform using **Google App Engine** flexible environment. App Engine flexible environment is based on Linux, it is useful for .NET Core applications.
### Setup Google Cloud
1. Sign in or create a new account on [Google Cloud Platform](https://console.cloud.google.com/).
2. Go to the [Project Selector](https://console.cloud.google.com/) in the **Google Cloud Console** and create a new Project.
Here we are naming the project as JSViewer MVC.
3. Make sure that billing is enabled for your Cloud project. Learn how to [check if billing is enabled on a project](https://docs.cloud.google.com/billing/docs/how-to/verify-billing-enabled).
4. From Console, go to the API Library and enable the following APIs.
* Cloud Build API
* Google App Engine Flexible Environment
* App Engine Admin API
5. [Install](https://docs.cloud.google.com/sdk/docs/install-sdk) and [initialize](https://docs.cloud.google.com/sdk/docs/initializing) the Google Cloud CLI.
6. Initialize the Application in App Engine, which we can either do through the console or using the [CLI](https://docs.cloud.google.com/sdk/gcloud/reference/app/create):
`gcloud app create –JSViewer-MVC-Core`
### Setup Visual Studio
1. Open **Visual Studio 2019**.
2. Go to **Extensions** \> **Manage Extensions**.
3. Search online and install **Google Cloud Tools for Visual Studio**.
### Setup your application
1. Download the [JSViewer_MVC_Core](https://github.com/activereports/WebSamples19/tree/main/JSViewer_MVC_Core) sample from our [WebSamples19](https://github.com/activereports/WebSamples19) GitHub repository.
2. Open the application in Visual Studio and build and run the application.
3. Remove the **Reports** folder containing links the reports from the project since we will be embedding the reports in the application.
4. Now add a new folder and name it 'Reports'.
5. Add all the files from **JSViewerReports** in the **Reports** folder and set the **Build Action** as 'Embedded Resource'.
6. Since the published docker might not contain the fonts used by reports we will add a custom font resolver in our ActiveReports application.
1. Add a new folder **Fonts** in the project where we will the required fonts.
2. Add a new .cs file '**CustomFontResolver.cs**' and make sure to set the **Build Action** to 'Embedded Resource'.
3. Add the following code in the .cs file to the add the script.
```csharp
using GrapeCity.Documents.Text.Windows;
public sealed class CustomFontResolver : GrapeCity.ActiveReports.IFontResolver
{
static readonly GrapeCity.Documents.Text.FontCollection _fonts = new GrapeCity.Documents.Text.FontCollection();
static CustomFontResolver()
{
_fonts.Clear();
var assembly = Assembly.GetExecutingAssembly();
var fontnames = assembly.GetManifestResourceNames().Where(str => str.EndsWith(".ttf"));
foreach (var fontname in fontnames)
{
Stream stream = assembly.GetManifestResourceStream(fontname);
_fonts.Add(GrapeCity.Documents.Text.Font.FromStream(stream));
}
_fonts.DefaultFont = _fonts.FindFamilyName("Arial");
}
public static GrapeCity.ActiveReports.IFontResolver Instance = new CustomFontResolver();
private CustomFontResolver() { }
GrapeCity.Documents.Text.FontCollection GrapeCity.ActiveReports.IFontResolver.GetFonts(string familyName, bool isBold, bool isItalic)
{
var fonts = new GrapeCity.Documents.Text.FontCollection();
var font = _fonts.FindFamilyName(familyName, isBold, isItalic);
if (font != null) fonts.Add(font);
fonts.Add(_fonts.DefaultFont);
return fonts;
}
}
```
4\. In Startup\.cs\, specify the **UseFontResolver** property in the JavaScript Viewers as in the following code example.
```auto
```csharp
app.UseReportViewer(settings =>
{
settings.UseFontResolver = CustomFontResolver.Instance;
settings.UseEmbeddedTemplates(EmbeddedReportsPrefix, Assembly.GetAssembly(app.GetType()));
settings.UseCompression = true;
});
```
```
7. To push your application to Google App Engine, you need to specify which environment and runtime it’s going to use. To do that, you need to add an app.yaml and a dockerfile to your project file to your application.
In a perfect world scenario, we would just need to specify that we are going to use the Flex environment and the AspNetCore runtime. However, as of now there are no images tagged for .Net 3.x or higher versions we will use an image from Microsoft Container Registry so that we can deploy our application with .Net 6.0. We will be using a docker file so we must set the runtime environment as custom in the .
```yml
runtime: custom
env: flex
```
Since we have installed the Google Cloud Tool for Visual studio extension in Visual studio 2019. This can be easily done by:
a. Right Clicking on the project and then on **Generate app.yaml and dockerfile**.
b. In the generated app.yaml change the runtime environment from aspnetcore to custom and add the following container configuration.
```yml
runtime: custom
env: flex
manual_scaling:
instances: 1
resources:
cpu: 1
memory_gb: 0.5
disk_size_gb: 10
```
>type=note
>
>
> Note: For testing purposes we have set the container specifications lower.
```auto
c. Clear the dockerfile and add the following text in the docker file:
```dockerfile
FROM mcr.microsoft.com/dotnet/sdk:6.0 AS build-env
WORKDIR /app
# Copy csproj and restore as distinct layers
COPY *.csproj ./
RUN dotnet restore
# Copy everything else and build
COPY . ./
RUN dotnet publish -c Release -o out
# Build runtime image
FROM mcr.microsoft.com/dotnet/aspnet:6.0
WORKDIR /app
COPY --from=build-env /app/out .
EXPOSE 8080
ENV ASPNETCORE_URLS=http://*:8080
ENTRYPOINT ["dotnet", "JSViewer_MVC_Core.dll"]
```
On Window’s command prompt, you can create a new app.yaml in one line:
```yml
(echo runtime: aspnetcore & echo env: flex) > app.yaml
```
The app.yaml file will have to be copied over to the destination folder when you start the publishing process.
You can include the file to the output through Visual Studio or editing the JsViewer\_MVC\_Core.csproj file:
```xml
net6.0
```
```auto
### Publish the Application
Now we can publish the release version our application either using Visual Studio or CLI. You can use the following command to publish the application using command prompt.
`dotnet publish -c Release
`
To publish using Visual Studio:
1. Right-click on the Project in Visual Studio and Click on Publish.
2. Set the **Target** as 'Folder'.
3. Set the Folder Location as: “bin\\Release\\net6.0\\publish\\”
4. Click Finish and now Click Publish.
### Deploy the application
Now that we have set up everything it is time to deploy the application.
1. Open command prompt and set the directory as the project’s folder.
2. Run the following command.
`gcloud app deploy`
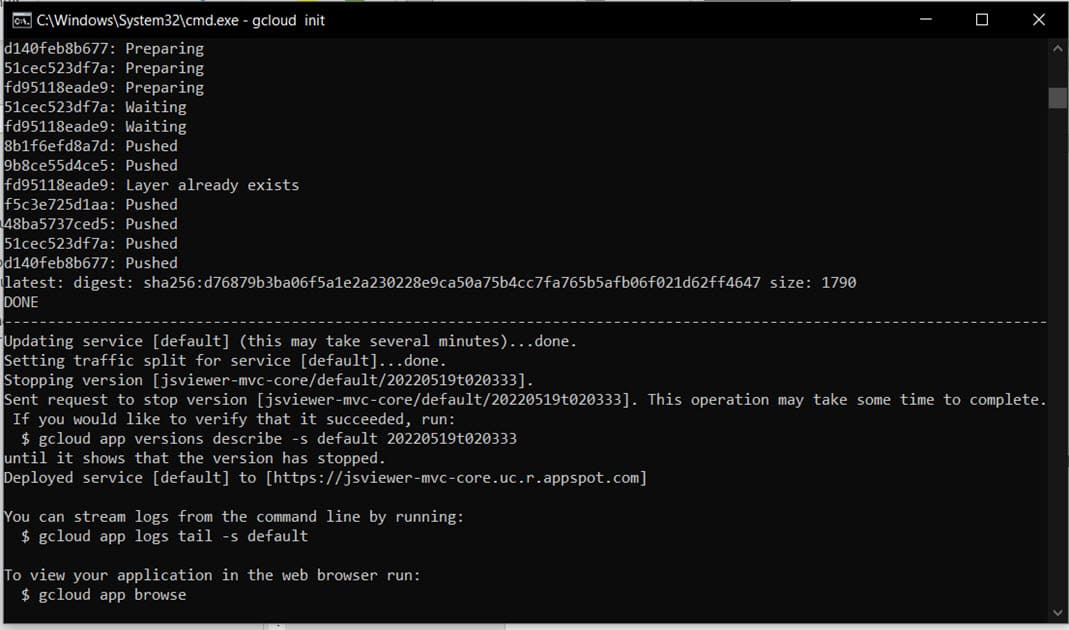
It will take 10-20 minutes to deploy the application on Google Cloud.
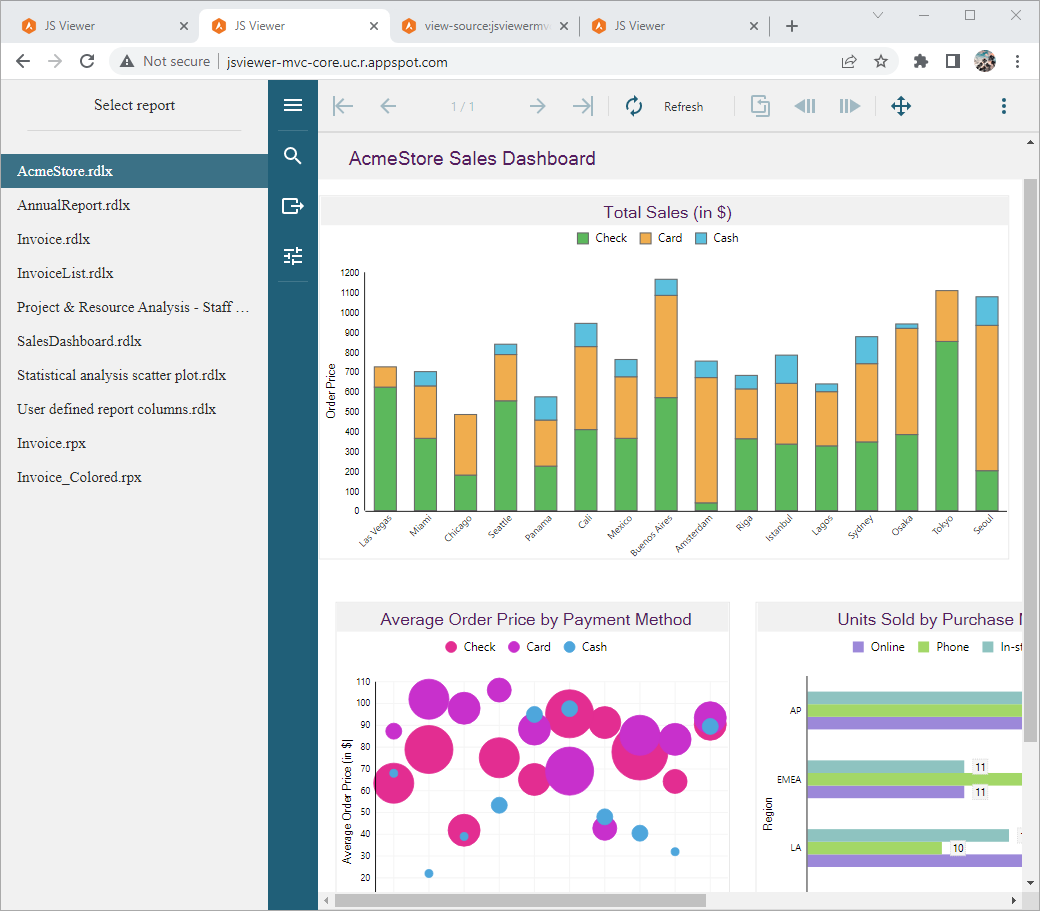
Once deployed you can open the deployed website using the following command:
`gcloud app browse`
### Clean Up
To avoid incurring charges, you can delete your Cloud project to stop billing for all the resources used within that project.
1. In the Cloud console, go to the Manage resources page.
2. In the project list, select the project that you want to delete, and then click Delete.
3. In the dialog, type the project ID, and then click Shut down to delete the project.
```