# Deploy on Azure using a Linux Environment
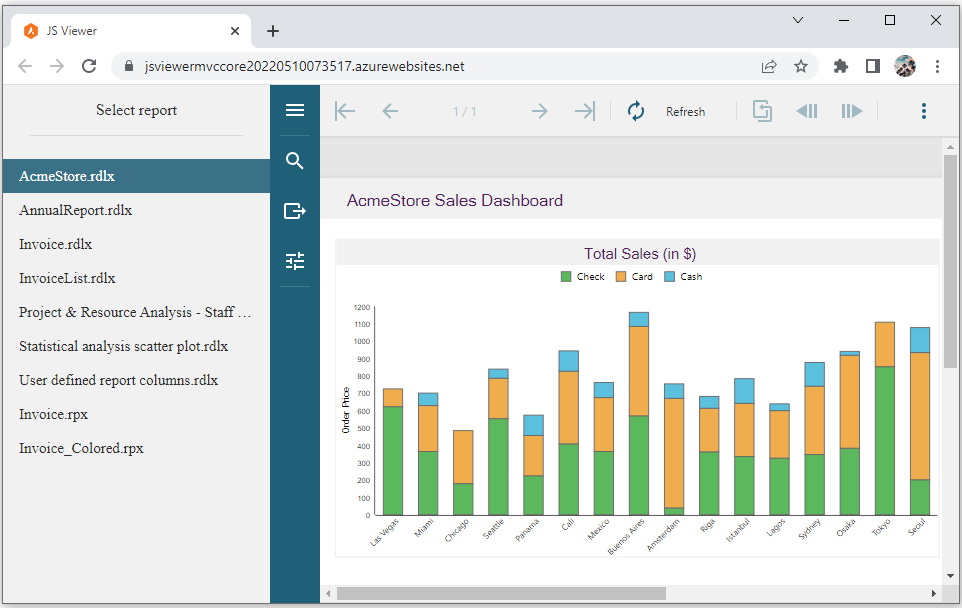
This is a tutorial on how to deploy the JSViewer_MVC_Core sample on Azure using a Linux environment.
## Content
In this tutorial we will be deploying the JSViewer\_MVC\_Core sample on Azure using a Linux environment.
1. Download the [JSViewer\_MVC\_Core](https://github.com/activereports/WebSamples19/tree/main/JSViewer_MVC_Core) sample from our [WebSamples19](https://github.com/activereports/WebSamples19) GitHub repository.
2. Build and run the application.
3. Remove the **Reports** folder containing links the reports from the project since we will be embedding the reports in the application.
4. Now add a new folder and name it 'Reports'.
5. Add all the files from **JSViewerReports** in the **Reports** folder and set the **Build Action** as 'Embedded Resource'.
6. Since the published docker might not contain the fonts used by reports we will add a custom font resolver in our ActiveReports application.
1. Add a new folder **Fonts** in the project where we will the required fonts.
2. Add a new .cs file '**CustomFontResolver.cs**' and make sure to set the **Build Action** to 'Embedded Resource'.
3. Add the following code in the .cs file to the add the script.
```csharp
using GrapeCity.Documents.Text.Windows;
public sealed class CustomFontResolver : GrapeCity.ActiveReports.IFontResolver
{
static readonly GrapeCity.Documents.Text.FontCollection _fonts = new GrapeCity.Documents.Text.FontCollection();
static CustomFontResolver()
{
_fonts.Clear();
var assembly = Assembly.GetExecutingAssembly();
var fontnames = assembly.GetManifestResourceNames().Where(str => str.EndsWith(".ttf"));
foreach (var fontname in fontnames)
{
Stream stream = assembly.GetManifestResourceStream(fontname);
_fonts.Add(GrapeCity.Documents.Text.Font.FromStream(stream));
}
_fonts.DefaultFont = _fonts.FindFamilyName("Arial");
}
public static GrapeCity.ActiveReports.IFontResolver Instance = new CustomFontResolver();
private CustomFontResolver() { }
GrapeCity.Documents.Text.FontCollection GrapeCity.ActiveReports.IFontResolver.GetFonts(string familyName, bool isBold, bool isItalic)
{
var fonts = new GrapeCity.Documents.Text.FontCollection();
var font = _fonts.FindFamilyName(familyName, isBold, isItalic);
if (font != null) fonts.Add(font);
fonts.Add(_fonts.DefaultFont);
return fonts;
}
}
```
4. In Startup.cs, specify the **UseFontResolver** property in the JavaScript Viewers as in the following code example.
```csharp
app.UseReportViewer(settings =>
{
settings.UseFontResolver = CustomFontResolver.Instance;
settings.UseEmbeddedTemplates(EmbeddedReportsPrefix, Assembly.GetAssembly(app.GetType()));
settings.UseCompression = true;
});
```
Follow these steps to create your App Service resources and publish your project. Let us use JSViewer\_MVC\_Core sample project for demonstration purpose.
1. Open the JSViewer\_MVC\_Core sample project in Visual Studio 2022.
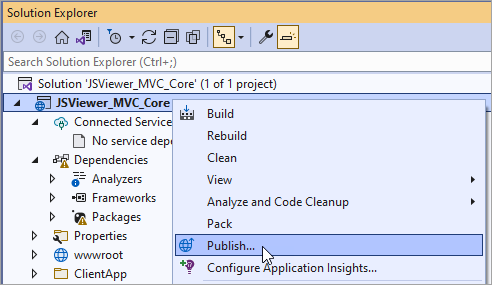
2. In the **Solution Explorer**, right-click the on your project name, and select **Publish**.
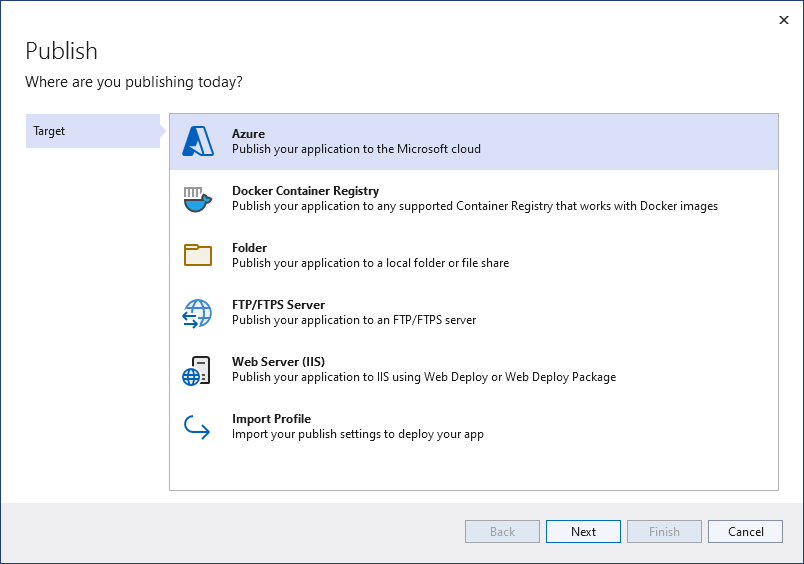
3. In **Publish** window, select **Azure** and then **Next**.
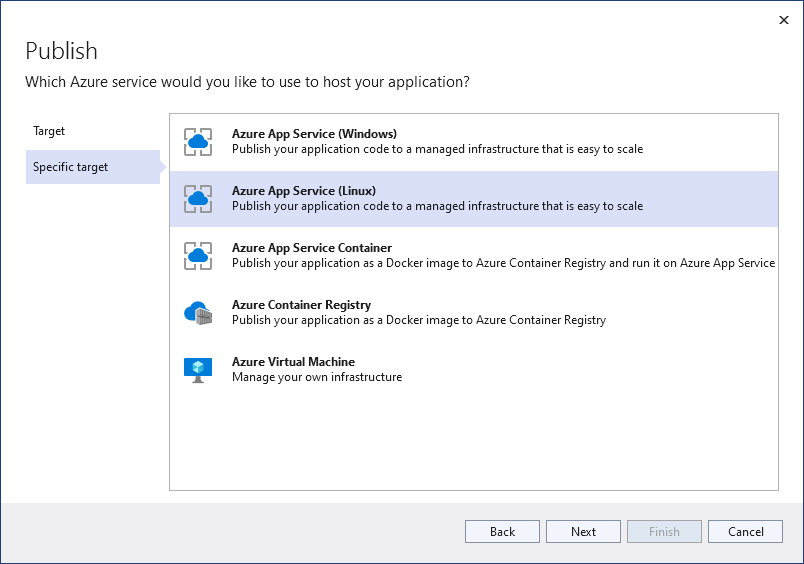
4. Choose the **Specific target** Azure App Service (Linux). Then, select **Next**.
5. Your options depend on whether you're signed in to Azure already and whether you have a Visual Studio account linked to an Azure account. Select either Add an account or Sign in to sign in to your Azure subscription. If you're already signed in, select the account you want.
6. To the right of App Service instances, select +.
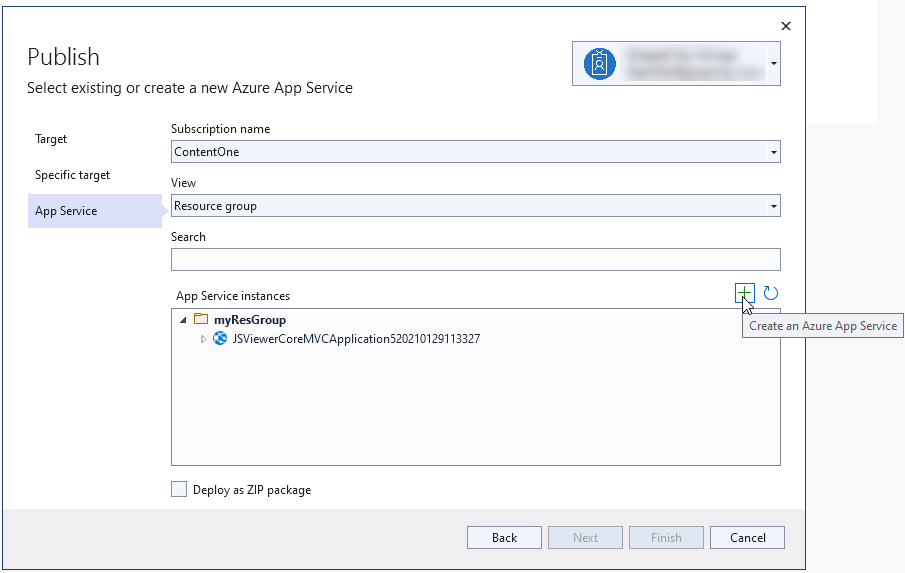
7. For **Subscription name**, accept the subscription that is listed or select a new one from the drop-down list.
8. For **Resource group**, select **New**. It will contain all of the Azure resources for the service.
9. In **New resource group name**, enter **JSViewerResourceGroup** and select OK.
10. For **Hosting Plan**, select **New**. It specifies the location, size, and features of the web server that hosts your app.
11. In the **Hosting Plan** dialog, enter the appropriate values:
**Hosting Plan**: JSViewerMVCCorePlan
**Location**: Central US
**Size**: S1
12. In **Name** field, enter a unique app name that includes only the valid characters (a-z, A-Z, 0-9, and -). You can accept the automatically generated unique name. The URL of the web app is _http://.azurewebsites.net_, where _\_ is your app name.
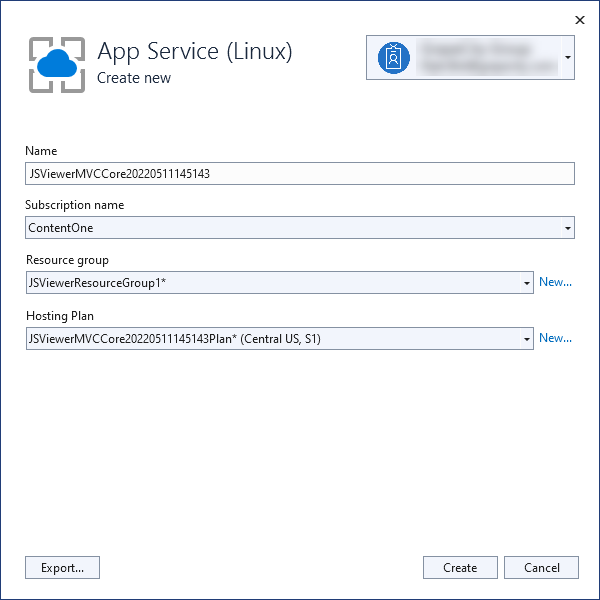
13. Select **Create**.
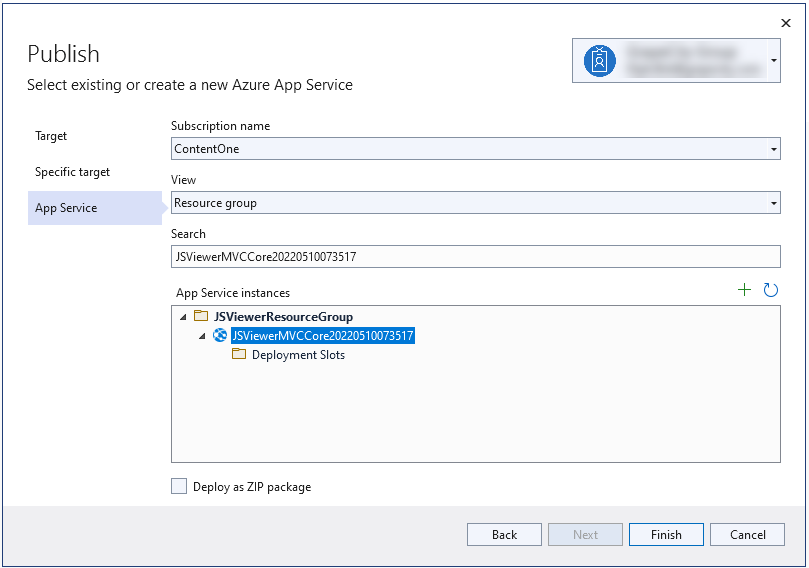
Once the wizard completes, the Azure resources are created and the project is ready to be published.
14. In the **Publish** dialog, ensure your new App Service app is selected in App Service instance, then select **Finish**. Visual Studio creates a publish profile for you for the selected App Service app.
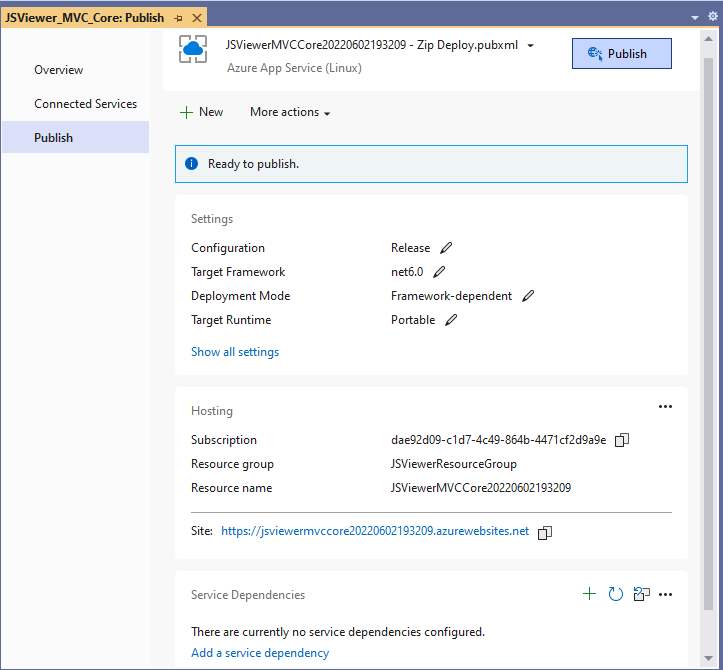
15. In the Publish page, select **Publish**.
Visual Studio builds, packages, and publishes the app to Azure, and then launches the app in the default browser.
Once you have followed all the steps the website is deployed on Azure.