# Annotations
Learn about annotations and how to add them in the ActiveReports Windows Forms Viewer.
## Content
Annotations are floating text bars or images to call attention to specific items or values or to add notes and special instructions directly to the reports. Annotations added via the viewer's toolbar are temporary and are destroyed when the report closes.
These annotations are accessible through the **Annotation** button present on the Viewer toolbar which is hidden by default. You can make the Annotations toolbar visible by setting the [AnnotationDropDownVisible](/activereportsnet/api/v19.2/MESCIUS.ActiveReports.Viewer.Win/GrapeCity.ActiveReports.Viewer.Win.Viewer.html) property to True in the viewer's Properties panel.
## Available Annotations
Each annotation type allows you to change the colors, transparency, border, font, and alignment, plus other properties specific to the type of annotation. Available annotations include:
| Annotation Name | Description |
| --- | --- |
| AnnotationText
 | A rectangular box to enter text using the **Text** property. |
| AnnotationCircle
 | A circle without text. You can change the shape to an oval by dragging its corners. |
| AnnotationRectangle
 | A rectangular box without text. You can change the shape to a square by dragging its corners. |
| AnnotationArrow
 | A 2D arrow to enter text using the **Text** property. You can also change the arrow direction using the **ArrowDirection** property. |
| AnnotationBalloon
 | A balloon caption to enter text using its **Text** property. You can also point the balloon's tail in any direction using its **Quadrant** property. |
| AnnotationLine
 | A line to enter text above or below it using its **Text** and **LineLocation** properties. You can also add arrow caps to one or both ends and select different dash styles using **DashCap**, **DashStyle**, and **ShowArrowCaps** properties. |
| AnnotationImage
 | A rectangle with a background image and text. You can select an any image inside it using the **BackgroundImage** property. You can also place text on the image using the **Text** property. |
## Add annotations in the Viewer
These steps assume that you have already placed the Viewer control onto a Windows Form and loaded a report in it. See [Windows Forms Viewer](/activereportsnet/docs/v19.2/report-readers/desktop-viewers/windows-forms-viewer) for more information.
1. In your Visual Studio project, on the Form where the Viewer control is placed, select the Viewer control an right-click to choose Properties.
2. In the Properties Panel that appears, set the AnnotationDropDownVisible property to **True** to get an additional toolbar in the viewer control.

3. Run the report application and select the annotation you want use from the Annotation toolbar on the Viewer.
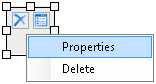
4. Drag the annotation to the desired location on the report design surface. The annotation appears with a **Delete** and a **Properties** button on the top left corner.

5. Inside the annotation, click the Properties button to view its properties in the Properties Panel and use those properties to enter text, change color or transparency, set border or font, alignment etc.
6. Close the Properties Panel to apply changes to the annotation.
7. Drag the corners to resize the annotation as needed. You can also select entire annotation to move it to another location on the report.
8. Right-click the annotation to display the annotation context menu. The context menu includes the **Properties** and **Delete** commands.
> type=note
> **Note**: You can print a Page, RDLX or Section Report that contains annotations. In a Section Report, you can also save a report with annotations in RDF format. See [Add and Save Annotations](/activereportsnet/docs/v19.2/developers/working-with-reports-devs/section-report-developers/save-load-rdf-files/add-annotations) for further details.