# Excel
This article explains connecting a Page or an RDLX report to an Excel data source. It also gives an overview of the Excel Data Provider configuration settings.
## Content
This article explains connecting a Page or an RDLX report to a Excel data source. You can connect to this data source while creating a new report (via report wizard) or using report explorer (via report data source dialog).
> type=note
> **Note**: To use an Excel data source in your Visual Studio project, you need to install the [MESCIUS.ActiveReports.Core.DataProviders.Excel](https://www.nuget.org/packages/MESCIUS.ActiveReports.Core.DataProviders.Excel) package.
## Connect to Excel Data Source using Report Wizard
The steps to connect to the Excel data source are:
1. Create a New Report.
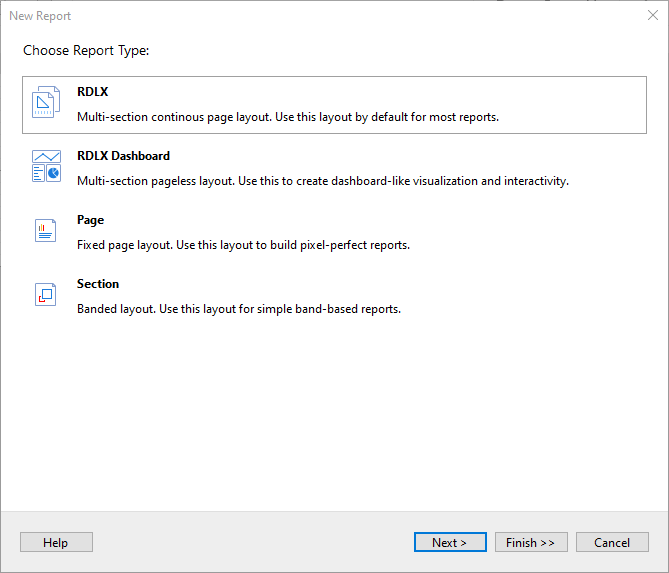
2. In the **New Report** dialog, choose the Report Type as RDLX, RDLX Dashboard, or Page and click **Next**.
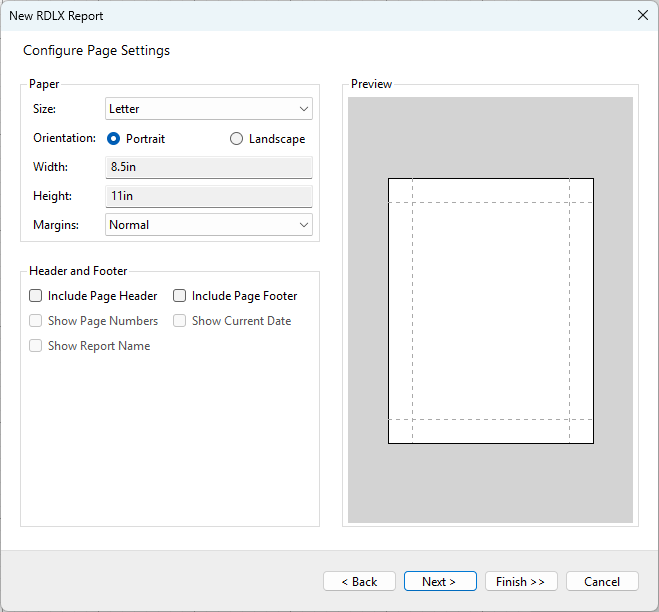
3. Configure page settings if you need to customize the report page settings and click **Next >**.
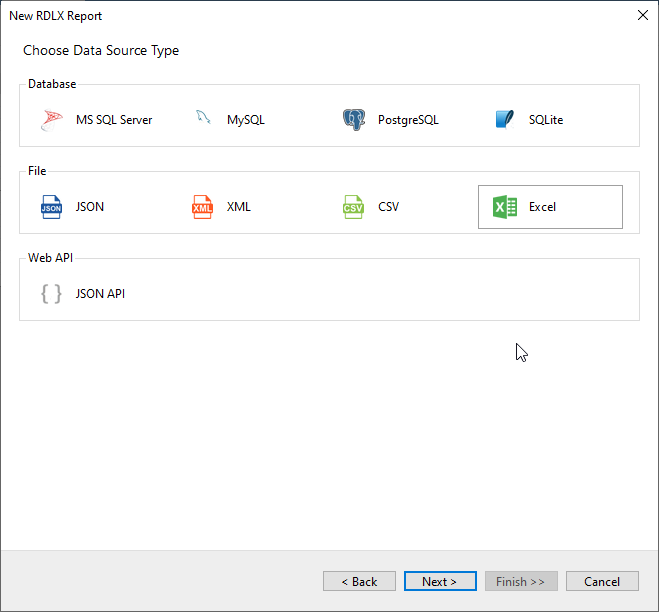
4. Select the Data Source Type as **Excel** and click **Next**.
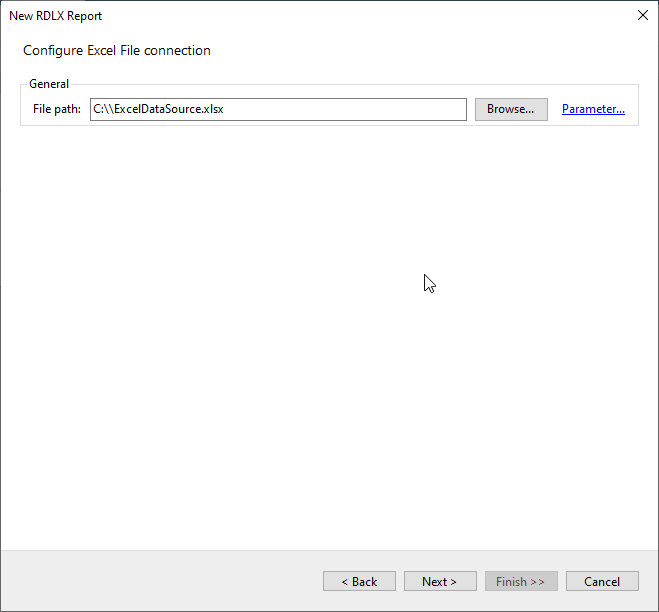
5. To specify the **File Path**, click the **Browse** button and navigate to the desired file on your system.
6. To specify the runtime connection values, click **Parameter** (or **Insert Parameter** for queries) to open the **Parameters** dialog. Then click the **Add** button to add a new parameter, or select the existing parameter and specify the below details:
* **Name**: Specify the name of the parameter.
* **Type**: Select the value type (string by default) from the drop-down list.
* **Testing Value**: Specify the runtime value for the connection properties.
* **Input Source**: Select **Interactive** for non-hidden parameters and **Programmatic** for hidden parameters from the drop-down list.
7. To configure the dataset, select the desired **Sheet** , **Table**, and **Named** (range) of the Excel file, and click **Next**.
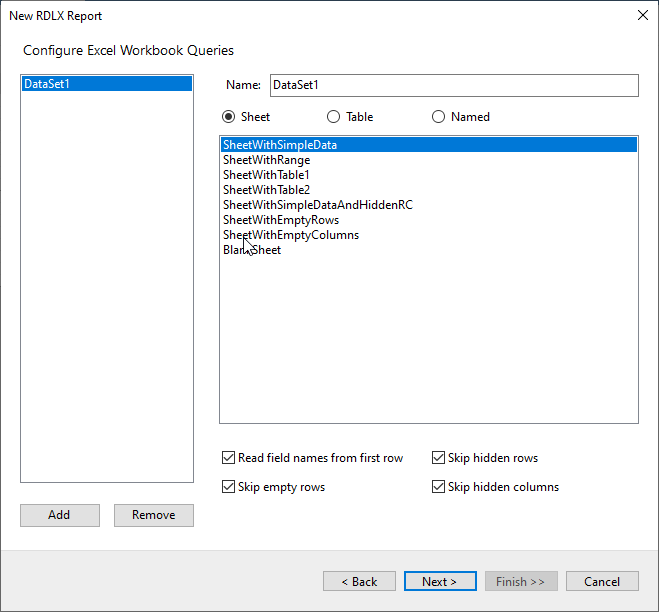
8. On the final screen of the Report Wizard, review the summary of the report and click **Finish** to successfully add the report with the Excel data source.
## Connect to a Excel Data Source using Report Data Source dialog
1. In the **Report Explorer**, right-click the **Data Sources** node and select the **Add Data Source** option or click the **Add** button and select the **Data Source** option.
2. In the **Report Data Source** dialog that appears, select the **General** page and enter the data source name in the **Name** field. By default, the data source name is set to DataSource1. This name appears as a child node to the Data Sources node in the Report Explorer.
3. Under the **Type** field, select **Excel Provider**.
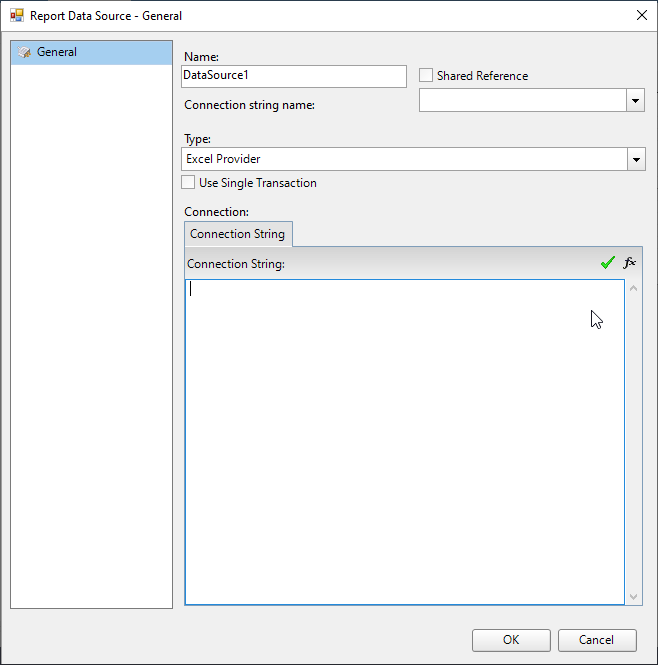
4. On the same page under the **Connection** section, enter the connection string to connect to the **Excel** data source. For example:
`datasource=C:\\ExcelDataSource.xlsx;`
5. Verify the generated connection string by clicking the **Validate DataSource** icon.
6. Click **OK** to save the changes and close the **Report Data Source** dialog box.
## Configuration Settings for Excel Data Source
The Excel Data Provider provides the following configuration settings in the Report Wizard dialog.
| **Setting** | **Description** |
| --- | --- |
| Sheet | Select the sheet of the Excel file that you want to use. |
| Table | Select the table that you want to use. |
| Named | Select the desired named range of the Excel file. |
| Read field names from the first row | Select the check box to use the first row from the Excel table as field names. |
| Skip hidden rows | Select the check box to skip the hidden rows present in the Excel table. |
| Skip empty rows | Select the check box to skip the empty rows present in the Excel table. |
| Skip hidden columns | Select the check box to skip the hidden columns present in the Excel table. |