# Create Basic End User Report Designer
This topic demonstrates how to set up a basic End-User Report Designer on a Windows Forms application in the Professional Edition of ActiveReports.
## Content
This topic demonstrates how to set up a basic End-User Report Designer on a Windows Forms application in the Professional Edition of ActiveReports.
## Add the Designer control to the Form
You will add the Designer that could only edit and preview a report file.
1. Create a new **Windows Forms App** project in Visual Studio 2022.
2. In the **Name** field, rename the file to 'CustomEUD' and click **Next**.
3. In the Additional Information screen, select a **Framework** and click **Create**.
4. Install following two packages to make ActiveReports 19 toolbox and the **Designer** control available in Visual Studio:
* **MESCIUS.ActiveReports**
* **MESCIUS.ActiveReports.Design.Win**
5. Select a Form and go to the Properties Panel to change the **Name** property to **frmMain** and the **Text** property to **ActiveReports**.
6. Resize the Form so that you can accommodate the controls listed further.
7. From the Visual Studio toolbox, drag the Designer control onto the Form and rename it to '\_designer'.
8. From the Visual Studio toolbox, drag the Toolbox control onto the Form and rename it to 'toolbox'.
9. To attach the toolbox control to the designer control, in the Solution Explorer, right-click Form1.cs and select **View Code.**
10. Add the following code (marked in bold) after the InitializeComponent method.
```csharp
public frmMain()
{
InitializeComponent();
_designer.Toolbox = toolbox;
}
```
11. At the top of the code view, add a using directive.
```csharp
using GrapeCity.ActiveReports.Design;
```
## Load and/or save the report file
1. From the Visual Studio **Menus & Toolbars** toolbox group, drag the MenuStrip control onto the Form.
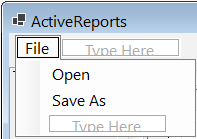
2. Create the following structure for the MenuStrip control: **File > Open**, **File > Save As**.
3. On the Form, double-click the **Open** menu item and paste the following code (marked in bold) into the openToolStripMenuItem\_Click handler.
```csharp
private void openToolStripMenuItem_Click(object sender, EventArgs e)
{
OpenFileDialog openFileDialog = new OpenFileDialog();
var dialogResult = openFileDialog.ShowDialog();
if (dialogResult == System.Windows.Forms.DialogResult.OK)
{
_designer.LoadReport(new System.IO.FileInfo(openFileDialog.FileName));
}
}
```
4. On the Form, double-click the **Save As** menu item and paste the following code (marked in bold) into the saveAsToolStripMenuItem\_Click handler.
```csharp
private void saveAsToolStripMenuItem_Click(object sender, EventArgs e)
{
SaveFileDialog saveFileDialog = new SaveFileDialog();
saveFileDialog.Filter = GetSaveFilter();
var dialogResult = saveFileDialog.ShowDialog();
if (dialogResult == System.Windows.Forms.DialogResult.OK)
{
_designer.SaveReport(new System.IO.FileInfo(saveFileDialog.FileName));
}
}
```
5. After the saveAsToolStripMenuItem\_Click handler code, add the code for the GetSaveFilter method as follows.
```csharp
private string GetSaveFilter()
{
switch (_designer.ReportType)
{
case DesignerReportType.Section:
return "Section Report Files (*.rpx)|*.rpx";
case DesignerReportType.Page:
return "Page Report Files (*.rdlx)|*.rdlx";
case DesignerReportType.RdlMultiSection|DesignerReportType.RdlDashboard:
return "RDLX Report Files (*.rdlx)|*.rdlx";
default:
return "RDLX Report Files (*.rdlx)|*.rdlx";
}
}
```
## Create a new report based on a chosen type
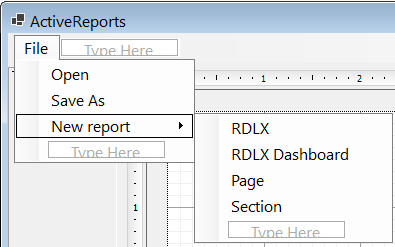
1. Create the following structure for the MenuStrip control: **File > New report > RDLX, RDLX Dashboard,** **Page, Section**.
2. Double-click the **RDLX** MenuStrip item and add the following code (marked in bold) into the rdlxToolStripMenuItem\_Click handler.
```csharp
private void rdlxToolStripMenuItem_Click(object sender, EventArgs e)
{
_designer.NewReport(DesignerReportType.RdlMultiSection);
}
```
3. Double-click the **RDLX Dashboard** MenuStrip item and add the following code (marked in bold) into the rdlxdashboardToolStripMenuItem\_Click handler.
```csharp
private void rdlxdashboardToolStripMenuItem_Click(object sender, EventArgs e)
{
_designer.NewReport(DesignerReportType.RdlDashboard);
}
```
4. Double-click the **Page** MenuStrip item and add the following code (marked in bold) into the pageToolStripMenuItem\_Click handler.
```csharp
private void pageToolStripMenuItem_Click(object sender, EventArgs e)
{
_designer.NewReport(DesignerReportType.Page);
}
```
5. Double-click the **Section** MenuStrip item and add the following code (marked in bold) into the sectionToolStripMenuItem\_Click handler.
```csharp
private void sectionToolStripMenuItem_Click(object sender, EventArgs e)
{
_designer.NewReport(DesignerReportType.Section);
}
```
### Add the Export option
1. Install packages from **NuGet** as follows:
i) Go to **Tools** > **NuGet Package Manager** > **Manage NuGet Packages for Solution**...
ii) Browse the following package and click Install.
```
MESCIUS.ActiveReports.Export.Pdf
```
2. At the top of the code view, add using statements.
```csharp
using GrapeCity.ActiveReports.Export.Pdf.Page;
using GrapeCity.ActiveReports.Rendering.IO;
using GrapeCity.ActiveReports;
using System.IO;
```
3. In the MenuStrip control, add the Export menu item to the **File** menu.
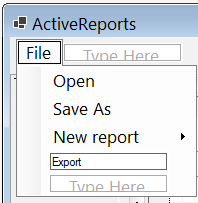
4. In the Properties Panel, set the **Enabled** property to **False**. This enables the Export menu item to be displayed in the Preview mode only.
5. To enable the Export menu item to be displayed for all report types, except Section report, add the following code (marked in bold) after the InitializeComponent method.
```csharp
public frmMain()
{
InitializeComponent();
_designer.Toolbox = toolbox;
_designer.ActiveTabChanged += designer_ActiveTabChanged;
}
void designer_ActiveTabChanged(object sender, EventArgs e)
{
exportToolStripMenuItem.Enabled = _designer.ActiveTab == DesignerTab.Preview && _designer.ReportType != DesignerReportType.Section;
}
```
6. On the Form, double-click the Export item and add the following code (marked in bold) to the exportToolStripMenuItem\_Click handler.
```csharp
private void exportToolStripMenuItem_Click(object sender, EventArgs e)
{
SaveFileDialog saveFileDialog = new SaveFileDialog();
saveFileDialog.Filter = "Pdf (*.pdf)|*.pdf";
var dialogResult = saveFileDialog.ShowDialog();
if (dialogResult == System.Windows.Forms.DialogResult.OK)
{
var pdfRe = new PdfRenderingExtension();
var msp = new MemoryStreamProvider();
(_designer.Report as PageReport).Document.Render(pdfRe, msp);
using (var stream = msp.GetPrimaryStream().OpenStream())
using (var fileStream = new FileStream(saveFileDialog.FileName, FileMode.Create, FileAccess.Write))
{
stream.CopyTo(fileStream);
}
MessageBox.Show("Export is done");
}
}
```
For more information on export filters, rendering extensions and their settings, see [Export Reports](/activereportsnet/docs/v19.2/developers/export-reports).
## Add other controls to the Form
1. From the Visual Studio toolbox, drag the following controls onto the Form.
| Control/Container | Name | Property Value |
| --- | --- | --- |
| ReportExplorer | arReportExplorer | ReportDesigner = \_designer
This binds the ActiveReports Designer to the ReportExplorer control.
Resize and move as necessary. |
| LayerList | arLayerList | ReportDesigner = \_designer
This binds the ActiveReports Designer to the LayerList control.
Resize and move as necessary. |
| PropertyGrid | arPropertyGrid | Resize and move as necessary. |
| GroupEditor
(under Containers) | arGroupEditor | ReportDesigner = \_designer
This binds the ActiveReports Designer to the GroupEditor control.
Resize and move as necessary. |
| ReportsLibrary | arReportsLibrary | ReportDesigner = \_designer
This binds the ActiveReports Designer to the ReportsLibrary control.
Resize and move as necessary. |
2. On the Form, select the Designer control.
3. In the Properties Panel, set the **PropertyGrid** property of the Designer control to arPropertyGrid. This binds the ActiveReports Designer to the Property Grid control.
## View the End User Report Designer
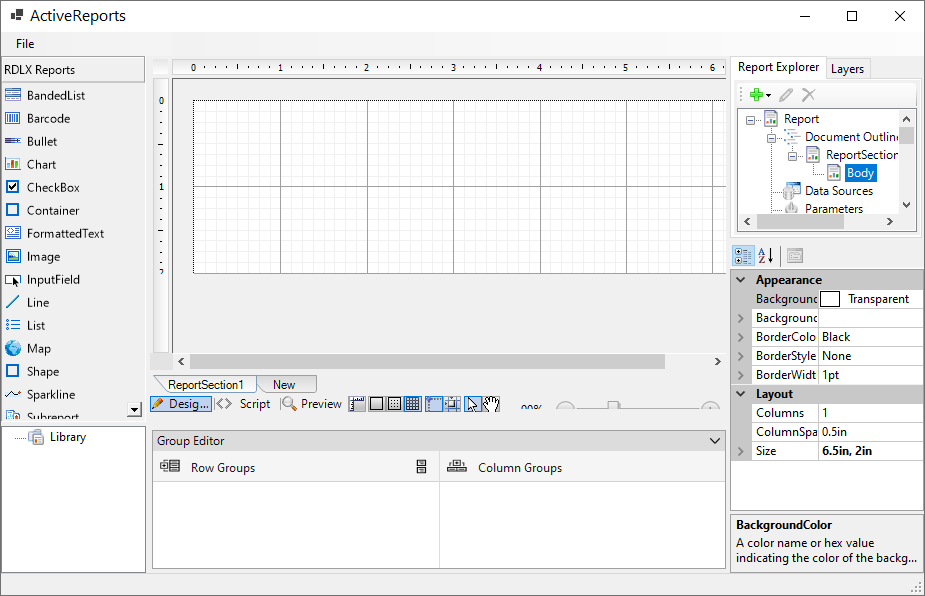
Press F5 to run the project. The **End User Report Designer** opens with an RDLX report.
For information on how you can customize the End User Report Designer and more, refer to the [End User Designer](https://github.com/activereports/Samples19/tree/main/DesignerPro/EndUserDesigner) sample.
## Call Designer
You need to call the **NewReport** designer action in GrapeCity.ActiveReports.Design.**DesignerAction**.
```csharp
public frmMain()
{
InitializeComponent();
_designer.ExecuteAction(DesignerAction.NewReport);
}
```
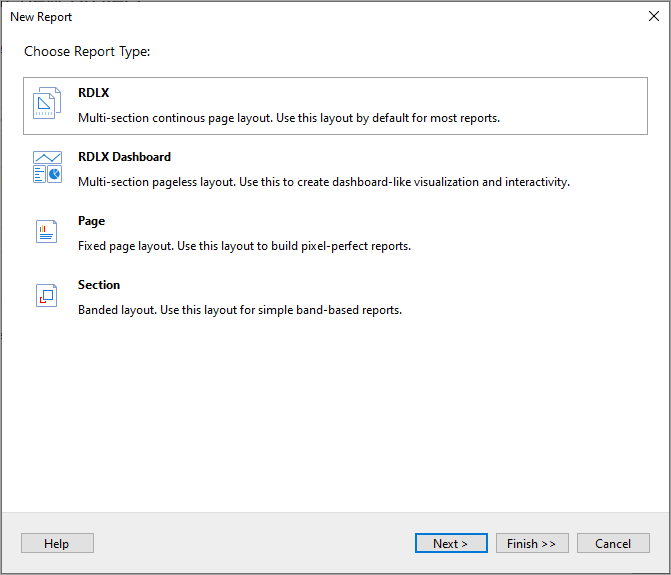
The **New Report** dialog shows the choice of reports to open.